Brother International GT-361 Instruction Manual - English - Page 134
Adjusting the CR Speed, 7-2-10. Adjusting the Flushing Interval
 |
View all Brother International GT-361 manuals
Add to My Manuals
Save this manual to your list of manuals |
Page 134 highlights
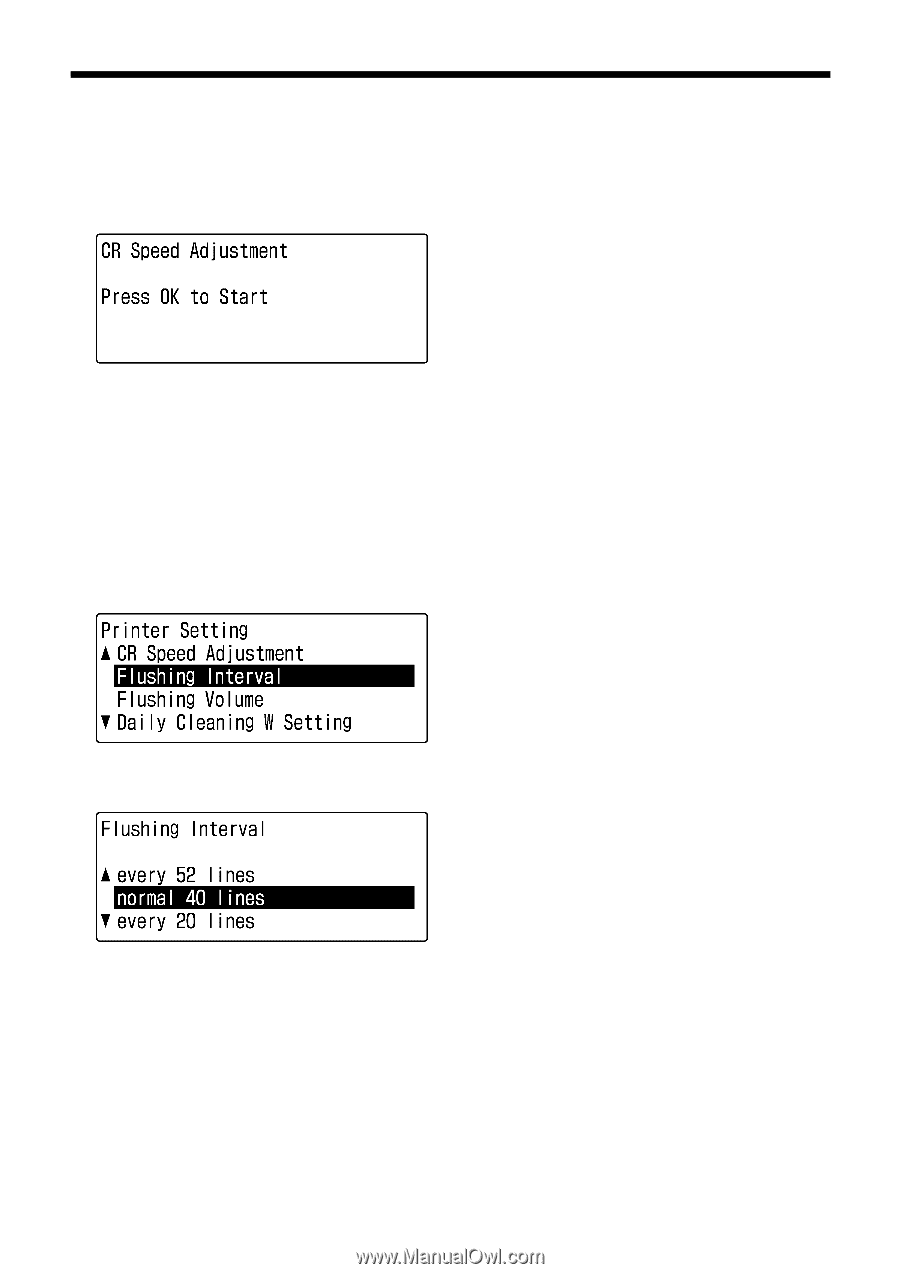
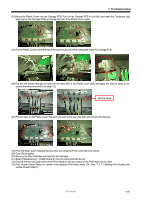
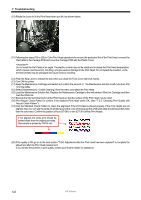
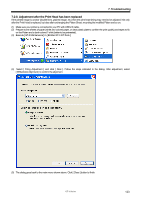
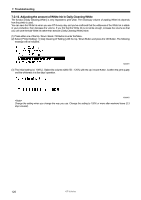
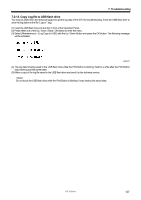
7. Troubleshooting 7-2-9. Adjusting the CR Speed Execute this menu after you clean the Carriage Shaft, or you are asked from the technical support. See "6-1-6. Cleaning the inside of the printer and restart". (1) Press either one of the Up / Down / Back / OK Button to enter the Menu. (2) Select [ Printer Setting ] > [ CR Speed Adjustment ] with the Up / Down Button and press the OK Button. The following message will be indicated. (3) Wait until the Carriage stops moving and bells. 17e0042Y 7-2-10. Adjusting the Flushing Interval Flushing is very important to keep the print quality. The initial setting is decided on the assumption that the printer works under the environment of 35 % humidity. Use a humidifier to avoid the Print Heads from clogging with dried ink as well as increase the frequency of Flushing (to shorten the interval of Flushing) in printing. You can lower the frequency (to lengthen the interval of Flushing) in more humid environment. Confirm the print quality before production. (1) Press either one of the Up / Down / Back / OK Button to enter the menu. (2) Select [ Printer Setting ] > [ Flushing Interval ] with the Up / Down Button and press the OK Button. The following message will be indicated. 10e0035Y (3) The initial setting is [ normal 40 lines ]. Select [ every 20 lines ] in dry environment and [ every 52 lines ] in humid environment with the Up / Down Button. Confirm the print quality before production. 11e0036Y Decrease the Flushing Interval (=increase the number of Flushing) with [ Flushing Interval ] menu when the print quality is not good while printing. On the other hand, increase the Flushing Volume with [ Flushing Volume ] menu when the print quality is not good at the beginning of the print. 124 GT-3 Series
-
 1
1 -
2
-
3
-
4
-
5
-
6
-
7
-
8
-
9
-
10
-
11
-
12
-
13
-
14
-
15
-
16
-
17
-
18
-
19
-
20
-
21
-
22
-
23
-
24
-
25
-
26
-
27
-
28
-
29
-
30
-
31
-
32
-
33
-
34
-
35
-
36
-
37
-
38
-
39
-
40
-
41
-
42
-
43
-
44
-
45
-
46
-
47
-
48
-
49
-
50
-
51
-
52
-
53
-
54
-
55
-
56
-
57
-
58
-
59
-
60
-
61
-
62
-
63
-
64
-
65
-
66
-
67
-
68
-
69
-
70
-
71
-
72
-
73
-
74
-
75
-
76
-
77
-
78
-
79
-
80
-
81
-
82
-
83
-
84
-
85
-
86
-
87
-
88
-
89
-
90
-
91
-
92
-
93
-
94
-
95
-
96
-
97
-
98
-
99
-
100
-
101
-
102
-
103
-
104
-
105
-
106
-
107
-
108
-
109
-
110
-
111
-
112
-
113
-
114
-
115
-
116
-
117
-
118
-
119
-
120
-
121
-
122
-
123
-
124
-
125
-
126
-
127
-
128
-
 129
129 -
 130
130 -
 131
131 -
 132
132 -
 133
133 -
 134
134 -
 135
135 -
 136
136 -
 137
137 -
 138
138 -
 139
139 -
140
-
141
-
142
-
143
-
144
-
145
-
146
-
147
-
148
 |
 |