Brother International GT-361 Instruction Manual - English - Page 129
Print Nozzle Check Pattern to confirm if the replaced Print Head works OK. See 7-2-3. Checking Print Quality
 |
View all Brother International GT-361 manuals
Add to My Manuals
Save this manual to your list of manuals |
Page 129 highlights
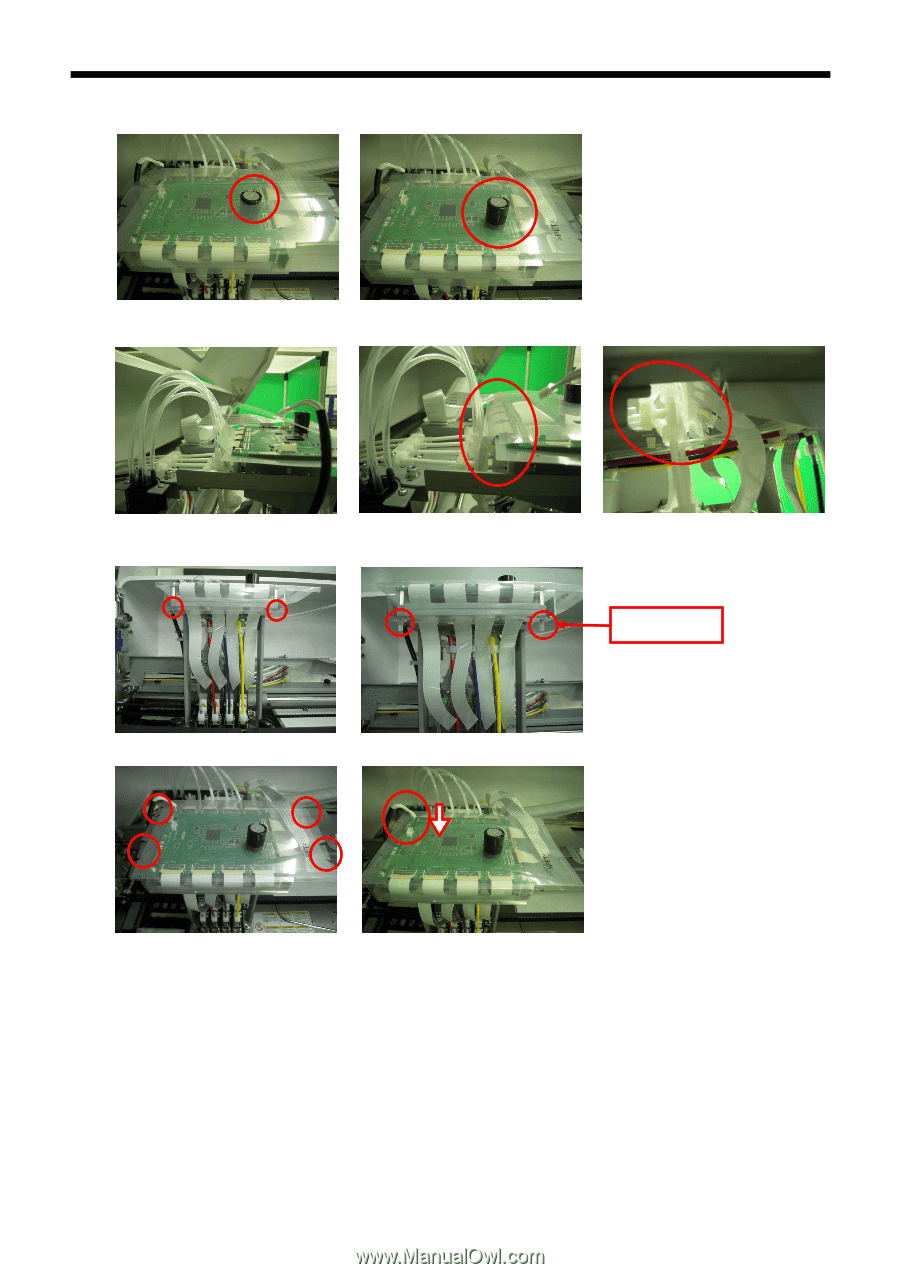
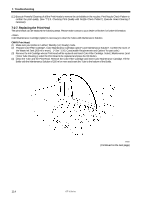
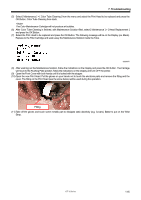
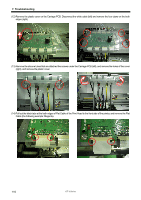
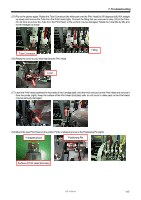
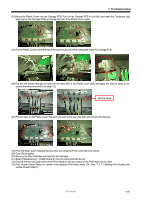
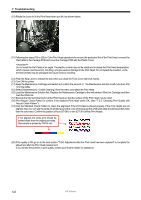
7. Troubleshooting (24) Mount the Plastic Cover over the Carriage PCB. Put it on the Carriage PCB in curl (left), and make the Condenser (big black part on the Carriage PCB) go through the hole of the Plastic Cover (right). (25) Put the Plastic Cover so that the fold at the back should cover the metal plate under the Carriage PCB. (26) Put the two screws through the holes on the front side of the Plastic Cover (left), and apply the silicone tubes to the screws that were removed in the step (13). silicone tubes (27) Put the claws on the Plastic Cover that were removed in the step (12) (left), and connect the Harness. (28) Push the Stop Lever to release the lock when you close the Front Cover with both hands. (29) Turn ON the printer. (30) Remove the Filter Cartridge and insert the Ink Cartridge. (31) Select [ Maintenance ] > [ Initial Cleaning ] from the menu and load the ink. (32) Execute the Normal Cleaning for all the Print Heads so that the surface of the Print Head may be dried. (33) Print Nozzle Check Pattern to confirm if the replaced Print Head works OK. (See "7-2-3. Checking Print Quality with Nozzle Check Pattern"). GT-3 Series 119
-
 1
1 -
2
-
3
-
4
-
5
-
6
-
7
-
8
-
9
-
10
-
11
-
12
-
13
-
14
-
15
-
16
-
17
-
18
-
19
-
20
-
21
-
22
-
23
-
24
-
25
-
26
-
27
-
28
-
29
-
30
-
31
-
32
-
33
-
34
-
35
-
36
-
37
-
38
-
39
-
40
-
41
-
42
-
43
-
44
-
45
-
46
-
47
-
48
-
49
-
50
-
51
-
52
-
53
-
54
-
55
-
56
-
57
-
58
-
59
-
60
-
61
-
62
-
63
-
64
-
65
-
66
-
67
-
68
-
69
-
70
-
71
-
72
-
73
-
74
-
75
-
76
-
77
-
78
-
79
-
80
-
81
-
82
-
83
-
84
-
85
-
86
-
87
-
88
-
89
-
90
-
91
-
92
-
93
-
94
-
95
-
96
-
97
-
98
-
99
-
100
-
101
-
102
-
103
-
104
-
105
-
106
-
107
-
108
-
109
-
110
-
111
-
112
-
113
-
114
-
115
-
116
-
117
-
118
-
119
-
120
-
121
-
122
-
123
-
 124
124 -
 125
125 -
 126
126 -
 127
127 -
 128
128 -
 129
129 -
 130
130 -
 131
131 -
 132
132 -
 133
133 -
 134
134 -
135
-
136
-
137
-
138
-
139
-
140
-
141
-
142
-
143
-
144
-
145
-
146
-
147
-
148
 |
 |