Brother International GT-361 Instruction Manual - English - Page 121
Changing the Print Direction, 7-2-5. Changing the Auto Cleaning Setting
 |
View all Brother International GT-361 manuals
Add to My Manuals
Save this manual to your list of manuals |
Page 121 highlights
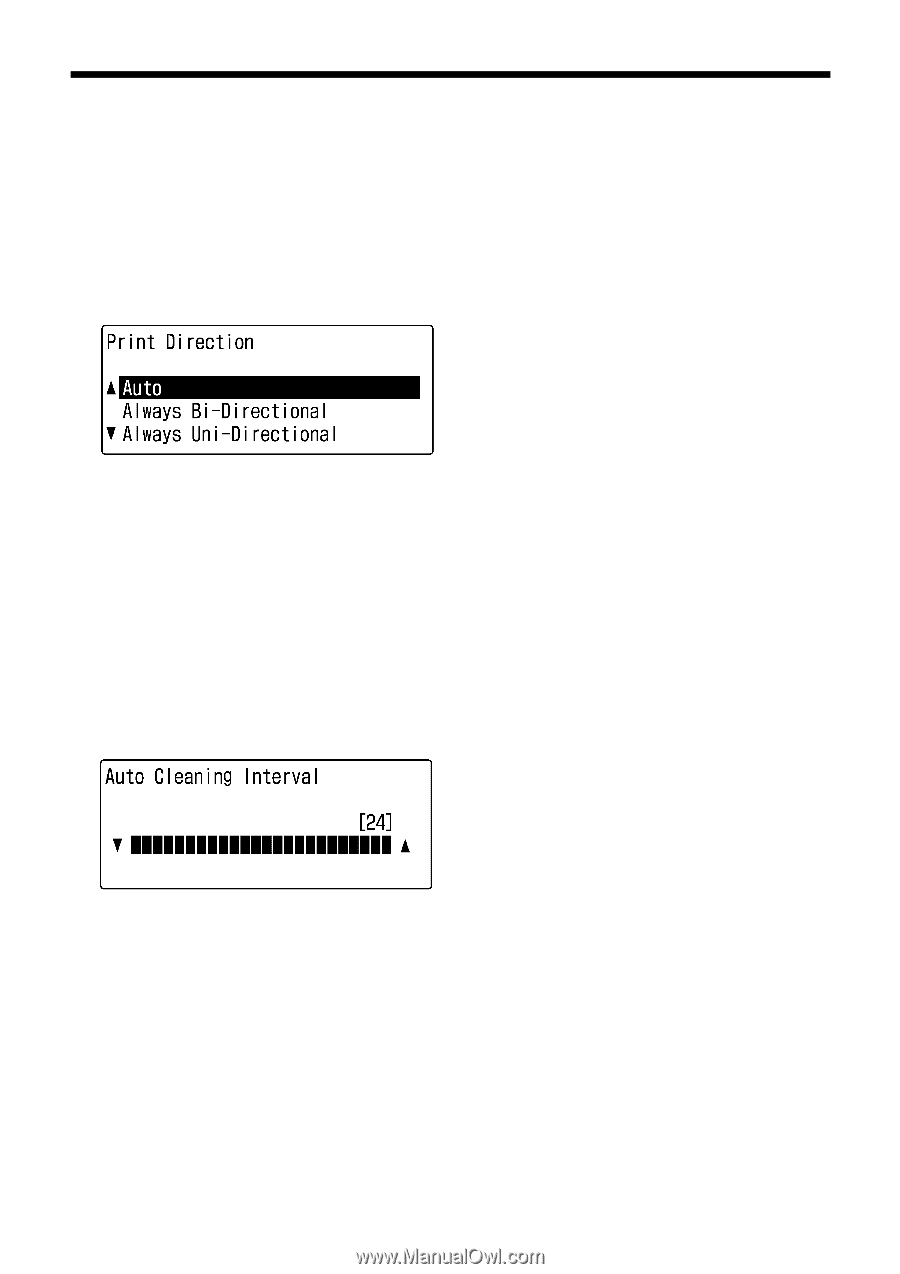
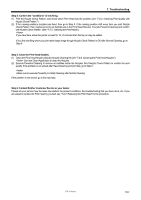
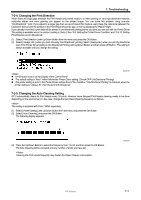
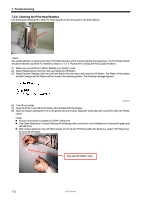
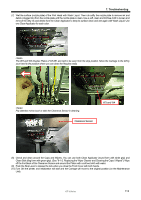
7. Troubleshooting 7-2-4. Changing the Print Direction When there are large gaps between the Print Heads and printed medium, or when printing on very high absorbent material, horizontal stripes and color graining can appear on the printed image. You can solve this problem using one-way "Uni-Directional " print. If you adjust to a larger gap then we recommend this mode is used. Keep the clearance between the Clearance Sensor and the surface of the Print Heads should be app. 2 mm by adjusting the Platen Height. If you already know that a print data will be printed in uni-directional printing before you print, you can set with the Printer Driver. This setting is available when the printer's setting is [ Auto ]. See "4-3. Setting the Printer Driver Condition" and "4-3-14. Setting Print Direction as Uni-Directional". (1) Select [ Print Direction ] with Up/Down Button from the menu and press the OK Button. (2) Select [ Always Uni- ] when you print one-way "Uni-Directional" printing. Select [ Always Bi- ] when you print by-directional even if the Printer Driver setting is Uni-Directional Printing with Up/Down Button and then press OK Button. This setting is always available until you change the setting. 06e0031Y z Uni-Direction Icon is on the Display of the Control Panel. z The default setting is "Auto", which follows the Printer Driver setting. (Check-OFF Uni-Directional Printing) z The printer setting is prior to the Printer Driver setting. Even if the checkbox "Uni-Directional Printing" is checked, when the printer setting is " Always Bi-" then the print is Bi-Directional. 7-2-5. Changing the Auto Cleaning Setting GT-3 automatically cleans its Print Heads every 24 prints. However more frequent Print Heads cleaning needs to be done depending on the environment. In this case, change the Auto Head Cleaning frequency as follows. This setting is available with Color / White separately. (1) Select [ Printer Setting ] with Up/Down Button from the menu and press the OK Button. (2) Select [ Auto Cleaning ] and press the OK Button. The following display appears. (3) Press the Up/Down Button to select the frequency from 1 to 24, and then press the OK Button. The Auto Cleaning will be executed at every number of prints you have set. Cleaning the Print Heads frequently may hasten the Wiper Cleaner consumption. 07e0032Y GT-3 Series 111
-
 1
1 -
2
-
3
-
4
-
5
-
6
-
7
-
8
-
9
-
10
-
11
-
12
-
13
-
14
-
15
-
16
-
17
-
18
-
19
-
20
-
21
-
22
-
23
-
24
-
25
-
26
-
27
-
28
-
29
-
30
-
31
-
32
-
33
-
34
-
35
-
36
-
37
-
38
-
39
-
40
-
41
-
42
-
43
-
44
-
45
-
46
-
47
-
48
-
49
-
50
-
51
-
52
-
53
-
54
-
55
-
56
-
57
-
58
-
59
-
60
-
61
-
62
-
63
-
64
-
65
-
66
-
67
-
68
-
69
-
70
-
71
-
72
-
73
-
74
-
75
-
76
-
77
-
78
-
79
-
80
-
81
-
82
-
83
-
84
-
85
-
86
-
87
-
88
-
89
-
90
-
91
-
92
-
93
-
94
-
95
-
96
-
97
-
98
-
99
-
100
-
101
-
102
-
103
-
104
-
105
-
106
-
107
-
108
-
109
-
110
-
111
-
112
-
113
-
114
-
115
-
 116
116 -
 117
117 -
 118
118 -
 119
119 -
 120
120 -
 121
121 -
 122
122 -
 123
123 -
 124
124 -
 125
125 -
 126
126 -
127
-
128
-
129
-
130
-
131
-
132
-
133
-
134
-
135
-
136
-
137
-
138
-
139
-
140
-
141
-
142
-
143
-
144
-
145
-
146
-
147
-
148
 |
 |