Brother International GT-361 Instruction Manual - English - Page 124
Replacing the Print Head, CMYK Print Head
 |
View all Brother International GT-361 manuals
Add to My Manuals
Save this manual to your list of manuals |
Page 124 highlights
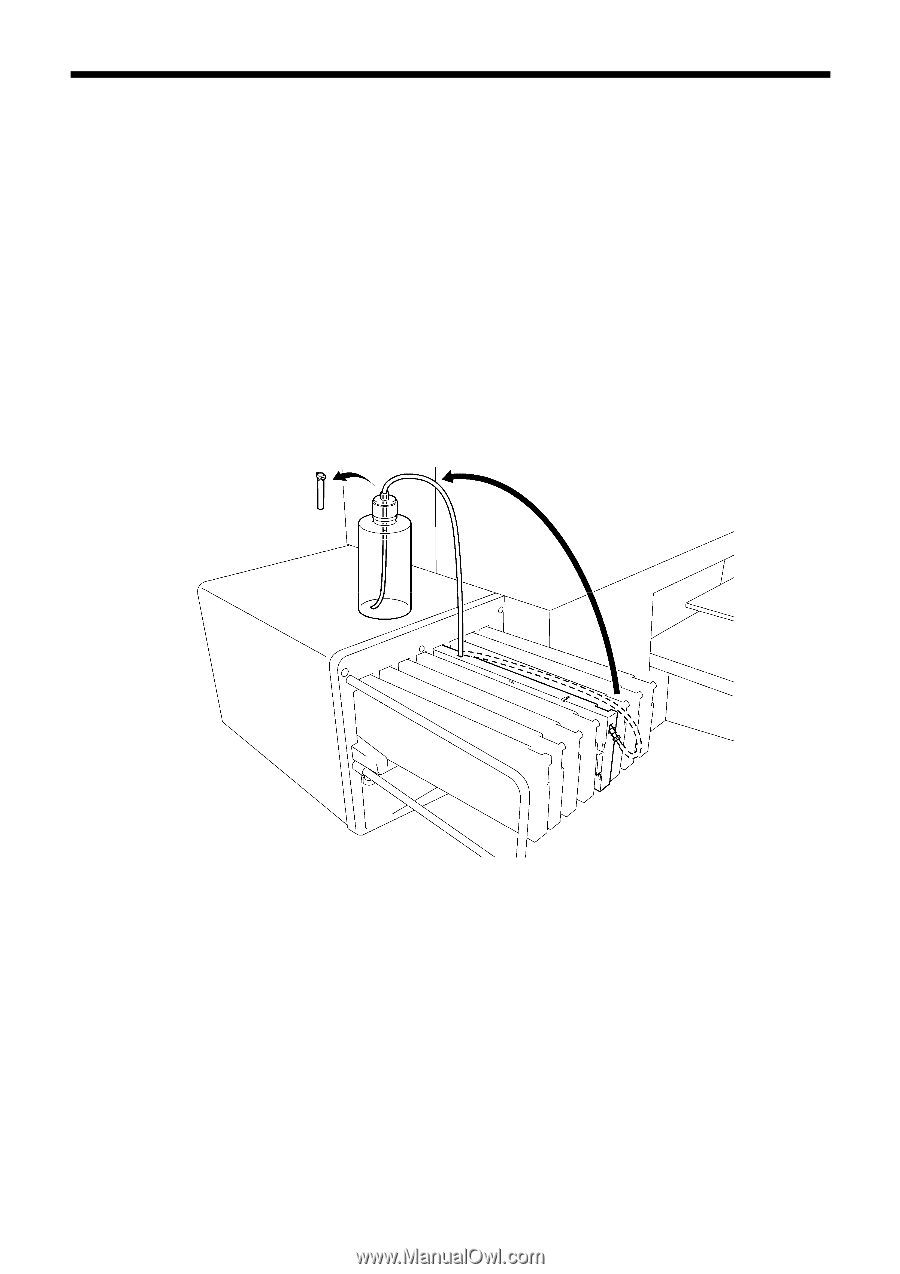
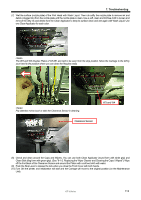
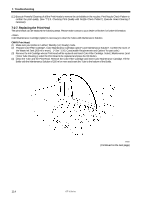
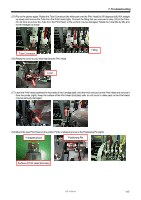
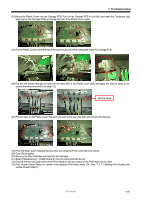
7. Troubleshooting (11) Execute Powerful Cleaning of all the Print Heads to remove the air bubbles in the nozzles. Print Nozzle Check Pattern to confirm the print quality. (See "7-2-3. Checking Print Quality with Nozzle Check Pattern"). Execute Head Cleaning if necessary. 7-2-7. Replacing the Print Head The print heads can be replaced the following steps. Please make contact to your dealer or Brother. for further information. Color Maintenance Cartridge (option) is necessary to clean the Tubes with Maintenance Solution. CMYK Print Head: (1) Make sure your printer is in either [ Standby ] or [ Ready ] mode. (2) Prepare Color Filter Cartridge*, Color Maintenance Cartridge (option*) and Maintenance Solution*. Confirm the room of the Waste Ink Tank (200 ml or more). (* See "1-3-5. Consumable Requirements and Options" for part code.) (3) Remove the Ink Cartridge whose Print Head will be replaced and insert Color Filter Cartridge. Select [ Maintenance ] and [ Color Tube Cleaning ], select the Print Head to be replaced and press the OK Button. (4) Clean the Tube and the Print Head. Remove the Color Filter Cartridge and insert Color Maintenance Cartridge. Fill the Bottle with the Maintenance Solution of 250 ml or more and insert the Tube to the bottom of the Bottle. 0082Y (Continued on the next page) 114 GT-3 Series
-
 1
1 -
2
-
3
-
4
-
5
-
6
-
7
-
8
-
9
-
10
-
11
-
12
-
13
-
14
-
15
-
16
-
17
-
18
-
19
-
20
-
21
-
22
-
23
-
24
-
25
-
26
-
27
-
28
-
29
-
30
-
31
-
32
-
33
-
34
-
35
-
36
-
37
-
38
-
39
-
40
-
41
-
42
-
43
-
44
-
45
-
46
-
47
-
48
-
49
-
50
-
51
-
52
-
53
-
54
-
55
-
56
-
57
-
58
-
59
-
60
-
61
-
62
-
63
-
64
-
65
-
66
-
67
-
68
-
69
-
70
-
71
-
72
-
73
-
74
-
75
-
76
-
77
-
78
-
79
-
80
-
81
-
82
-
83
-
84
-
85
-
86
-
87
-
88
-
89
-
90
-
91
-
92
-
93
-
94
-
95
-
96
-
97
-
98
-
99
-
100
-
101
-
102
-
103
-
104
-
105
-
106
-
107
-
108
-
109
-
110
-
111
-
112
-
113
-
114
-
115
-
116
-
117
-
118
-
 119
119 -
 120
120 -
 121
121 -
 122
122 -
 123
123 -
 124
124 -
 125
125 -
 126
126 -
 127
127 -
 128
128 -
 129
129 -
130
-
131
-
132
-
133
-
134
-
135
-
136
-
137
-
138
-
139
-
140
-
141
-
142
-
143
-
144
-
145
-
146
-
147
-
148
 |
 |