Canon PIXMA MX532 Scanning Guide - Page 178
Click, to preview the image., Click
 |
View all Canon PIXMA MX532 manuals
Add to My Manuals
Save this manual to your list of manuals |
Page 178 highlights
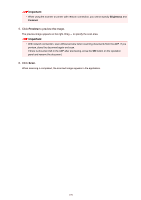
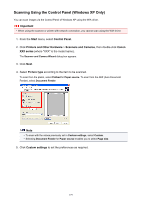
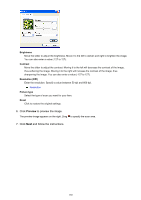
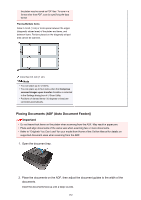
Important • When using the scanner or printer with network connection, you cannot specify Brightness and Contrast. 5. Click Preview to preview the image. The preview image appears on the right. Drag to specify the scan area. Important • With network connection, scan without preview when scanning documents from the ADF. If you preview, place the document again and scan. If there is document left in the ADF after previewing, press the OK button on the operation panel and remove the document. 6. Click Scan. When scanning is completed, the scanned image appears in the application. 178
-
 1
1 -
2
-
3
-
4
-
5
-
6
-
7
-
8
-
9
-
10
-
11
-
12
-
13
-
14
-
15
-
16
-
17
-
18
-
19
-
20
-
21
-
22
-
23
-
24
-
25
-
26
-
27
-
28
-
29
-
30
-
31
-
32
-
33
-
34
-
35
-
36
-
37
-
38
-
39
-
40
-
41
-
42
-
43
-
44
-
45
-
46
-
47
-
48
-
49
-
50
-
51
-
52
-
53
-
54
-
55
-
56
-
57
-
58
-
59
-
60
-
61
-
62
-
63
-
64
-
65
-
66
-
67
-
68
-
69
-
70
-
71
-
72
-
73
-
74
-
75
-
76
-
77
-
78
-
79
-
80
-
81
-
82
-
83
-
84
-
85
-
86
-
87
-
88
-
89
-
90
-
91
-
92
-
93
-
94
-
95
-
96
-
97
-
98
-
99
-
100
-
101
-
102
-
103
-
104
-
105
-
106
-
107
-
108
-
109
-
110
-
111
-
112
-
113
-
114
-
115
-
116
-
117
-
118
-
119
-
120
-
121
-
122
-
123
-
124
-
125
-
126
-
127
-
128
-
129
-
130
-
131
-
132
-
133
-
134
-
135
-
136
-
137
-
138
-
139
-
140
-
141
-
142
-
143
-
144
-
145
-
146
-
147
-
148
-
149
-
150
-
151
-
152
-
153
-
154
-
155
-
156
-
157
-
158
-
159
-
160
-
161
-
162
-
163
-
164
-
165
-
166
-
167
-
168
-
169
-
170
-
171
-
172
-
 173
173 -
 174
174 -
 175
175 -
 176
176 -
 177
177 -
 178
178 -
 179
179 -
 180
180 -
 181
181 -
 182
182 -
 183
183 -
184
-
185
-
186
-
187
-
188
-
189
-
190
-
191
-
192
-
193
-
194
-
195
-
196
-
197
-
198
-
199
-
200
-
201
-
202
 |
 |

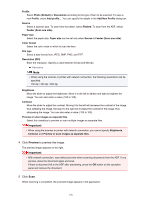
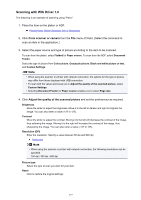
Important
•
When using the scanner or printer with network connection, you cannot specify
Brightness
and
Contrast
.
5. Click
Preview
to preview the image.
The preview image appears on the right. Drag
to specify the scan area.
Important
•
With network connection, scan without preview when scanning documents from the ADF. If you
preview, place the document again and scan.
If there is document left in the ADF after previewing, press the
OK
button on the operation
panel and remove the document.
6. Click
Scan
.
When scanning is completed, the scanned image appears in the application.
178