Canon PIXMA MX532 Scanning Guide - Page 187
Color, Black
 |
View all Canon PIXMA MX532 manuals
Add to My Manuals
Save this manual to your list of manuals |
Page 187 highlights
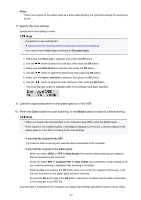
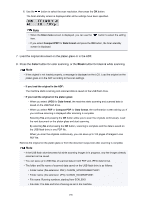
Photo Scans the original on the platen glass as a photo data applying the optimized settings for scanning a photo. 8. Specify the scan settings. Specify each scan setting in order. Note • For details on each setting item: Setting Items for Scanning Using the Operation Panel of the Machine • Go to step 9 when Auto scan is selected for Document type. 1. Make sure that Scan size is selected, then press the OK button. 2. Use the button to select the scan size, then press the OK button. 3. Make sure that Data format is selected, then press the OK button. 4. Use the button to select the data format, then press the OK button. 5. Make sure that Scan resolution is selected, then press the OK button. 6. Use the button to select the scan resolution, then press the OK button. The Scan standby screen is displayed after all the settings have been specified. 9. Load the original document on the platen glass or in the ADF. 10. Press the Color button for color scanning, or the Black button for black & white scanning. Note • When you forward the scanned data to the computer using WSD, press the Color button. • If the original is not loaded properly, a message is displayed on the LCD. Load the original on the platen glass or in the ADF according to the scan settings. • If you load the original in the ADF: The machine starts scanning and scanned data is forwarded to the computer. • If you load the original on the platen glass: ◦ When you select JPEG or TIFF for Data format, the machine starts scanning and scanned data is forwarded to the computer. ◦ When you select PDF or Compact PDF for Data format, the confirmation screen asking you if you continue scanning is displayed after scanning is complete. Selecting Yes and pressing the OK button allow you to scan the originals continuously. Load the next document on the platen glass and start scanning. By selecting No and pressing the OK button, scanning is complete and the data is forwarded to the computer in one PDF file. Scanned data is forwarded to the computer according to the settings specified in Canon IJ Scan Utility. 187
-
 1
1 -
2
-
3
-
4
-
5
-
6
-
7
-
8
-
9
-
10
-
11
-
12
-
13
-
14
-
15
-
16
-
17
-
18
-
19
-
20
-
21
-
22
-
23
-
24
-
25
-
26
-
27
-
28
-
29
-
30
-
31
-
32
-
33
-
34
-
35
-
36
-
37
-
38
-
39
-
40
-
41
-
42
-
43
-
44
-
45
-
46
-
47
-
48
-
49
-
50
-
51
-
52
-
53
-
54
-
55
-
56
-
57
-
58
-
59
-
60
-
61
-
62
-
63
-
64
-
65
-
66
-
67
-
68
-
69
-
70
-
71
-
72
-
73
-
74
-
75
-
76
-
77
-
78
-
79
-
80
-
81
-
82
-
83
-
84
-
85
-
86
-
87
-
88
-
89
-
90
-
91
-
92
-
93
-
94
-
95
-
96
-
97
-
98
-
99
-
100
-
101
-
102
-
103
-
104
-
105
-
106
-
107
-
108
-
109
-
110
-
111
-
112
-
113
-
114
-
115
-
116
-
117
-
118
-
119
-
120
-
121
-
122
-
123
-
124
-
125
-
126
-
127
-
128
-
129
-
130
-
131
-
132
-
133
-
134
-
135
-
136
-
137
-
138
-
139
-
140
-
141
-
142
-
143
-
144
-
145
-
146
-
147
-
148
-
149
-
150
-
151
-
152
-
153
-
154
-
155
-
156
-
157
-
158
-
159
-
160
-
161
-
162
-
163
-
164
-
165
-
166
-
167
-
168
-
169
-
170
-
171
-
172
-
173
-
174
-
175
-
176
-
177
-
178
-
179
-
180
-
181
-
 182
182 -
 183
183 -
 184
184 -
 185
185 -
 186
186 -
 187
187 -
 188
188 -
 189
189 -
 190
190 -
 191
191 -
 192
192 -
193
-
194
-
195
-
196
-
197
-
198
-
199
-
200
-
201
-
202
 |
 |
