Canon PIXMA MX532 Scanning Guide - Page 68
Data Format
 |
View all Canon PIXMA MX532 manuals
Add to My Manuals
Save this manual to your list of manuals |
Page 68 highlights
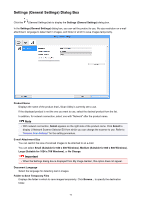
(2) Save Settings Area File Name Enter the file name of the image to be saved. When you save a file, the date and four digits are appended to the set file name in the "_20XX0101_0001" format. Data Format Set from the operation panel. Settings... Click to display the Data Format Settings dialog box in which you can set the quality of the images to be saved, keyword search of PDF files, and the data format in which to save images scanned with Auto Scan. Save in Displays the folder in which to save the scanned images. To change the folder, specify the destination folder in the Select Destination Folder dialog box displayed by selecting Add... from the pull-down menu. The default save folders are as follows. • Windows 8: My Documents folder • Windows 7: My Documents folder • Windows Vista: Documents folder • Windows XP: My Documents folder (3) Application Settings Area Open with an application Select this when you want to enhance or correct the scanned images. You can specify the application from the pull-down menu. Send to an application Select this when you want to use the scanned images as they are in an application that allows you to browse or organize images. You can specify the application from the pull-down menu. Send to a folder Select this when you also want to save the scanned images to a folder other than the one specified in Save in. You can specify the folder from the pull-down menu. Do not start any application Saves to the folder specified in Save in. Note • Specify the application or folder in the Select Application or Select Destination Folder dialog box displayed by selecting Add... from the pull-down menu. Instructions Opens this guide. Defaults You can restore the settings in the displayed screen to the default settings. 68
-
 1
1 -
2
-
3
-
4
-
5
-
6
-
7
-
8
-
9
-
10
-
11
-
12
-
13
-
14
-
15
-
16
-
17
-
18
-
19
-
20
-
21
-
22
-
23
-
24
-
25
-
26
-
27
-
28
-
29
-
30
-
31
-
32
-
33
-
34
-
35
-
36
-
37
-
38
-
39
-
40
-
41
-
42
-
43
-
44
-
45
-
46
-
47
-
48
-
49
-
50
-
51
-
52
-
53
-
54
-
55
-
56
-
57
-
58
-
59
-
60
-
61
-
62
-
 63
63 -
 64
64 -
 65
65 -
 66
66 -
 67
67 -
 68
68 -
 69
69 -
 70
70 -
 71
71 -
 72
72 -
 73
73 -
74
-
75
-
76
-
77
-
78
-
79
-
80
-
81
-
82
-
83
-
84
-
85
-
86
-
87
-
88
-
89
-
90
-
91
-
92
-
93
-
94
-
95
-
96
-
97
-
98
-
99
-
100
-
101
-
102
-
103
-
104
-
105
-
106
-
107
-
108
-
109
-
110
-
111
-
112
-
113
-
114
-
115
-
116
-
117
-
118
-
119
-
120
-
121
-
122
-
123
-
124
-
125
-
126
-
127
-
128
-
129
-
130
-
131
-
132
-
133
-
134
-
135
-
136
-
137
-
138
-
139
-
140
-
141
-
142
-
143
-
144
-
145
-
146
-
147
-
148
-
149
-
150
-
151
-
152
-
153
-
154
-
155
-
156
-
157
-
158
-
159
-
160
-
161
-
162
-
163
-
164
-
165
-
166
-
167
-
168
-
169
-
170
-
171
-
172
-
173
-
174
-
175
-
176
-
177
-
178
-
179
-
180
-
181
-
182
-
183
-
184
-
185
-
186
-
187
-
188
-
189
-
190
-
191
-
192
-
193
-
194
-
195
-
196
-
197
-
198
-
199
-
200
-
201
-
202
 |
 |
