Canon PIXMA MX532 Scanning Guide - Page 186
Document type
 |
View all Canon PIXMA MX532 manuals
Add to My Manuals
Save this manual to your list of manuals |
Page 186 highlights
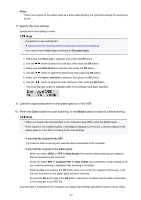
If you forward the data to the USB-connected computer, select Local (USB). If you forward the data to the LAN-connected computer, select a name of the computer to forward the scanned data. Note • If you select Search again and press the OK button, the machine starts searching for the connected computers again. • When you forward the scanned data to the computer using WSD (one of the network protocols supported in Windows 8, Windows 7, and Windows Vista), select Active for WSD scan from dev. on WSD setting on Other settings in LAN settings under Device settings. 6. Make sure that Document type is selected, then press the OK button. 7. Use the button to select the document type, then press the OK button. Note • When you forward the scanned data to the computer searched using WSD, you cannot select the document type. • The * (asterisk) on the LCD indicates the current setting. Auto scan This item is available only when the machine is connected to the computer using a USB cable. The machine detects the type of the originals automatically and the image is forwarded in the optimized size, resolution and data format. Important • You can select Auto scan only when you forward the scanned data to the USB-connected computer. • Load originals properly according to their type; otherwise, some originals may not be scanned properly. For details on how to load the original: Loading Originals • The following items can be scanned: Photos, postcards, visiting cards, magazines, newspapers, documents, BD/DVD/CDs • The following items cannot be scanned properly. • A4 sized photos • Documents smaller than 5 inches x 7 inches (127 mm x 178 mm) such as a paperback with its backbone cut off • Originals on thin white paper • Long and narrow originals such as panoramic photographs • When you scan originals from the ADF, it may take longer to scan the first page. Document Scans the original on the platen glass or in the ADF applying the optimized settings for scanning a document. 186
-
 1
1 -
2
-
3
-
4
-
5
-
6
-
7
-
8
-
9
-
10
-
11
-
12
-
13
-
14
-
15
-
16
-
17
-
18
-
19
-
20
-
21
-
22
-
23
-
24
-
25
-
26
-
27
-
28
-
29
-
30
-
31
-
32
-
33
-
34
-
35
-
36
-
37
-
38
-
39
-
40
-
41
-
42
-
43
-
44
-
45
-
46
-
47
-
48
-
49
-
50
-
51
-
52
-
53
-
54
-
55
-
56
-
57
-
58
-
59
-
60
-
61
-
62
-
63
-
64
-
65
-
66
-
67
-
68
-
69
-
70
-
71
-
72
-
73
-
74
-
75
-
76
-
77
-
78
-
79
-
80
-
81
-
82
-
83
-
84
-
85
-
86
-
87
-
88
-
89
-
90
-
91
-
92
-
93
-
94
-
95
-
96
-
97
-
98
-
99
-
100
-
101
-
102
-
103
-
104
-
105
-
106
-
107
-
108
-
109
-
110
-
111
-
112
-
113
-
114
-
115
-
116
-
117
-
118
-
119
-
120
-
121
-
122
-
123
-
124
-
125
-
126
-
127
-
128
-
129
-
130
-
131
-
132
-
133
-
134
-
135
-
136
-
137
-
138
-
139
-
140
-
141
-
142
-
143
-
144
-
145
-
146
-
147
-
148
-
149
-
150
-
151
-
152
-
153
-
154
-
155
-
156
-
157
-
158
-
159
-
160
-
161
-
162
-
163
-
164
-
165
-
166
-
167
-
168
-
169
-
170
-
171
-
172
-
173
-
174
-
175
-
176
-
177
-
178
-
179
-
180
-
 181
181 -
 182
182 -
 183
183 -
 184
184 -
 185
185 -
 186
186 -
 187
187 -
 188
188 -
 189
189 -
 190
190 -
 191
191 -
192
-
193
-
194
-
195
-
196
-
197
-
198
-
199
-
200
-
201
-
202
 |
 |
