Canon PIXMA MX532 Scanning Guide - Page 188
When the program selection screen is displayed, If you want to scan originals with advanced settings
 |
View all Canon PIXMA MX532 manuals
Add to My Manuals
Save this manual to your list of manuals |
Page 188 highlights
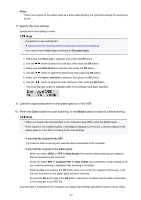
Remove the original on the platen glass or from the document output slot after scanning is complete. Important • If the scanning result with Auto scan is not satisfactory, select Document or Photo according to the original in step 7, then specify the scan size or other setting items in step 8. When the program selection screen is displayed: • If you are using Windows 8, Windows 7, or Windows Vista: The program selection screen may be displayed after pressing the Color or Black button. In this case, select Canon IJ Scan Utility and click OK. • If you are using Windows XP: The program selection screen may be displayed after pressing the Color or Black button for the first time. In this case, specify Canon IJ Scan Utility as the application software to use, select Always use this program for this action, then click OK. From the next time, Canon IJ Scan Utility is automatically started. If you want to scan originals with advanced settings, or if you want to edit or print the scanned images: If you scan originals from a computer using My Image Garden, My Image Garden enables you to edit the scanned images, such as optimizing or trimming. In addition, you can edit or print the scanned images using the compatible application software to make better use of them. Scanning Photos and Documents Note • You can use a WIA-compliant application software and the Control Panel (Windows XP only) to scan originals with this machine. For details: Other Scanning Methods • If you want to convert a scanned document to text: Extracting Text from Scanned Images (OCR) 188
-
 1
1 -
2
-
3
-
4
-
5
-
6
-
7
-
8
-
9
-
10
-
11
-
12
-
13
-
14
-
15
-
16
-
17
-
18
-
19
-
20
-
21
-
22
-
23
-
24
-
25
-
26
-
27
-
28
-
29
-
30
-
31
-
32
-
33
-
34
-
35
-
36
-
37
-
38
-
39
-
40
-
41
-
42
-
43
-
44
-
45
-
46
-
47
-
48
-
49
-
50
-
51
-
52
-
53
-
54
-
55
-
56
-
57
-
58
-
59
-
60
-
61
-
62
-
63
-
64
-
65
-
66
-
67
-
68
-
69
-
70
-
71
-
72
-
73
-
74
-
75
-
76
-
77
-
78
-
79
-
80
-
81
-
82
-
83
-
84
-
85
-
86
-
87
-
88
-
89
-
90
-
91
-
92
-
93
-
94
-
95
-
96
-
97
-
98
-
99
-
100
-
101
-
102
-
103
-
104
-
105
-
106
-
107
-
108
-
109
-
110
-
111
-
112
-
113
-
114
-
115
-
116
-
117
-
118
-
119
-
120
-
121
-
122
-
123
-
124
-
125
-
126
-
127
-
128
-
129
-
130
-
131
-
132
-
133
-
134
-
135
-
136
-
137
-
138
-
139
-
140
-
141
-
142
-
143
-
144
-
145
-
146
-
147
-
148
-
149
-
150
-
151
-
152
-
153
-
154
-
155
-
156
-
157
-
158
-
159
-
160
-
161
-
162
-
163
-
164
-
165
-
166
-
167
-
168
-
169
-
170
-
171
-
172
-
173
-
174
-
175
-
176
-
177
-
178
-
179
-
180
-
181
-
182
-
 183
183 -
 184
184 -
 185
185 -
 186
186 -
 187
187 -
 188
188 -
 189
189 -
 190
190 -
 191
191 -
 192
192 -
 193
193 -
194
-
195
-
196
-
197
-
198
-
199
-
200
-
201
-
202
 |
 |