Canon SELPHY ES3 SELPHY ES3 Printer User Guide - Page 43
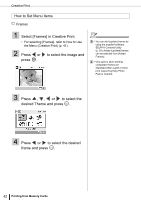
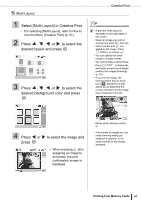
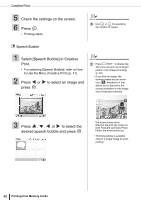
Select [Clip Art] in Creative Print.
 |
View all Canon SELPHY ES3 manuals
Add to My Manuals
Save this manual to your list of manuals |
Page 43 highlights
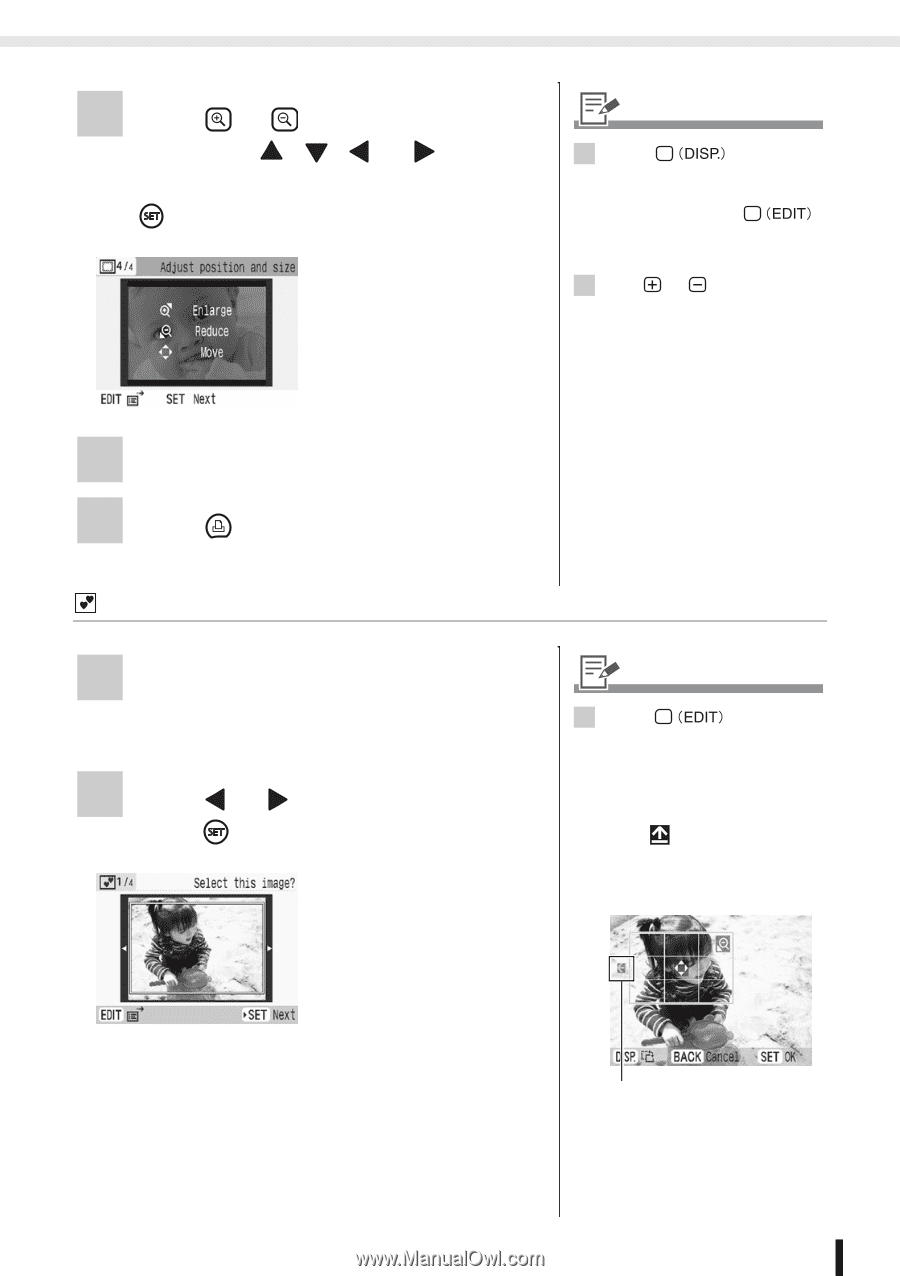
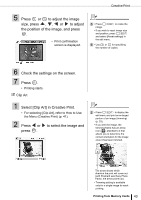
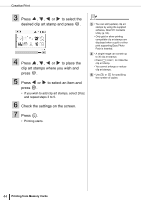
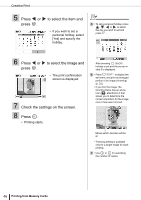
Creative Print 5 Press or to adjust the image size, press , , or to adjust the position of the image, and press . • Print confirmation screen is displayed. 5 • Press image. to rotate the • If you wish to reset image size and position, press and select [Reset settings] in the edit menu. 6 • Use or for specifying the number of copies. 6 Check the settings on the screen. 7 Press . • Printing starts. Clip Art 1 Select [Clip Art] in Creative Print. • For selecting [Clip Art], refer to How to Use the Menu (Creative Print) (p. 41). 2 Press or to select the image and press . 2 • Press to display the edit menu and print an enlarged portion of an image (trimming) (p. 33). • If you trim the image, the trimming frame has an arrow icon ( ) attached to it that allows you to determine the correct orientation for the image once it has been trimmed. The arrow shows which direction the print will come out (with Postcard size Easy Photo Packs, the arrow points up). • Trimming setting is available only for a single image for each printing. Printing from Memory Cards 43
-
 1
1 -
2
-
3
-
4
-
5
-
6
-
7
-
8
-
9
-
10
-
11
-
12
-
13
-
14
-
15
-
16
-
17
-
18
-
19
-
20
-
21
-
22
-
23
-
24
-
25
-
26
-
27
-
28
-
29
-
30
-
31
-
32
-
33
-
34
-
35
-
36
-
37
-
 38
38 -
 39
39 -
 40
40 -
 41
41 -
 42
42 -
 43
43 -
 44
44 -
 45
45 -
 46
46 -
 47
47 -
 48
48 -
49
-
50
-
51
-
52
-
53
-
54
-
55
-
56
-
57
-
58
-
59
-
60
-
61
-
62
-
63
-
64
-
65
-
66
-
67
-
68
-
69
-
70
-
71
-
72
-
73
-
74
-
75
-
76
-
77
-
78
-
79
-
80
-
81
-
82
-
83
-
84
-
85
-
86
-
87
-
88
-
89
-
90
-
91
-
92
-
93
-
94
-
95
-
96
-
97
-
98
-
99
-
100
-
101
-
102
-
103
-
104
-
105
-
106
-
107
-
108
-
109
-
110
-
111
-
112
-
113
-
114
-
115
-
116
-
117
-
118
-
119
-
120
-
121
-
122
-
123
-
124
 |
 |