Dell Force10 E1200i Installing and Maintaining the E1200i System - Page 19

Installing the AC Chassis, Unpacking the E1200 System, Installing the Equipment Rack Shelf Bar
Page 19 highlights

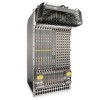
4 Installing the AC Chassis This chapter provides instructions to rack mount your E1200 system into a standard 19-inch or 23-inch equipment rack. It contains the following sections: • Unpacking the E1200 System • Installing the Equipment Rack Shelf Bar • Standard Front Chassis Mounting • Installing the Chassis into an Equipment Cabinet Unpacking the E1200 System The E1200 AC system and components are shipped on a wooden pallet with Front Shipping cover. Remove the chassis from the shipping packaging and move the chassis with a hand cart, pallet jack, or fork lift to its rack. Do not unpack the power supplies, fan trays, air filter, or cards until the chassis is installed. WARNING: The E1200 AC shipping containers each weigh up to 400 pounds. The unpacked chassis and pallet weigh approximately 200 pounds. Do not attempt to lift or move the chassis without the use of a hand cart, pallet jack, or forklift. CAUTION: Lift the E1200 chassis only with the handles provided or from the bottom. Lifting by the chassis shelves will cause chassis damage. Do not remove the shipping cover during the installation process. The cover prevents damage to the internal framework and EMI seals. WARNING: Electrostatic discharge (ESD) damage can occur when components are mishandled. Always wear an ESD-preventative wrist or foot-heal ground strap when handling RPMs, SFMs, or line cards. After you remove the original packaging, place RPMs, SFMs, and line cards directly into the chassis, or on an antistatic surface. WARNING: Complete the chassis installation into the rack before you install any other component (fan trays, power supplies, line cards, RPMs, SFMs, cables). Installing the Equipment Rack Shelf Bar The rack shelf bar (Figure 4-1) enables you to easily position the chassis into the rack and provides the unit additional stability. The E1200 system must be mounted in a rack that is permanently secured to the floor. Installing the AC Chassis | 19

  • 1
  • 2
  • 3
  • 4
  • 5
  • 6
  • 7
  • 8
  • 9
  • 10
  • 11
  • 12
  • 13
  • 14
  • 15
  • 16
  • 17
  • 18
  • 19
  • 20
  • 21
  • 22
  • 23
  • 24
  • 25
  • 26
  • 27
  • 28
  • 29
  • 30
  • 31
  • 32
  • 33
  • 34
  • 35
  • 36
  • 37
  • 38
  • 39
  • 40
  • 41
  • 42
  • 43
  • 44
  • 45
  • 46
  • 47
  • 48
  • 49
  • 50
  • 51
  • 52
  • 53
  • 54
  • 55
  • 56
  • 57
  • 58
  • 59
  • 60
  • 61
  • 62
  • 63
  • 64
  • 65
  • 66
  • 67
  • 68
  • 69
  • 70
  • 71
  • 72
  • 73
  • 74
  • 75
  • 76
  • 77
  • 78
  • 79
  • 80
  • 81
  • 82
  • 83
  • 84
  • 85
  • 86
  • 87
  • 88
  • 89
  • 90
  • 91
  • 92
  • 93
  • 94

Installing the AC Chassis
|
19
4
Installing the AC Chassis
This chapter provides instructions to rack mount your E1200 system into a standard 19-inch or 23-inch
equipment rack. It contains the following sections:
Unpacking the E1200 System
Installing the Equipment Rack Shelf Bar
Standard Front Chassis Mounting
Installing the Chassis into an Equipment Cabinet
Unpacking the E1200 System
The E1200 AC system and components are shipped on a wooden pallet with Front Shipping cover.
Remove the chassis from the shipping packaging and move the chassis with a hand cart, pallet jack, or
fork lift to its rack. Do not unpack the power supplies, fan trays, air filter, or cards until the chassis is
installed.
WARNING:
The E1200 AC shipping containers each weigh up to 400 pounds. The unpacked chassis and
pallet weigh approximately 200 pounds. Do not attempt to lift or move the chassis without the use of a hand
cart, pallet jack, or forklift.
CAUTION:
Lift the E1200 chassis
only
with the handles provided or from the bottom. Lifting by the chassis
shelves will cause chassis damage. Do not remove the shipping cover during the installation process. The
cover prevents damage to the internal framework and EMI seals.
WARNING:
Electrostatic discharge (ESD) damage can occur when components are mishandled. Always
wear an ESD-preventative wrist or foot-heal ground strap when handling RPMs, SFMs, or line cards. After you
remove the original packaging, place RPMs, SFMs, and line cards directly into the chassis, or on an antistatic
surface.
WARNING:
Complete the chassis installation into the rack before you install any other component (fan trays,
power supplies, line cards, RPMs, SFMs, cables).
Installing the Equipment Rack Shelf Bar
The rack shelf bar (
Figure
4-
1
) enables you to easily position the chassis into the rack and provides the
unit additional stability. The E1200 system must be mounted in a rack that is permanently secured to the
floor.