Dell Force10 E1200i Installing and Maintaining the E1200i System - Page 24
Standard Front Chassis Mounting, of an empty rack to avoid a top-heavy rack
 |
View all Dell Force10 E1200i manuals
Add to My Manuals
Save this manual to your list of manuals |
Page 24 highlights
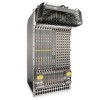
www.dell.com | support.dell.com Figure 5-1. Rack Shelf Bar UP UP FN To install a equipment rack shelf bar: Step Task 1 Determine the chassis mounting location in the equipment rack. 2 Orient the bar with the arrows pointing upward. The smooth side of the bar should face outward. 3 Attach the bar to the equipment rack brackets using the mounting screws provided by the manufacturer. Standard Front Chassis Mounting NOTE: Dell Force10 recommends that you install and operate the E1200 system in a standard 19-inch or 23inch equipment rack. Install the E1200 system after you secure the equipment rack shelf bar. Load the chassis in the lower half of an empty rack to avoid a top-heavy rack (Figure 5-2). WARNING: Do not remove the Front shipping Cover during the initial installation process. The cover provides front handles to assist in lifting and prevents damage to the internal framework and EMI seals. 24 | Installing the DC Chassis
-
 1
1 -
2
-
3
-
4
-
5
-
6
-
7
-
8
-
9
-
10
-
11
-
12
-
13
-
14
-
15
-
16
-
17
-
18
-
 19
19 -
 20
20 -
 21
21 -
 22
22 -
 23
23 -
 24
24 -
 25
25 -
 26
26 -
 27
27 -
 28
28 -
 29
29 -
30
-
31
-
32
-
33
-
34
-
35
-
36
-
37
-
38
-
39
-
40
-
41
-
42
-
43
-
44
-
45
-
46
-
47
-
48
-
49
-
50
-
51
-
52
-
53
-
54
-
55
-
56
-
57
-
58
-
59
-
60
-
61
-
62
-
63
-
64
-
65
-
66
-
67
-
68
-
69
-
70
-
71
-
72
-
73
-
74
-
75
-
76
-
77
-
78
-
79
-
80
-
81
-
82
-
83
-
84
-
85
-
86
-
87
-
88
-
89
-
90
-
91
-
92
-
93
-
94
 |
 |
