Dell Force10 E1200i Installing and Maintaining the E1200i System - Page 63

Removing and Replacing the Air Filter
Page 63 highlights

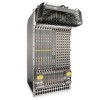
4 NOTE: Always keep your fingers away from rotating blades. 5 Prior to inserting the fan tray replacement, turn the screw latch counter-clockwise (with a Phillips screwdriver) until the fan tray latching mechanism retracts into the fan tray. Insert the fan tray into the chassis at a slightly upward angle. Guide the tray firmly into the slot until you feel the connectors engage with the chassis backplane. Release the screw latch. 6 Tighten the captive screws. 7 Verify that the fan tray LED is lit green (online). Removing and Replacing the Air Filter A factory-installed air filter (Figure 12-2) is shipped with the E1200 system. The hot-swappable air filter prevents large particles, debris, and dust from entering and circulating through the system, and ensures proper air flow through the system. Filters should be inspected monthly and replaced every twelve months or as required. WARNING: An improperly installed air filter will restrict air flow and will generate thermal problems throughout the chassis. Ensure the air filter is oriented correctly and seated securely in the slot. Do not operate without a filter for any longer than 30 minutes to avoid card over-temperature conditions. To remove and replace the air filter: Step Task 1 Pull the air filter straight out of the chassis. 2 Rotate the replacement filter so that the front handle label is right reading. 3 Guide the filter firmly into the slot until it stops. The E1200 air filter is hot-swappable. You do not need to turn the power off to the chassis to replace a filter. Filters should be inspected monthly and clean and replaced every six months. Figure 12-2. Replacing the Air Filter FN Removing and Replacing Components | 63

  • 1
  • 2
  • 3
  • 4
  • 5
  • 6
  • 7
  • 8
  • 9
  • 10
  • 11
  • 12
  • 13
  • 14
  • 15
  • 16
  • 17
  • 18
  • 19
  • 20
  • 21
  • 22
  • 23
  • 24
  • 25
  • 26
  • 27
  • 28
  • 29
  • 30
  • 31
  • 32
  • 33
  • 34
  • 35
  • 36
  • 37
  • 38
  • 39
  • 40
  • 41
  • 42
  • 43
  • 44
  • 45
  • 46
  • 47
  • 48
  • 49
  • 50
  • 51
  • 52
  • 53
  • 54
  • 55
  • 56
  • 57
  • 58
  • 59
  • 60
  • 61
  • 62
  • 63
  • 64
  • 65
  • 66
  • 67
  • 68
  • 69
  • 70
  • 71
  • 72
  • 73
  • 74
  • 75
  • 76
  • 77
  • 78
  • 79
  • 80
  • 81
  • 82
  • 83
  • 84
  • 85
  • 86
  • 87
  • 88
  • 89
  • 90
  • 91
  • 92
  • 93
  • 94

Removing and Replacing Components
|
63
4
NOTE:
Always keep your fingers away from rotating blades.
5
Prior to inserting the fan tray replacement, turn the screw latch counter-clockwise (with a Phillips
screwdriver) until the fan tray latching mechanism retracts into the fan tray. Insert the fan tray into
the chassis at a slightly upward angle. Guide the tray firmly into the slot until you feel the connectors
engage with the chassis backplane. Release the screw latch.
6
Tighten the captive screws.
7
Verify that the fan tray LED is lit green (online).
Removing and Replacing the Air Filter
A factory-installed air filter (
Figure
12-
2
) is shipped with the E1200 system. The hot-swappable air filter
prevents large particles, debris, and dust from entering and circulating through the system, and ensures
proper air flow through the system. Filters should be inspected monthly and replaced every twelve
months or as required.
WARNING:
An improperly installed air filter will restrict air flow and will generate thermal problems throughout
the chassis. Ensure the air filter is oriented correctly and seated securely in the slot.
Do not operate without a filter for any longer than 30 minutes to avoid card over-temperature conditions.
To remove and replace the air filter:
The E1200 air filter is hot-swappable. You do not need to turn the power off to the chassis to replace a
filter. Filters should be inspected monthly and clean and replaced every six months.
Figure 12-2.
Replacing the Air Filter
Step
Task
1
Pull the air filter straight out of the chassis.
2
Rotate the replacement filter so that the front handle label is right reading.
3
Guide the filter firmly into the slot until it stops.
FN