Dell Force10 E1200i Installing and Maintaining the E1200i System - Page 60

Remove a DC Power Supply, Loosen the Locking screws.
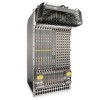
Page 60 highlights

www.dell.com | support.dell.com Remove a DC Power Supply Step Task 1 Ensure that the remote power source is in the OFF position and that the PEM status light is off. • PEM 0 connects to remote power source 0. • PEM 1 connects to remote power source 1. 2 Loosen the retaining screw and remove the PEM safety cover. R etaining s cre w S afety cover 3 Switch the Over Current Protector (located on the PEM front panel) to the OFF position. Studs FN00103lp PEM interlock lever Latch Release Status -48/-60Vdc 150A, 7200VA CC-E1200-PWR-DC Over-current protector FN00102lp Locking screws 4 Loosen the Locking screws. 5 Lift and hold the PEM interlock lever to release the PEM 6 While holding the interlock lever up, using the bottom handle, pull the PEM straight out of the slot. 60 | Removing and Replacing Components

  • 1
  • 2
  • 3
  • 4
  • 5
  • 6
  • 7
  • 8
  • 9
  • 10
  • 11
  • 12
  • 13
  • 14
  • 15
  • 16
  • 17
  • 18
  • 19
  • 20
  • 21
  • 22
  • 23
  • 24
  • 25
  • 26
  • 27
  • 28
  • 29
  • 30
  • 31
  • 32
  • 33
  • 34
  • 35
  • 36
  • 37
  • 38
  • 39
  • 40
  • 41
  • 42
  • 43
  • 44
  • 45
  • 46
  • 47
  • 48
  • 49
  • 50
  • 51
  • 52
  • 53
  • 54
  • 55
  • 56
  • 57
  • 58
  • 59
  • 60
  • 61
  • 62
  • 63
  • 64
  • 65
  • 66
  • 67
  • 68
  • 69
  • 70
  • 71
  • 72
  • 73
  • 74
  • 75
  • 76
  • 77
  • 78
  • 79
  • 80
  • 81
  • 82
  • 83
  • 84
  • 85
  • 86
  • 87
  • 88
  • 89
  • 90
  • 91
  • 92
  • 93
  • 94

60
|
Removing and Replacing Components
www.dell.com | support.dell.com
Remove a DC Power Supply
Step
Task
1
Ensure that the remote power source is in the OFF position and that the PEM status light is off.
PEM 0 connects to remote power source 0.
PEM 1 connects to remote power source 1.
2
Loosen the retaining screw and remove the PEM safety cover.
3
Switch the Over Current Protector (located on the PEM front panel) to the OFF position.
4
Loosen the Locking screws.
5
Lift and hold the PEM interlock lever to release the PEM
6
While holding the interlock lever up, using the bottom handle, pull the PEM straight out of the slot.
FN00103lp
S afety
cover
R etaining
screw
CC-E1200-PWR-DC
-48/-60Vdc
150A, 7200VA
Status
Latch Release
PEM interlock
lever
Over-current protector
Locking screws
Studs
FN00102lp