Dell Force10 E1200i Installing and Maintaining the E1200i System - Page 53
Powering Up, Preparation
 |
View all Dell Force10 E1200i manuals
Add to My Manuals
Save this manual to your list of manuals |
Page 53 highlights
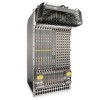
11 Powering Up This chapter provides instructions for powering up your E1200 AC or DC system after you have installed all the chassis components and made your power and network connections. It covers the following topics: • Preparation • Supplying Power - AC • Supplying Power - DC • Booting to the CLI Prompt Preparation NOTE: Make sure that the switch on the remote power source is in the OFF position until you are ready to supply power to the chassis. Before you supply power to your chassis, Dell Force10 recommends that you re-inspect your equipment rack and chassis. Verify that: • The equipment rack is properly secured and grounded. • The chassis is bolted and secured into your equipment rack. • The chassis is grounded. • Each power supply module is properly installed and secured. • The AC-Cord Retainer is installed, if applicable (AC systems). • The power switch is in the OFF position, if applicable (DC systems). • Power cables connect to a compliant remote power source. • Both fan trays are installed and secured. • All line cards, RPMs, and SFMs are properly installed and secured. • All chassis slots are filled. Blank panels and covers are installed in all empty slots. WARNING: Leakage Current (High Touch Current): The AC power cords are secured to the power inlet using the provided bracket. The power cord plugs must be secured to the building outlets by the chassis installer or a qualified electrician. Powering Up | 53
-
 1
1 -
2
-
3
-
4
-
5
-
6
-
7
-
8
-
9
-
10
-
11
-
12
-
13
-
14
-
15
-
16
-
17
-
18
-
19
-
20
-
21
-
22
-
23
-
24
-
25
-
26
-
27
-
28
-
29
-
30
-
31
-
32
-
33
-
34
-
35
-
36
-
37
-
38
-
39
-
40
-
41
-
42
-
43
-
44
-
45
-
46
-
47
-
 48
48 -
 49
49 -
 50
50 -
 51
51 -
 52
52 -
 53
53 -
 54
54 -
 55
55 -
 56
56 -
 57
57 -
 58
58 -
59
-
60
-
61
-
62
-
63
-
64
-
65
-
66
-
67
-
68
-
69
-
70
-
71
-
72
-
73
-
74
-
75
-
76
-
77
-
78
-
79
-
80
-
81
-
82
-
83
-
84
-
85
-
86
-
87
-
88
-
89
-
90
-
91
-
92
-
93
-
94
 |
 |
