Dell Force10 E1200i Installing and Maintaining the E1200i System - Page 61
Removing and Replacing RPMs, Line Cards, or SFMs, Removing and Replacing line cards or RPMs
 |
View all Dell Force10 E1200i manuals
Add to My Manuals
Save this manual to your list of manuals |
Page 61 highlights
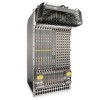
Removing and Replacing RPMs, Line Cards, or SFMs WARNING: • Do not remove a panel blank unless you are ready to install a line card, RPM, or SFM into that slot. If you remove a card, immediately replace the empty slot with a panel blank. Blanks are required to control airflow and electromagnetic interference. • Electrostatic discharge (ESD) damage can occur when components are mishandled. Always wear an ESD-preventive wrist or foot-heel ground strap when handling RPMs, SFMs, or line cards. (Connect the ESD strap to the grounding plug located on the front of the chassis.) • After you remove the original packaging, place RPMs, SFMs, and line cards on an antistatic surface. NOTE: • If you operate your E1200 without redundant RPMs, the system enters a software-defined power-down state when you remove the only RPM for replacement. • Your E1200 system will not function properly with fewer than eight SFMs. NOTE: • If you operate your E1200 without redundant RPMs, the system enters a software-defined power-down state when you remove the only RPM for replacement. • Your E1200 system will not function properly with fewer than eight SFMs. The line cards will not forward information to a non-operational or absent SFM. • Use the optical connector insertion/removal tool to insert and remove fiber cables from 1GE cards with small form factor ports. A optical Connector insertion/removal tool is shipped with each card that is ordered separately. You can add, replace, or remove modules without interrupting the system power or system operations. RPMs, line cards, and SFMs are hot-swappable. The E1200 system generates major alarm events for high temperatures (over 75°C) and module failures depending on the module and whether or not it is redundant. Minor alarms are generated for component temperatures over 65°C and 75°C for line cards. SNMP traps are sent for both alarm types. Refer to Appendix C, Alarms, on page 75 for more details. Removing and Replacing line cards or RPMs To remove and replace E1200 line card or RPM modules: Step Task 1 Unplug the network interface cables connected to the line card or RPM. 2 Loosen the captive screws and pull the ejector levers simultaneously toward you to disengage the backplane connections. 3 Slide the card out of the slot and store the cards in the original antistatic packaging. 4 If you are immediately installing a replacement card, align the new card with the guide, and gently slide the card into the slot until you feel the connectors engage with the chassis backplane. If you are not planning to install a new card immediately, install a blank panel. Removing and Replacing Components | 61
-
 1
1 -
2
-
3
-
4
-
5
-
6
-
7
-
8
-
9
-
10
-
11
-
12
-
13
-
14
-
15
-
16
-
17
-
18
-
19
-
20
-
21
-
22
-
23
-
24
-
25
-
26
-
27
-
28
-
29
-
30
-
31
-
32
-
33
-
34
-
35
-
36
-
37
-
38
-
39
-
40
-
41
-
42
-
43
-
44
-
45
-
46
-
47
-
48
-
49
-
50
-
51
-
52
-
53
-
54
-
55
-
 56
56 -
 57
57 -
 58
58 -
 59
59 -
 60
60 -
 61
61 -
 62
62 -
 63
63 -
 64
64 -
 65
65 -
 66
66 -
67
-
68
-
69
-
70
-
71
-
72
-
73
-
74
-
75
-
76
-
77
-
78
-
79
-
80
-
81
-
82
-
83
-
84
-
85
-
86
-
87
-
88
-
89
-
90
-
91
-
92
-
93
-
94
 |
 |
