Dell OpenManage Network Manager Web Client Guide 5.2 - Page 66
Network Type and Addresses, Authentication, Inspect Network using your current settings, Network
 |
View all Dell OpenManage Network Manager manuals
Add to My Manuals
Save this manual to your list of manuals |
Page 66 highlights
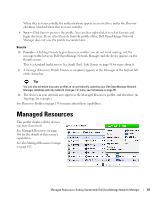
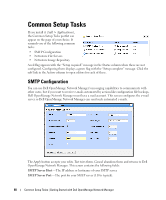
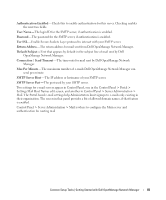
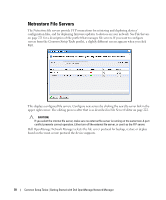
The Filters (by Location, Vendor, or Device Type) let you narrow the list of devices discovered by the selected item(s). As the screen says, this filtering will not have any impact on the processing that occurs during the Inspection step. Network 5 After you click Next, the Network screen appears. Network Type and Addresses- Select the type of entry in the pick list (IP Address(es), CIDR Address, Hostname, SNMP Broadcast, Subnet). Tip You can specify an IP Address range by separating the beginning and end with a dash. For example: 192.168.1.1 - 192.168.1.240. The tooltips in the data entry field describe what valid entries look like. 6 Authentication-You can Create new, or Choose existing authentications. (See Discovery Profiles on page 153 for details.) Notice that authentications appear with Edit / Delete icons and Up / Down arrows on their right. The Edit icon opens the authentication editor. Click the arrows to arrange the order in which credentials are tried (top first). Ordering only applies when two credentials are of the same type. Actions 7 You can configure Actions to run as part of discovery. By default, the actions screen includes the Resync action. Use Add Action to select others to enter here. You can also edit parameters (if available), delete and re-order the actions listed here by clicking the icons to the right of them. Dell OpenManage Network Manager executes them in top-to-bottom order. Inspection 8 Inspect Network using your current settings-This screen lets you preview the discovery profile's actions and access to devices. If you clicked Next rather than Inspect at the bottom of the previous screen, click Start Inspection to begin the inspection process for selected authentications that validates the device's credentials. Notice that the Inspection Status fields below listed authentications indicates the success or failure of Ping, Hostname resolution, and the listed Authentications. If the device does not match all required authentications, you can click the Fix it icon (a wrench with a red or yellow dot) to edit them for the selected device. You can also click Test Device, Create New, or Choose Existing authentications while in the editor clicking the Fix it icon displays the authentication selection panel. The yellow dot on the Fix it icon means an optional authentication is missing. A red dot means a required one is missing. When authentications are unsuccessful, you can remove or edit them in this editor too. Click the icons to the right of listed authentications to do this. 66 Discovery Profiles | Getting Started with Dell OpenManage Network Manager
-
 1
1 -
2
-
3
-
4
-
5
-
6
-
7
-
8
-
9
-
10
-
11
-
12
-
13
-
14
-
15
-
16
-
17
-
18
-
19
-
20
-
21
-
22
-
23
-
24
-
25
-
26
-
27
-
28
-
29
-
30
-
31
-
32
-
33
-
34
-
35
-
36
-
37
-
38
-
39
-
40
-
41
-
42
-
43
-
44
-
45
-
46
-
47
-
48
-
49
-
50
-
51
-
52
-
53
-
54
-
55
-
56
-
57
-
58
-
59
-
60
-
 61
61 -
 62
62 -
 63
63 -
 64
64 -
 65
65 -
 66
66 -
 67
67 -
 68
68 -
 69
69 -
 70
70 -
 71
71 -
72
-
73
-
74
-
75
-
76
-
77
-
78
-
79
-
80
-
81
-
82
-
83
-
84
-
85
-
86
-
87
-
88
-
89
-
90
-
91
-
92
-
93
-
94
-
95
-
96
-
97
-
98
-
99
-
100
-
101
-
102
-
103
-
104
-
105
-
106
-
107
-
108
-
109
-
110
-
111
-
112
-
113
-
114
-
115
-
116
-
117
-
118
-
119
-
120
-
121
-
122
-
123
-
124
-
125
-
126
-
127
-
128
-
129
-
130
-
131
-
132
-
133
-
134
-
135
-
136
-
137
-
138
-
139
-
140
-
141
-
142
-
143
-
144
-
145
-
146
-
147
-
148
-
149
-
150
-
151
-
152
-
153
-
154
-
155
-
156
-
157
-
158
-
159
-
160
-
161
-
162
-
163
-
164
-
165
-
166
-
167
-
168
-
169
-
170
-
171
-
172
-
173
-
174
-
175
-
176
-
177
-
178
-
179
-
180
-
181
-
182
-
183
-
184
-
185
-
186
-
187
-
188
-
189
-
190
-
191
-
192
-
193
-
194
-
195
-
196
-
197
-
198
-
199
-
200
-
201
-
202
-
203
-
204
-
205
-
206
-
207
-
208
-
209
-
210
-
211
-
212
-
213
-
214
-
215
-
216
-
217
-
218
-
219
-
220
-
221
-
222
-
223
-
224
-
225
-
226
-
227
-
228
-
229
-
230
-
231
-
232
-
233
-
234
-
235
-
236
-
237
-
238
-
239
-
240
-
241
-
242
-
243
-
244
-
245
-
246
-
247
-
248
-
249
-
250
-
251
-
252
-
253
-
254
-
255
-
256
-
257
-
258
-
259
-
260
-
261
-
262
-
263
-
264
-
265
-
266
-
267
-
268
-
269
-
270
-
271
-
272
-
273
-
274
-
275
-
276
-
277
-
278
-
279
-
280
-
281
-
282
-
283
-
284
-
285
-
286
-
287
-
288
-
289
-
290
-
291
-
292
-
293
-
294
-
295
-
296
-
297
-
298
-
299
-
300
-
301
-
302
-
303
-
304
-
305
-
306
-
307
-
308
-
309
-
310
-
311
-
312
-
313
-
314
-
315
-
316
-
317
-
318
-
319
-
320
-
321
-
322
-
323
-
324
-
325
-
326
-
327
-
328
-
329
-
330
-
331
-
332
-
333
-
334
-
335
-
336
-
337
-
338
-
339
-
340
-
341
-
342
-
343
-
344
-
345
-
346
-
347
-
348
-
349
-
350
-
351
-
352
-
353
-
354
-
355
-
356
-
357
-
358
-
359
-
360
-
361
-
362
-
363
-
364
-
365
-
366
-
367
-
368
-
369
-
370
-
371
-
372
-
373
-
374
-
375
-
376
-
377
-
378
-
379
-
380
 |
 |