Epson C3400 Technical Reference Guide TRG - Page 99
Attaching/Adjusting the Paper Ejection Tray
 |
View all Epson C3400 manuals
Add to My Manuals
Save this manual to your list of manuals |
Page 99 highlights
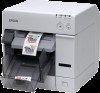
Chapter 2 Setup Attaching/Adjusting the Paper Ejection Tray If you attach the paper ejection tray, you can temporarily store the printed paper in the tray. Follow the steps below to install/adjust the ejection tray. • Paper may not stay in the paper ejection tray depending on the paper curl and length. • When the fanfold paper is used, the several printed papers can be stored in the ejection tray. See Paper Ejection Tray on page 53 for the numbers of the fanfold paper that can be stored in the ejection tray. 1 Attach the paper ejection tray to the hooks under the paper ejection table. 2 2 Pull the lever at the bottom-right of the paper ejection tray to unlock it. 99
-
 1
1 -
2
-
3
-
4
-
5
-
6
-
7
-
8
-
9
-
10
-
11
-
12
-
13
-
14
-
15
-
16
-
17
-
18
-
19
-
20
-
21
-
22
-
23
-
24
-
25
-
26
-
27
-
28
-
29
-
30
-
31
-
32
-
33
-
34
-
35
-
36
-
37
-
38
-
39
-
40
-
41
-
42
-
43
-
44
-
45
-
46
-
47
-
48
-
49
-
50
-
51
-
52
-
53
-
54
-
55
-
56
-
57
-
58
-
59
-
60
-
61
-
62
-
63
-
64
-
65
-
66
-
67
-
68
-
69
-
70
-
71
-
72
-
73
-
74
-
75
-
76
-
77
-
78
-
79
-
80
-
81
-
82
-
83
-
84
-
85
-
86
-
87
-
88
-
89
-
90
-
91
-
92
-
93
-
 94
94 -
 95
95 -
 96
96 -
 97
97 -
 98
98 -
 99
99 -
 100
100 -
 101
101 -
 102
102 -
 103
103 -
 104
104 -
105
-
106
-
107
-
108
-
109
-
110
-
111
-
112
-
113
-
114
-
115
-
116
-
117
-
118
-
119
-
120
-
121
-
122
-
123
-
124
-
125
-
126
-
127
-
128
-
129
-
130
-
131
-
132
-
133
-
134
-
135
-
136
-
137
-
138
-
139
-
140
-
141
-
142
-
143
-
144
-
145
-
146
-
147
-
148
-
149
-
150
-
151
-
152
-
153
-
154
-
155
-
156
-
157
-
158
-
159
-
160
-
161
-
162
-
163
-
164
-
165
-
166
-
167
-
168
-
169
-
170
-
171
-
172
-
173
-
174
-
175
-
176
-
177
-
178
-
179
-
180
-
181
-
182
-
183
-
184
-
185
-
186
-
187
-
188
-
189
-
190
-
191
-
192
-
193
-
194
-
195
-
196
-
197
-
198
-
199
-
200
-
201
-
202
-
203
-
204
-
205
-
206
-
207
-
208
-
209
-
210
-
211
-
212
-
213
-
214
-
215
-
216
-
217
-
218
-
219
-
220
-
221
-
222
-
223
-
224
-
225
-
226
-
227
-
228
-
229
-
230
-
231
-
232
-
233
-
234
-
235
-
236
-
237
-
238
-
239
-
240
-
241
-
242
 |
 |

Chapter 2
Setup
99
2
Attaching/Adjusting the Paper Ejection Tray
If yo
u
a
tt
ach
t
he paper ejec
ti
o
n
t
ray, yo
u
ca
n
t
emporar
i
ly s
t
ore
t
he pr
int
ed paper
in
t
he
t
ray.
Follow
t
he s
t
eps below
t
o
in
s
t
all/adj
u
s
t
t
he ejec
ti
o
n
t
ray.
1
Attach the paper ejection tray to the hooks under the paper ejection
table.
2
Pull the lever at the bottom-right of the paper ejection tray to unlock it.
•
Paper may not stay in the paper ejection tray depending on the paper curl and length.
•
When the fanfold paper is used, the several printed papers can be stored in the ejection
tray. See
Paper Ejection Tray on page 53
for the numbers of the fanfold paper that can
be stored in the ejection tray.