Epson ES-500W Users Guide - Page 66
Advanced Settings, Image Format, Options
 |
View all Epson ES-500W manuals
Add to My Manuals
Save this manual to your list of manuals |
Page 66 highlights
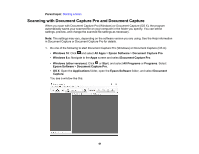
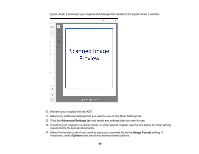
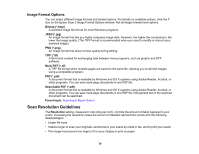
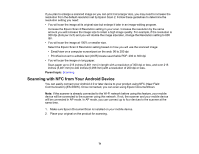
Epson Scan 2 previews your original and displays the results in the Epson Scan 2 window. 10. Reinsert your original into the ADF. 11. Select any additional settings that you want to use on the Main Settings tab. 12. Click the Advanced Settings tab and select any settings that you want to use. 13. If scanning an original in a carrier sheet, or other special original, see the link below for other setting requirements for special documents. 14. Select the format in which you want to save your scanned file as the Image Format setting. If necessary, select Options and select any desired format options. 66
-
 1
1 -
2
-
3
-
4
-
5
-
6
-
7
-
8
-
9
-
10
-
11
-
12
-
13
-
14
-
15
-
16
-
17
-
18
-
19
-
20
-
21
-
22
-
23
-
24
-
25
-
26
-
27
-
28
-
29
-
30
-
31
-
32
-
33
-
34
-
35
-
36
-
37
-
38
-
39
-
40
-
41
-
42
-
43
-
44
-
45
-
46
-
47
-
48
-
49
-
50
-
51
-
52
-
53
-
54
-
55
-
56
-
57
-
58
-
59
-
60
-
 61
61 -
 62
62 -
 63
63 -
 64
64 -
 65
65 -
 66
66 -
 67
67 -
 68
68 -
 69
69 -
 70
70 -
 71
71 -
72
-
73
-
74
-
75
-
76
-
77
-
78
-
79
-
80
-
81
-
82
-
83
-
84
-
85
-
86
-
87
-
88
-
89
-
90
-
91
-
92
-
93
-
94
-
95
-
96
-
97
-
98
-
99
-
100
-
101
-
102
-
103
-
104
-
105
-
106
-
107
-
108
-
109
-
110
-
111
-
112
-
113
-
114
-
115
-
116
-
117
-
118
-
119
-
120
-
121
-
122
-
123
-
124
-
125
-
126
-
127
-
128
-
129
-
130
-
131
-
132
-
133
-
134
-
135
-
136
-
137
-
138
-
139
-
140
-
141
-
142
-
143
-
144
-
145
-
146
-
147
-
148
-
149
-
150
-
151
 |
 |

66
Epson Scan 2 previews your original and displays the results in the Epson Scan 2 window.
10. Reinsert your original into the ADF.
11. Select any additional settings that you want to use on the Main Settings tab.
12. Click the
Advanced Settings
tab and select any settings that you want to use.
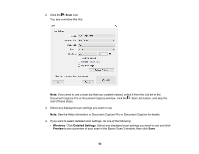
13. If scanning an original in a carrier sheet, or other special original, see the link below for other setting
requirements for special documents.
14. Select the format in which you want to save your scanned file as the
Image Format
setting. If
necessary, select
Options
and select any desired format options.