Epson PictureMate Charm - PM 225 User's Guide
Epson PictureMate Charm - PM 225 - PictureMate Charm Compact Photo Printer Manual
 |
View all Epson PictureMate Charm - PM 225 manuals
Add to My Manuals
Save this manual to your list of manuals |
Epson PictureMate Charm - PM 225 manual content summary:
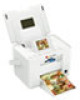
- Epson PictureMate Charm - PM 225 | User's Guide - Page 1
User's Guide - Epson PictureMate Charm - PM 225 | User's Guide - Page 2
17 Print From an External Device 23 Print From a Computer 31 Copy Photos to and From Your Computer 26 Replace Print Pack 29 Take PictureMate With You 33 Set PictureMate Preferences 36 Printer Care and Troubleshooting 40 Set Up Network Printing 54 Specifications 74 Notices 58 Index 68 2 - Epson PictureMate Charm - PM 225 | User's Guide - Page 3
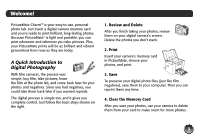
and Delete After you finish taking your photos, review them on your digital camera's screen. Delete the photos you don't want. 2. Print Insert your camera's memory card in PictureMate, choose your photos, and print. 3. Save To preserve your digital photo files (just like film negatives), save them - Epson PictureMate Charm - PM 225 | User's Guide - Page 4
becomes even easier with these special features: From PictureMate's photo viewer screen, you can view your photos and press Print to print the ones you want. Or you can select to print all photos. (See page 11.) If your camera supports DPOF (Digital Print Order Format), you can select which - Epson PictureMate Charm - PM 225 | User's Guide - Page 5
that sell printer supplies. The following Print Packs are available: Print Pack contents Glossy photo paper (150 sheets) and photo cartridge Matte photo paper (100 sheets) and photo cartridge Part number T5846 T5845-M Supported PictureMate models All PictureMate 200/ 300 Series models You can - Epson PictureMate Charm - PM 225 | User's Guide - Page 6
PictureMate Buttons Turn PictureMate on or off 6 Change the number of photos displayed Display optional settings menu Move through photos and menu options Stop printing or cancel settings Start printing - Epson PictureMate Charm - PM 225 | User's Guide - Page 7
you print with PictureMate, you need to: ● Insert your memory card (below) ● Load paper (see page 7) When you finish printing, you can remove your memory card (see page 9). Inserting Your Memory Card 1 Move the handle to the back. Then open the top cover. 2 Raise and adjust the photo viewer screen - Epson PictureMate Charm - PM 225 | User's Guide - Page 8
shown on the right. Insert just one card at a time. Note: PictureMate can't read multiple cards at once. 6 Push the card in carefully Do not remove a card while the memory card light is flashing; you may lose photos on your card. Top slot: Memory card light Bottom slot: SDTM (Secure Digital) - Epson PictureMate Charm - PM 225 | User's Guide - Page 9
not remove a card while the memory card light is flashing; you may lose photos on your card. Top slot: Push in the card and release it, then load plain paper; this may damage PictureMate. 1 Move the handle to the back. Then open the top cover and raise the photo viewer screen. Bottom slot: Push in - Epson PictureMate Charm - PM 225 | User's Guide - Page 10
paper into the slot between the edge guides with the glossy or whiter side up. Slide the edge guides inward slightly. Load glossy or whiter side a PictureMate Print Pack. See page 29 for more information. Choosing a Group of Photos If your memory card contains 1000 photos or more, PictureMate sorts - Epson PictureMate Charm - PM 225 | User's Guide - Page 11
on specific dates (see page 14) If your camera supports DPOF (Digital Print Order Format), you can use it to pre-select the photos and copies you want to print. PictureMate then prints the selected photos. (See page 15.) To view a slideshow of your photos, see page 15. To store and display your - Epson PictureMate Charm - PM 225 | User's Guide - Page 12
more information. Press the Display button to switch between one photo displayed with or without text, one photo with a "filmstrip" of 5 additional photos, or 6 photos. Responding to a Blank Screen (Power Saver) If you are not using PictureMate, the screen goes dark after about 13 minutes to save - Epson PictureMate Charm - PM 225 | User's Guide - Page 13
17. 6 Press l or r to review your selected photos. If you change your mind, press the Photos 1 Press Menu. 2 Press l or r to choose Select Photos, then press OK. 3 Press l or r to choose Select Group, then press OK. 4 Follow the on-screen instructions. Printing All Photos You can print all the photos - Epson PictureMate Charm - PM 225 | User's Guide - Page 14
or l to decrease it. 5 To preview your photos, press Print. 6 Press l or r to review your selected photos. If you change your mind, press the Stop/Clear button. 7 If you want to change the layout or edit your photos, press Menu. See page 17 for instructions. 8 Make sure you have enough paper loaded - Epson PictureMate Charm - PM 225 | User's Guide - Page 15
-Selected DPOF Photos If your camera supports DPOF (Digital Print Order Format), you can use it to pre-select which photos and how many copies you want to print. See your camera's manual to choose photos for printing with DPOF, then insert your memory card in PictureMate. PictureMate automatically - Epson PictureMate Charm - PM 225 | User's Guide - Page 16
and Displaying Your PictureMate Photos Photos printed on PictureMate photo paper are beautiful and long-lasting. Follow these guidelines to make sure they will look great for generations. Caring for Your Photos ● To avoid scratches or smudging, do not rub the printed side of the photo. ● To prevent - Epson PictureMate Charm - PM 225 | User's Guide - Page 17
Help You can learn how to improve print quality or handle memory cards, paper, or photo cartridges. 1 Press Menu. 2 Press l or r to highlight Help, then press OK. 3 Press l or r to highlight Improve print quality or Quick Guide, then press OK. 4 Press l or r to highlight the topic you need help with - Epson PictureMate Charm - PM 225 | User's Guide - Page 18
and cropping; see page 21 for instructions. 5 At the photo selection screen, press OK to select the current photo for printing. (See page 12.) To print two or more photos per sheet, select multiple copies or multiple photos. For example, if you want 4 mini-wallet photos of one image and 4 of another - Epson PictureMate Charm - PM 225 | User's Guide - Page 19
that are too dark, too light, or backlit. You can select the following types of enhancement: Standard, People, Landscape, or Night Scene. If your camera supports PRINT Image Matching® (P.I.M.) or Exif Print, the printer's P.I.M. setting automatically adjusts your photos for the best results. 19 - Epson PictureMate Charm - PM 225 | User's Guide - Page 20
then press OK. 3 Press l or r to highlight Enhance, then press OK. 4 Press l or r to select one of the following options: ● Fix Photo: This setting improves your photos' colors and increases contrast and sharpness. It may correct images that are too dark, too bright, or backlit. (This is the default - Epson PictureMate Charm - PM 225 | User's Guide - Page 21
the originals are in color. Your original images are not changed. You can apply the color effect to one photo or all photos currently selected for printing. 1 Select a photo or photos to print black-and-white or sepia. 2 Press Menu. 3 Press l or r to highlight Basic Print Settings, then press OK - Epson PictureMate Charm - PM 225 | User's Guide - Page 22
. Adding Camera Text If your camera allows you to add text to your photos, you can print the pictures along with the text. This setting is available for borderless photos only. 1 Select the photos that have text added by your camera. 2 Press Menu. 3 Press l or r to highlight Setup, then press OK - Epson PictureMate Charm - PM 225 | User's Guide - Page 23
the printer will read photos from the card, not from a camera. 3 Turn on your camera. 4 Connect your camera's USB cable to your camera and the EXT. I/F port on the back of PictureMate. 5 Use your camera's controls to select and print photos on PictureMate. (See your camera manual for instructions - Epson PictureMate Charm - PM 225 | User's Guide - Page 24
-enabled PDA, cell phone, or computer when you use the optional Bluetooth Photo Print Adapter. The adapter (part# C12C824383) is available from your local reseller or Epson (see page 53). Note: Although PictureMate complies with the Bluetooth specification, it is not guaranteed to work with all - Epson PictureMate Charm - PM 225 | User's Guide - Page 25
File Exchange in your Utilities folder. Follow the on-screen steps to choose a photo file, discover PictureMate, and send photos. ● Cell phones or PDAs: See your product's documentation for instructions on setting up Bluetooth file sharing and sending files. Printing starts automatically. If you - Epson PictureMate Charm - PM 225 | User's Guide - Page 26
. See "Inserting Your Memory Card and Copying Photos" on page 26 for instructions. Periodically, it's a good idea to check Epson's support website at epson.com/support for free updates to your PictureMate printer software. Download instructions are posted for your convenience. Installing Software - Epson PictureMate Charm - PM 225 | User's Guide - Page 27
Note: If you have problems installing the software, see page 48. Installing Software for Windows Before you start, make sure PictureMate is NOT connected to your computer and does NOT have a memory card inserted in it. 1 Press the P On button to turn on PictureMate. Note: If you see a Found New - Epson PictureMate Charm - PM 225 | User's Guide - Page 28
USB port on your computer. Then connect the other end to the USB port on the back of PictureMate. Note: PictureMate is automatically set as your default printer. If you have another printer, you can change this setting in the Windows Control Panel. 7 When you see the Bonus Software Installation - Epson PictureMate Charm - PM 225 | User's Guide - Page 29
on-screen instructions to register PictureMate. 10 When you're done, remove the CD. Now you can print photos from your computer on PictureMate (see . 1 Press the P On button to turn on PictureMate. 2 Insert the PictureMate CD. 3 Double-click the Epson icon. 4 When you see this screen, click Install - Epson PictureMate Charm - PM 225 | User's Guide - Page 30
screen, click Add Printer. 7 Connect the USB cable to any open USB port on your Macintosh. Then connect the other end to the USB port on the back of PictureMate. 30 9 Follow the steps on the right side of the screen to add PictureMate. 10 Follow the on-screen instructions to install the rest - Epson PictureMate Charm - PM 225 | User's Guide - Page 31
Print From a Computer Follow these basic printing instructions for your computer: ● Windows (below) ● Macintosh (see page 37) Printing From a Windows Computer You can print photos from an imaging application, the Windows Photo Gallery in Windows Vista (page 31), or the Picture and Fax Viewer in - Epson PictureMate Charm - PM 225 | User's Guide - Page 32
top of the screen, then select Print from the drop-down menu that appears. You see the printer settings window: Sample photo Options 4 Make sure your printer is selected, then choose PictureMate Photo Paper as the Paper type setting. (4 × 6 in is automatically selected as the Paper size setting - Epson PictureMate Charm - PM 225 | User's Guide - Page 33
cast. Scene Correction lets you choose the subject of your photo so that PictureMate can correct it appropriately. You can select People, Landscapes Tip: For more information about printer settings, click Help. 7 Click OK. 8 When you return to the Windows Photo Gallery, click Print to start - Epson PictureMate Charm - PM 225 | User's Guide - Page 34
Printing with the Windows XP Picture and Fax Viewer 1 Locate the photo you want to print on your computer. 2 Right-click the photo, highlight Open With, and select Windows Picture and Fax Viewer. 5 When you see this screen, select the photo(s) you want to print and click Next. Print icon 3 Click - Epson PictureMate Charm - PM 225 | User's Guide - Page 35
6 When you see this screen, select your EPSON PictureMate model and click Printing Preferences. You see the printer settings screen: Sample image Printing Preferences 7 Choose from the following settings: ● Select Borderless to print a photo without borders. Select Borders to print with a white - Epson PictureMate Charm - PM 225 | User's Guide - Page 36
Scene Correction lets you choose the subject of your photo so that PictureMate can correct it appropriately. You can select People, photo. ● Select the number of copies you want to print. 36 Tip: For more information about printer settings, click Help. 8 Click OK. 9 At the Photo Printing - Epson PictureMate Charm - PM 225 | User's Guide - Page 37
see your photo cartridge status. Printing From a Macintosh See the section below for your Mac OS operating system. Mac OS X 10.5 1 Start your print program and open the photo you want to print. 2 Open the File menu and select Print. Cancel 3 Select EPSON PictureMate PM225 as the Printer setting - Epson PictureMate Charm - PM 225 | User's Guide - Page 38
see the settings shown below: 6 Select the direction you want your photo to print ( for portrait, for landscape facing right, or for landscape bring out the fine details of a particularly intricate photo (printing may be slower). ● You can change the Color Option and see the effects on the sample - Epson PictureMate Charm - PM 225 | User's Guide - Page 39
check photo cartridge status, click Utility, then select EPSON Status Monitor. 12 When you're finished, close the window to exit. Mac OS X 10.3 and 10.4 1 Start your print program and open the photo you want to print. 2 Open the File menu and select Page Setup. 3 Select your PictureMate model from - Epson PictureMate Charm - PM 225 | User's Guide - Page 40
. Select Print Settings 8 Select Print Settings from the pop-up menu. Sample image Tip: To check your photo cartridge status, click the maintenance icon. For more information about printer settings, click ?. 9 Choose from the following settings: ● Select Enhance Fine Details to bring out the fine - Epson PictureMate Charm - PM 225 | User's Guide - Page 41
in the dock. If you clicked the Print Center icon, double-click your PictureMate model. 12 From this window, you can do the following: ● To cancel printing up. ● To check photo cartridge status, click Utility, then select EPSON Status Monitor. 13 When you're finished, close the window to exit. 41 - Epson PictureMate Charm - PM 225 | User's Guide - Page 42
80 × 80 to 9200 × 9200 pixels PictureMate recognizes up to 9,990 photos on your memory card. 26 Note: PictureMate supports Exif Print image enhancement features. See your camera manual to determine if this feature is included on your camera. PictureMate does not support progressive-scan JPEG or RAW - Epson PictureMate Charm - PM 225 | User's Guide - Page 43
click OK (Windows XP). Follow the on-screen instructions. ● To copy photos from your computer to the card, select Open folder to view files your memory card from PictureMate and insert it again. You can choose any of the options to copy, view, or import your photos. ● To copy photos to your computer, - Epson PictureMate Charm - PM 225 | User's Guide - Page 44
photos to and from your computer and card, drag and drop the photos to the card or folder. Make sure the photo files meet the requirements described in "Supported Photo photos to or from your memory card, follow the steps below to remove it. Be sure to remove any cards before turning off PictureMate - Epson PictureMate Charm - PM 225 | User's Guide - Page 45
that sell printer supplies. The following Print Packs are available: Print Pack contents Glossy photo paper (150 sheets) and photo cartridge Matte photo paper (100 sheets) and photo cartridge Part number T5846 T5845-M Supported PictureMate models All PictureMate 200/ 300 Series models You can - Epson PictureMate Charm - PM 225 | User's Guide - Page 46
new one right away. Caution: Before you replace the cartridge, read the "Photo Cartridge Safety Instructions" on page 60. 1 Make sure PictureMate is on but not printing. 2 Open the cartridge door on the back of PictureMate. 3 Slide the cartridge lever left, to the Release position. Caution: Do not - Epson PictureMate Charm - PM 225 | User's Guide - Page 47
water. If discomfort or vision problems continue after flushing, see a doctor immediately. Caution: Do not attempt to refill the photo cartridge. This could result in ink spills or other damage to PictureMate not covered by Epson's warranty. 5 Remove the new photo cartridge from its package. Don - Epson PictureMate Charm - PM 225 | User's Guide - Page 48
will not be able to print. 8 Close the cartridge door all the way. Note: If the screen displays a Photo Cartridge low message, you should buy a new PictureMate Print Pack. See page 29 for details. Checking Photo Cartridge Status You can check the status of your Print Pack at any time. 1 Press - Epson PictureMate Charm - PM 225 | User's Guide - Page 49
optional carrying case. Caution: Make sure the photo cartridge is installed. Do not remove the photo cartridge before transporting. Don't place PictureMate on its side or upside down, or ink may leak. Note: If your prints don't look as good after PictureMate has been moved, try aligning the print - Epson PictureMate Charm - PM 225 | User's Guide - Page 50
accessories. With a fully charged battery, you can print about 100 photos. Installing the Battery 1 Make sure PictureMate is turned off. 2 Unplug the AC adapter from PictureMate. 3 Release the latch and remove the battery cover from the back of the printer. 4 Insert the battery as shown until it - Epson PictureMate Charm - PM 225 | User's Guide - Page 51
If you are running PictureMate with the battery, the printer turns off automatically after 15 minutes if it is not being used (unless PictureMate is connected to a computer and a memory card is inserted). Press the P On button to turn it back on. Removing the Battery If there is a problem with your - Epson PictureMate Charm - PM 225 | User's Guide - Page 52
that will appear after 3 minutes of inactivity (see page 37) ● Change PictureMate's language to French, Portuguese, or Spanish (see page 37) ● Make the Print button, you see a screen that lets you confirm your selected photos and settings, for example: Then you press Print again to start printing - Epson PictureMate Charm - PM 225 | User's Guide - Page 53
the right language. Making Bluetooth Settings If you have the optional Epson Bluetooth Photo Print Adapter, you can print wirelessly from your Bluetoothenabled phone, PDA, or computer. If necessary, use the PictureMate buttons to choose settings for Bluetooth wireless communication. You may need - Epson PictureMate Charm - PM 225 | User's Guide - Page 54
when you're finished. This mode allows Bluetoothenabled devices to freely discover PictureMate and send print jobs. This mode prevents unknown devices from discovering the printer. To print in this mode, first search for PictureMate in Discoverable mode. After that, you will be able to print using - Epson PictureMate Charm - PM 225 | User's Guide - Page 55
Off (default = Off) Select On to encrypt communication and require that a four-digit Passkey be entered into a device before it can print from PictureMate. Passkey Any four-digit number (default = 0000) This setting allows you to set a four-digit Passkey that must be entered into a device before - Epson PictureMate Charm - PM 225 | User's Guide - Page 56
Printer Care and Troubleshooting If you have problems or questions about how to use PictureMate, check the built-in help system: 1 Press Menu. 2 Press l or r to highlight Help, then press OK. 3 Press l or r to select from the following:. Section Improve Print Quality Quick Guide Topics Lines in - Epson PictureMate Charm - PM 225 | User's Guide - Page 57
and clean the print head if necessary. Note: If the screen displays a Photo cartridge low message, you may not be able to clean the print head until you replace the photo cartridge. 1 Load paper in PictureMate. 2 Press Menu. 3 Press l or r to highlight Maintenance, then press OK. 4 Press l or - Epson PictureMate Charm - PM 225 | User's Guide - Page 58
of your screen). Select Nozzle Check. Macintosh: Open the Applications folder and select EPSON Printer Utility3. Select PictureMate 42 in the printer list, click OK, and select Nozzle Check. 3 Follow the instructions on the screen to print a nozzle check pattern. 4 Check the pattern to see - Epson PictureMate Charm - PM 225 | User's Guide - Page 59
Alignment screen: 5 Press Print. The alignment pattern is printed: Best pattern Misaligned pattern 6 Look at the printed squares to determine which l or r to highlight the number for the best square (1 to 9) in set #2. Then press OK. PictureMate aligns the print head and exits the Maintenance menu - Epson PictureMate Charm - PM 225 | User's Guide - Page 60
screen). Select Print Head Alignment. Macintosh: Open the Applications folder and select EPSON Printer Utility3. Select PictureMate in the printer list, click OK, and select Print Head Alignment. 3 Follow the instructions on the screen to print the alignment pattern. You see a window like this - Epson PictureMate Charm - PM 225 | User's Guide - Page 61
PictureMate To make sure your pictures look their best, you may need to use a "cleaning sheet" to clean inside the printer. Typically, this is done only if you notice lines of ink the PictureMate exterior with a soft, damp cloth. 4 Use a soft, dry cloth to clean the PictureMate photo viewer screen - Epson PictureMate Charm - PM 225 | User's Guide - Page 62
an unexpected noise after you install a photo cartridge. The first time you install the photo cartridge, PictureMate charges its print head for about three and a half minutes. Wait until charging finishes before you turn it off, or it may charge improperly and use more ink the next time you turn it - Epson PictureMate Charm - PM 225 | User's Guide - Page 63
(paper support) snaps off. Replace the lid by inserting the hinges in the brackets. Your memory card does not work correctly. ● Insert only one card at a time. ● Make sure you are using a compatible memory card. See page 7. ● PictureMate recognizes and can print the first 9,990 photos on a memory - Epson PictureMate Charm - PM 225 | User's Guide - Page 64
print faster than borderless photos. ● Turn off special features such as color effects and red-eye reduction. Software Installation Problems ● Follow the instructions beginning on page 26 to install your software. Don't connect PictureMate to your computer until you are instructed to. ● Close other - Epson PictureMate Charm - PM 225 | User's Guide - Page 65
is blurry or smeared. ● Use PictureMate photo paper to ensure proper saturation, absorption of ink, and quality. ● Be sure to Sepia. See page 21. ● The print head may need cleaning. See page 41. ● The photo cartridge may be old or low. See page 29 to replace it. ● Colors may change slightly after - Epson PictureMate Charm - PM 225 | User's Guide - Page 66
the arrow on the edge guides. 50 ● Don't load plain paper; this may damage PictureMate. ● Use only PictureMate photo paper or Epson Premium Photo Paper Glossy or Semigloss. (See page 5.) ● Store paper flat to help prevent curling. Miscellaneous Printout Problems PictureMate prints blank pages. The - Epson PictureMate Charm - PM 225 | User's Guide - Page 67
All Programs. 2 Select Epson or Epson Printers, then select Epson Printer Software Uninstall. Note: With windows Vista, click Continue, then go to the next step. 3 In the next window, select your Epson PictureMate printer and click OK. Then follow the on-screen instructions. 4 Restart your computer - Epson PictureMate Charm - PM 225 | User's Guide - Page 68
to common problems. You can download drivers and documentation, get FAQs and troubleshooting advice, or e-mail Epson with your questions. Speak to a Support Representative Before you call Epson for support, please have the following information ready: ● Product name (PictureMate Charm or PM - Epson PictureMate Charm - PM 225 | User's Guide - Page 69
. Days and hours of support are subject to change without notice. Toll or long distance charges may apply. Purchase Supplies and Accessories You can purchase genuine PictureMate Print Packs and accessories at Epson Supplies Central at www.epson.com/ink3 (U.S. sales) or www.epson.ca (Canadian sales - Epson PictureMate Charm - PM 225 | User's Guide - Page 70
Click , click Control Panel, and click Printer under Hardware and Sound. Windows XP: Click Start, click Control Panel, and click Printers and Other Hardware or Printers and Faxes. Windows 2000: Click Start, click Settings, and click Printers. 2 Right-click your Epson PictureMate, then click Sharing. - Epson PictureMate Charm - PM 225 | User's Guide - Page 71
. The Add Printer Wizard opens. 3 Click Next. 4 Select Network printer and click Next. 5 On the next screen, click Next. 6 Double-click the icon of the computer that is directly connected to PictureMate, then click your Epson PictureMate model. 7 Click Next and follow the on-screen instructions. 55 - Epson PictureMate Charm - PM 225 | User's Guide - Page 72
screen instructions. Macintosh First, you need to set up PictureMate as a shared printer on the Macintosh that it is directly connected to. Then, you must choose the shared PictureMate in the Page Setup and Print menus when you print your photos. Setting Up a Shared Printer To share PictureMate with - Epson PictureMate Charm - PM 225 | User's Guide - Page 73
.3 or 10.4) Follow the steps in this section to print to PictureMate from other Macintosh computers on your network. 1 Turn on the shared PictureMate. 2 Print as you normally would, choosing your PictureMate model from the Shared Printers list that appears in the Page Setup and Print windows. Note - Epson PictureMate Charm - PM 225 | User's Guide - Page 74
with your computer, your system must meet the requirements below. Note: Visit Epson's support website (U.S. or Canada) for more compatibility information and the latest drivers for PictureMate. Windows System Requirements ● Microsoft® Windows 2000, Windows XP, Windows XP Professional x64 Edition - Epson PictureMate Charm - PM 225 | User's Guide - Page 75
40 °C) * Ink thaws and is usable after approximately 3 hours at 77 °F (25 °C). Caution: To ensure good results, use a genuine Epson PictureMate photo cartridge and do not refill it. Other products may cause damage to your printer not covered by Epson's warranty. Do not use a photo cartridge if the - Epson PictureMate Charm - PM 225 | User's Guide - Page 76
10.4 inches (265 mm) Approx. 4.9 lb (2.2 kg) without photo cartridge or AC adapter Border printing: 0.12 inch (3 mm) margin on W 0.3 Note: Check the label on the bottom of PictureMate for voltage information. AC Adapter Model Rated voltage Rated frequency Rated current Rated power Output A431H AC - Epson PictureMate Charm - PM 225 | User's Guide - Page 77
Environmental Temperature Humidity Operation: 50 to 95 °F (10 to 35 °C) Storage: -4 to 140 °F (-20 to 40 °C) 1 month at 104 °F (40 °C) Operation: 20 to 80% RH (without condensation) Memory Card Slots Card type CompactFlash Microdrive Memory Stick* Memory Stick PRO Memory Stick Duo** Memory Stick - Epson PictureMate Charm - PM 225 | User's Guide - Page 78
Interface USB Bluetooth (optional) 2.0 Hi-Speed (for PictBridge compliant devices/Mass storage class for external storage) Recommended cable length: less than 6.5 feet (2 meters) Ver. 2.0 + EDR compliant Standards and Approvals Safety EMC UL 60950-1 CAN/CSA-C22.2 No. 60950-1 FCC part 15 Subpart - Epson PictureMate Charm - PM 225 | User's Guide - Page 79
as in airplanes or hospitals, follow all instructions in those places. ● Do not insert objects through the slots in the printer. ● Take care not to spill liquid on the printer and the AC adapter. ● Do not put your hand inside the printer or touch the photo cartridge during printing. ● Do not use - Epson PictureMate Charm - PM 225 | User's Guide - Page 80
AC adapter model A431H is designed for use with the printer with which printer's guides. Doing so may result in injury, electric shock, or fire. ● Do not use with wet hands. ● Unplug the printer and the AC adapter, remove the optional battery from the printer, and refer servicing to qualified service - Epson PictureMate Charm - PM 225 | User's Guide - Page 81
with Proposition 65 in Cal. Health & Safety Code §25249.5 and following.) Photo Cartridge Safety Instructions ● Keep photo cartridges out of the reach of children and do not drink the ink. ● Do not shake the photo cartridge after removing it from the bag; this can cause leakage. ● Be careful - Epson PictureMate Charm - PM 225 | User's Guide - Page 82
. Battery Safety Instructions ● If battery acid gets into your eyes or on your skin, immediately rinse the affected area thoroughly with water and seek medical treatment. If a battery is swallowed, seek medical treatment immediately. ● Use only an Epson Li-ion battery model D121A for this printer - Epson PictureMate Charm - PM 225 | User's Guide - Page 83
Will Do To Correct Problems: Should your Epson printer prove defective during the warranty period, please call the Epson ConnectionSM at (562) 276-7282 (U.S.) or (905) 709-2567 (Canada) for warranty repair instructions and return authorization. An Epson service technician will provide telephone - Epson PictureMate Charm - PM 225 | User's Guide - Page 84
This warranty does not cover ribbons, ink cartridges or third party parts, components, or peripheral devices added to the Epson product after its shipment from Epson, e.g., dealer or user-added boards or components. Epson is not responsible for warranty service should the Epson label or logo or the - Epson PictureMate Charm - PM 225 | User's Guide - Page 85
papers may result in poor color reproduction, print quality problems or more fading. Both a PictureMate Photo Cartridge and some PictureMate Photo Paper were included in the box with your PictureMate printer. The included cartridge contains enough ink to allow borderless, color printing of about the - Epson PictureMate Charm - PM 225 | User's Guide - Page 86
make with the initial cartridge and paper which were included in the box with your PictureMate printer, please submit: a) Fully completed PictureMate Print Pack Satisfaction Guarantee Form b) Copy of Original UPC code of PictureMate printer c) Copy of PictureMate printer receipt d) Remaining paper - Epson PictureMate Charm - PM 225 | User's Guide - Page 87
that may cause undesired operation. Trade Name: Epson Type of Product: Ink Jet Printer Model: B385A FCC Compliance Statement For United States energy and, if not installed and used in accordance with the instructions, may cause harmful interference to radio or television reception. However, - Epson PictureMate Charm - PM 225 | User's Guide - Page 88
Seiko Epson Corporation's operating and maintenance instructions. Seiko Epson Corporation shall not be liable for any damages or problems Epson Exceed Your Vision is a registered logomark, and PictureMate Charm is a trademark of Seiko Epson Corporation. Epson Connection is a service mark of Epson - Epson PictureMate Charm - PM 225 | User's Guide - Page 89
64 Basic printing Macintosh, 37, 39, 41 Windows, 31, 37 Battery charging, 50 to 51 installing, 50 removing, 51 safety instructions, 82 to 83 status, 51 Black-and-white printing, 21, 33 35, 38, 40 problems, 66 Borderless layout, 18, 35, 38, 40 problems, 66 Borderless expansion, 21, 35, 38, 39, 41 89 - Epson PictureMate Charm - PM 225 | User's Guide - Page 90
software from, 41 Cell phone, printing from, 24 to 25 Charging battery, 50 to 51 photo cartridge, 62 90 Checking nozzles, 57 Choosing photos, 11, 15 Cleaning PictureMate, 61 print head, 57 to 58, 64 Color effects, 21 fixing, 33, 36 problems, 65 Computer Bluetooth printing, 24 to 25 connecting to - Epson PictureMate Charm - PM 225 | User's Guide - Page 91
in image, 57 to 58, 65 Grainy prints, 64 H Half-page photos, 18 Help control panel, 17 Epson, 68 I Icons on screen, 51 Image formats, 42 quality problems, 64 Incorrect colors, 65 margins, 21, 66 Ink, see Photo cartridge Instructions, control panel, 17 Internet support, 68 J Jammed paper, 66 91 - Epson PictureMate Charm - PM 225 | User's Guide - Page 92
L Landscape orientation, 38, 40 Layout Macintosh, 38, 39 problems, 66 settings, 18 Windows, 35 Lever, cartridge, 46, 47 License agreement, 27 Lights memory card, 8 to 9, 42 On, 62, 79 Lines in photos, fixing, 57 to 58, 64 Loading paper, 9, 66 M Macintosh basic printing, 37, 39, 41 Bluetooth printing - Epson PictureMate Charm - PM 225 | User's Guide - Page 93
33, 36 fixing cut off, 21, 35, 38, 39, 41 formats, 42 paper, 45 quality problems, 64 quality, adjusting, 33, 36 remove red eye, 19 slideshow, 15 storing, 16 viewing, 11, 15 Photo cartridge buying, 5, 45 door, 46 to 48 information, 85 to 86 release lever, 46, 47 safety instructions, 81 status, 48 93 - Epson PictureMate Charm - PM 225 | User's Guide - Page 94
Photo viewer screen adjusting angle, 11 blank, 12, 51, 62 display options, 11 icons, 51 instructions on, 17 problems, 62 safety instructions, 82 using, 11, 59 PictBridge camera, 23 Picture and Fax Viewer, Windows, 31 to 37 PIM (PRINT Image Matching), 20 Portrait orientation, 38, 40 Power battery, 50 - Epson PictureMate Charm - PM 225 | User's Guide - Page 95
, 62 power, 62 print quality, 64 printing, 62 to 64 slow printing, 64 software installation, 64 Proof Sheet layout, 18 Q Quality problems, 64 Quality, adjusting, 33, 36 R Red-eye reduction, 19 Release lever, 47 Removing battery, 51 Replacing photo cartridge, 45 Resetting preferences, 52 to 55 95 - Epson PictureMate Charm - PM 225 | User's Guide - Page 96
paper and prints, 16 Supplies, 5, 24, 45, 69 Support, paper, 10, 49 Support, technical, 68 T Technical support, 68 Troubleshooting, 56, 66 Turning printer on or off, 27, 29, 49, 62, 79 U USB cable, 23, 26, 28, 30 User's Guide, 5, 28 W Wallet-size photos, 18 Warranty, 83 to 84 Where to get help, 68 - Epson PictureMate Charm - PM 225 | User's Guide - Page 97
Windows basic printing, 31, 37 Bluetooth printing, 25 cancelling printing, 37 installing software for, 27 to 29 network printing, 70 system requirements, 74 uninstalling software for, 67 Wireless printing, 24 to 25 97
-
 1
1 -
 2
2 -
 3
3 -
 4
4 -
 5
5 -
 6
6 -
 7
7 -
8
-
9
-
10
-
11
-
12
-
13
-
14
-
15
-
16
-
17
-
18
-
19
-
20
-
21
-
22
-
23
-
24
-
25
-
26
-
27
-
28
-
29
-
30
-
31
-
32
-
33
-
34
-
35
-
36
-
37
-
38
-
39
-
40
-
41
-
42
-
43
-
44
-
45
-
46
-
47
-
48
-
49
-
50
-
51
-
52
-
53
-
54
-
55
-
56
-
57
-
58
-
59
-
60
-
61
-
62
-
63
-
64
-
65
-
66
-
67
-
68
-
69
-
70
-
71
-
72
-
73
-
74
-
75
-
76
-
77
-
78
-
79
-
80
-
81
-
82
-
83
-
84
-
85
-
86
-
87
-
88
-
89
-
90
-
91
-
92
-
93
-
94
-
95
-
96
-
97
 |
 |
User’s Guide