Epson PictureMate Charm - PM 225 User's Guide - Page 44
Windows 2000, Macintosh, Preparing to Remove a Memory Card
 |
View all Epson PictureMate Charm - PM 225 manuals
Add to My Manuals
Save this manual to your list of manuals |
Page 44 highlights
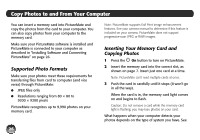
Windows 2000 Access your card just as you would access a drive on your computer. To copy photos to and from your computer and card, drag and drop the photos to the card or folder. Make sure the photo files meet the requirements described in "Supported Photo Formats" on page 5 Note: To copy files from Adobe Photoshop, save them as RGB images using the standard save option (non-progressive). Files saved in the CMYK format may not print with the colors you expect. When you're done copying photos, carefully remove your memory card, as described on the right. Macintosh A drive icon appears on your desktop that you can use to copy the photos from the card to your Macintosh or vice-versa. When you're done copying photos, carefully remove your memory card, as described on the right. Preparing to Remove a Memory Card Once you're finished copying photos to or from your memory card, follow the steps below to remove it. Be sure to remove any cards before turning off PictureMate or unplugging its USB cable. Note: Do not remove a card while the memory card light is flashing, or without performing the steps described below, or you may lose photos on your card. 1 Depending on your operating system, you may need to do one of the following: ● Windows Vista, XP, or XP Professional x64 Edition: Click the or icon on the taskbar. Then click Safely Remove USB Mass Storage Device. ● Windows 2000: Click the Safely Remove Hardware icon on the taskbar. Then click Stop USB Mass Storage Device. ● Macintosh: Drag the memory card icon from your desktop to the trash. 2 Pull your card straight out of the slot. 28
-
 1
1 -
2
-
3
-
4
-
5
-
6
-
7
-
8
-
9
-
10
-
11
-
12
-
13
-
14
-
15
-
16
-
17
-
18
-
19
-
20
-
21
-
22
-
23
-
24
-
25
-
26
-
27
-
28
-
29
-
30
-
31
-
32
-
33
-
34
-
35
-
36
-
37
-
38
-
 39
39 -
 40
40 -
 41
41 -
 42
42 -
 43
43 -
 44
44 -
 45
45 -
 46
46 -
 47
47 -
 48
48 -
 49
49 -
50
-
51
-
52
-
53
-
54
-
55
-
56
-
57
-
58
-
59
-
60
-
61
-
62
-
63
-
64
-
65
-
66
-
67
-
68
-
69
-
70
-
71
-
72
-
73
-
74
-
75
-
76
-
77
-
78
-
79
-
80
-
81
-
82
-
83
-
84
-
85
-
86
-
87
-
88
-
89
-
90
-
91
-
92
-
93
-
94
-
95
-
96
-
97
 |
 |
