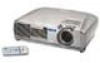
Epson PowerLite 54c User Manual - Page 54
Enter, Brightness Control, Brightness, Startup Screen, Color Adjustment, Color Temp, Projection, Front - mount
 |
View all Epson PowerLite 54c manuals
Add to My Manuals
Save this manual to your list of manuals |
Page 54 highlights
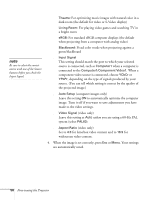
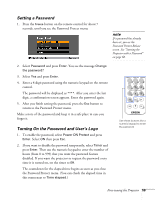
note The Startup Screen option cannot be turned off if the User's Logo Protect feature has been turned on. See page 59. 3. Press Enter and use the directional buttons and the Enter button to set the following options: ■ Brightness Control Select Low lamp brightness when the projection is too bright for the room. The Low setting also reduces the electricity consumption and fan noise. Select High to project the maximum brightness. (Also check the Brightness setting in the Image menu; see page 49.) ■ Startup Screen Turn on to display the image or logo you have captured whenever the projector is turned on. See page 56 for more information. ■ Color Adjustment Color Temp: Adjusts the whiteness of the screen. RGB: Adjusts the individual RGB values. ■ Projection Front: Projector is in front of the screen Front/Ceiling: Projector is in front of the screen, mounted upside-down from the ceiling Rear: Projector is behind the screen Rear/Ceiling: Projector is behind the screen, mounted upside-down from the ceiling ■ COM Port Turn on USB only if you're controlling the projector from a computer with the EMP Link 21L software. This software can be downloaded from the EPSON website at support.epson.com. (You must turn the projector off and then on again to use the new setting.) ■ Language Select from nine languages to be used for the projector menus. 4. When you're finished, press Esc or Menu. 54 Fine-tuning the Projector
-
 1
1 -
2
-
3
-
4
-
5
-
6
-
7
-
8
-
9
-
10
-
11
-
12
-
13
-
14
-
15
-
16
-
17
-
18
-
19
-
20
-
21
-
22
-
23
-
24
-
25
-
26
-
27
-
28
-
29
-
30
-
31
-
32
-
33
-
34
-
35
-
36
-
37
-
38
-
39
-
40
-
41
-
42
-
43
-
44
-
45
-
46
-
47
-
48
-
 49
49 -
 50
50 -
 51
51 -
 52
52 -
 53
53 -
 54
54 -
 55
55 -
 56
56 -
 57
57 -
 58
58 -
 59
59 -
60
-
61
-
62
-
63
-
64
-
65
-
66
-
67
-
68
-
69
-
70
-
71
-
72
-
73
-
74
-
75
-
76
-
77
-
78
-
79
-
80
-
81
-
82
-
83
-
84
-
85
-
86
-
87
-
88
-
89
-
90
-
91
-
92
-
93
-
94
-
95
-
96
-
97
-
98
-
99
-
100
-
101
-
102
-
103
-
104
-
105
-
106
 |
 |