Epson Stylus C80WN User Setup Information - Page 37
Setting Up a Network Port on Windows NT, Make sure you clicked
 |
View all Epson Stylus C80WN manuals
Add to My Manuals
Save this manual to your list of manuals |
Page 37 highlights
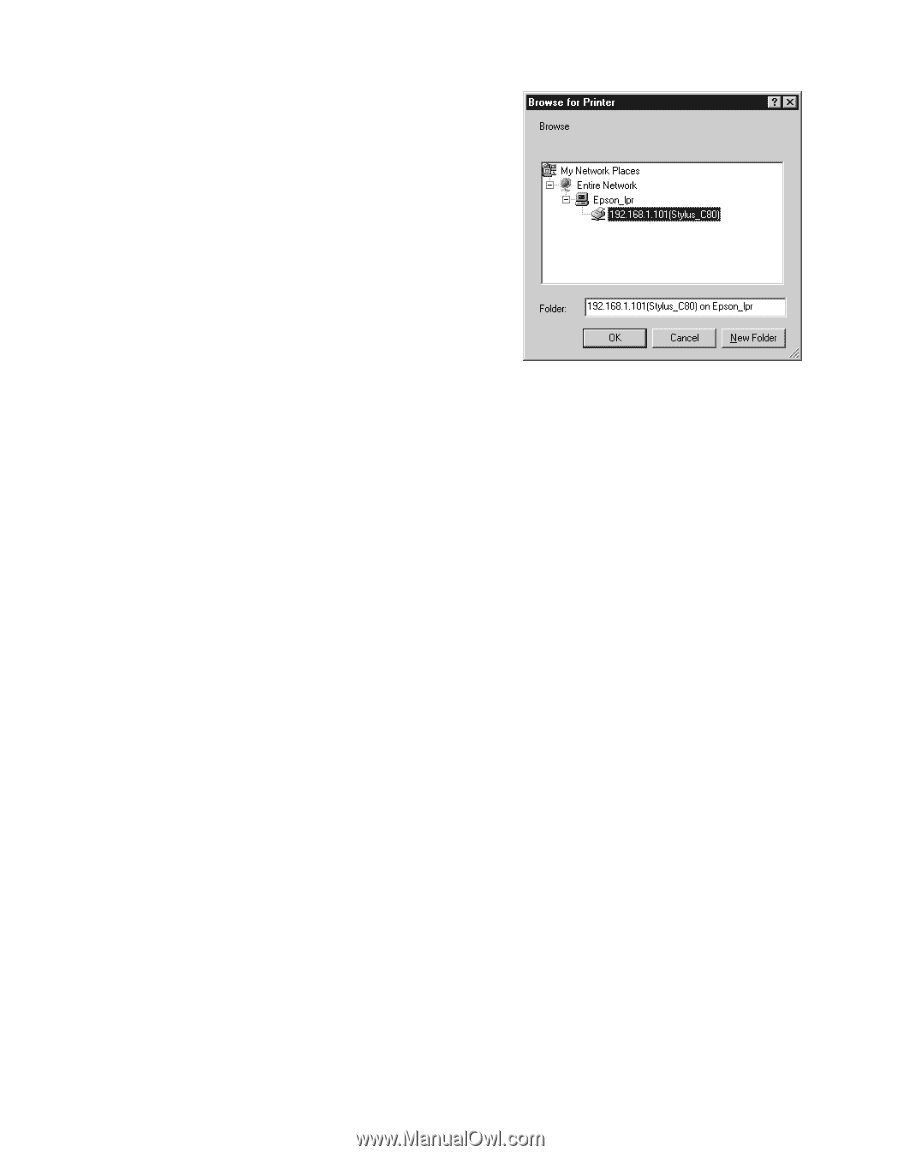
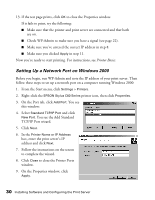
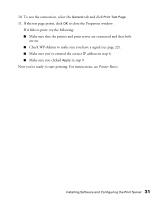
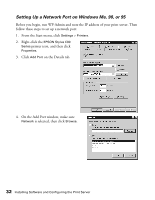
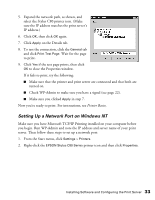
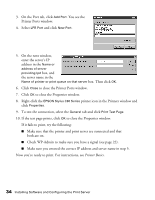
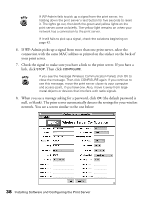
5. Expand the network path, as shown, and select the Stylus C80 printer icon. (Make sure the IP address matches the print server's IP address.) 6. Click OK, then click OK again. 7. Click Apply on the Details tab. 8. To test the connection, click the General tab and click Print Test Page. Wait for the page to print. 9. Click Yes if the test page prints, then click OK to close the Properties window. If it fails to print, try the following: I Make sure that the printer and print server are connected and that both are turned on. I Check WP-Admin to make sure you have a signal (see page 22). I Make sure you clicked Apply in step 7. Now you're ready to print. For instructions, see Printer Basics. Setting Up a Network Port on Windows NT Make sure you have Microsoft TCP/IP Printing installed on your computer before you begin. Run WP-Admin and note the IP address and server name of your print server. Then follow these steps to set up a network port: 1. From the Start menu, click Settings > Printers. 2. Right-click the EPSON Stylus C80 Series printer icon and then click Properties. Installing Software and Configuring the Print Server 33
-
 1
1 -
2
-
3
-
4
-
5
-
6
-
7
-
8
-
9
-
10
-
11
-
12
-
13
-
14
-
15
-
16
-
17
-
18
-
19
-
20
-
21
-
22
-
23
-
24
-
25
-
26
-
27
-
28
-
29
-
30
-
31
-
 32
32 -
 33
33 -
 34
34 -
 35
35 -
 36
36 -
 37
37 -
 38
38 -
 39
39 -
 40
40 -
 41
41 -
 42
42 -
43
-
44
-
45
-
46
-
47
-
48
-
49
-
50
-
51
-
52
-
53
-
54
-
55
-
56
-
57
-
58
-
59
-
60
-
61
-
62
-
63
-
64
-
65
-
66
-
67
 |
 |