Garmin D2 Mach 1 Owners Manual PDF - Page 67
Stride length, Vertical ratio, REMEMBER, Activities & Apps, Running, Power, Status, Source,
 |
View all Garmin D2 Mach 1 manuals
Add to My Manuals
Save this manual to your list of manuals |
Page 67 highlights
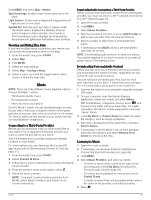
Metric Stride length Vertical ratio Sensor Type Watch or compatible accessory Watch or compatible accessory Description Stride length is the length of your stride from one footfall to the next. It is measured in meters. Vertical ratio is the ratio of vertical oscillation to stride length. It displays a percentage. A lower number typically indicates better running form. Tips for Missing Running Dynamics Data This topic provides tips for using a compatible running dynamics accessory. If the accessory is not connected to your watch, the watch automatically switches to wristbased running dynamics. • Make sure you have a running dynamics accessory, such as the HRM-Pro series accessory. Accessories with running dynamics have on the front of the module. • Pair the running dynamics accessory with your watch again, according to the instructions. • If you are using the HRM-Pro series accessory, pair it with your watch using ANT+ technology, rather than Bluetooth technology. • If the running dynamics data display shows only zeros, make sure the accessory is worn right-side up. NOTE: Ground contact time and balance appears only while running. It is not calculated while walking. REMEMBER: Ground contact time balance is not calculated with wrist-based running dynamics. Running Power Garmin running power is calculated using measured running dynamics information, user mass, environmental data, and other sensor data. The power measurement estimates the amount of power a runner applies to the road surface, and it is displayed in watts. Using running power as a gauge of effort may suit some runners better than using either pace or heart rate. Running power can be more responsive than heart rate for indicating the level of effort, and it can account for the uphills, downhills, and wind, which a pace measurement does not do. For more information, go to garmin.com/performance-data/running. Running power can be measured using a compatible running dynamics accessory or the watch sensors. You can customize the running power data fields to view your power output and make adjustments to your training (Data Fields, page 82). You can set up power alerts to be notified when you reach a specified power zone (Activity Alerts, page 26). Running power zones are similar to cycling power zones. The values for the zones are default values based on gender, weight, and average ability, and may not match your personal abilities. You can manually adjust your zones on the watch or using your Garmin Connect account (Setting Your Power Zones, page 69). Running Power Settings Hold MENU, select Activities & Apps, select a running activity, select the activity settings, and select Running Power. Status: Enables or disables recording Garmin running power data. You can use this setting if you prefer to use third-party running power data. Source: Allows you to select which device to use to record running power data. The Smart Mode option automatically detects and uses the running dynamics accessory, when available. The watch uses wristbased running power data when an accessory is not connected. Account for Wind: Enables or disables using wind data when calculating your running power. Wind data is a combination of the speed, heading, and barometer data from your watch and the available wind data from your phone. Using the Varia Camera Controls NOTICE Some jurisdictions may prohibit or regulate the recording of video, audio, or photographs, or may require that all parties have knowledge of the recording and provide consent. It is your responsibility to know and follow all laws, regulations, and any other restrictions in jurisdictions where you plan to use this device. Before you can use the Varia camera controls, you must pair the accessory with your watch (Pairing Your Wireless Sensors, page 58). 1 Add the RCT Camera glance to your watch (Glances, page 38). 2 From the RCT Camera glance, select an option: • Select to view the camera settings. • Select to take a photo. • Select to save a clip. inReach Remote The inReach remote function allows you to control your inReach satellite communicator using your D2 Mach 1 watch. Go to buy.garmin.com for more information about compatible devices. Using the inReach Remote Before you can use the inReach remote function, you must add the inReach glance to the glance loop (Customizing the Glance Loop, page 41). 1 Turn on the inReach satellite communicator. 2 On your D2 Mach 1 watch, press UP or DOWN from the watch face to view the inReach glance. 3 Press START to search for your inReach satellite communicator. Sensors and Accessories 59
-
 1
1 -
2
-
3
-
4
-
5
-
6
-
7
-
8
-
9
-
10
-
11
-
12
-
13
-
14
-
15
-
16
-
17
-
18
-
19
-
20
-
21
-
22
-
23
-
24
-
25
-
26
-
27
-
28
-
29
-
30
-
31
-
32
-
33
-
34
-
35
-
36
-
37
-
38
-
39
-
40
-
41
-
42
-
43
-
44
-
45
-
46
-
47
-
48
-
49
-
50
-
51
-
52
-
53
-
54
-
55
-
56
-
57
-
58
-
59
-
60
-
61
-
 62
62 -
 63
63 -
 64
64 -
 65
65 -
 66
66 -
 67
67 -
 68
68 -
 69
69 -
 70
70 -
 71
71 -
 72
72 -
73
-
74
-
75
-
76
-
77
-
78
-
79
-
80
-
81
-
82
-
83
-
84
-
85
-
86
-
87
-
88
-
89
-
90
-
91
-
92
-
93
-
94
-
95
-
96
-
97
-
98
-
99
-
100
-
101
-
102
-
103
-
104
 |
 |
