Garmin D2 Mach 1 Owners Manual PDF - Page 82
Stopping Navigation, Courses
 |
View all Garmin D2 Mach 1 manuals
Add to My Manuals
Save this manual to your list of manuals |
Page 82 highlights
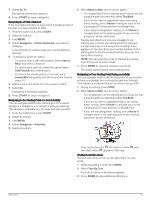
Navigating with Sight 'N Go You can point the device at an object in the distance, such as a water tower, lock in the direction, and then navigate to the object. 1 From the watch face, press START. 2 Select an activity. 3 Hold MENU. 4 Select Navigation > Sight 'N Go. 5 Point the top of the watch at an object, and press START. Navigation information appears. 6 Press START to begin navigation. Marking and Starting Navigation to a Man Overboard Location You can save a man overboard (MOB) location, and automatically start navigation back to it. TIP: You can customize the hold function of the keys to access the MOB function (Customizing the Hot Keys, page 78). 1 From the watch face, press START. 2 Select an activity. 3 Hold MENU. 4 Select Navigation > Last MOB. Navigation information appears. Stopping Navigation 1 During an activity, hold MENU. 2 Select Stop Navigation. Courses WARNING This feature allows users to download routes created by other users. Garmin makes no representations about the safety, accuracy, reliability, completeness, or timeliness of routes created by third parties. Any use or reliance on routes created by third parties is at your own risk. You can send a course from your Garmin Connect account to your device. After it is saved to your device, you can navigate the course on your device. You can follow a saved course simply because it is a good route. For example, you can save and follow a bike friendly commute to work. You can also follow a saved course, trying to match or exceed previously set performance goals. For example, if the original course was completed in 30 minutes, you can race against a Virtual Partner trying to complete the course in under 30 minutes. Creating and Following a Course on Your Device 1 From the watch face, press START. 2 Select an activity. 3 Hold MENU. 4 Select Navigation > Courses > Create New. 5 Enter a name for the course, and select . 6 Select Add Location. 7 Select an option. 8 If necessary, repeat steps 6 and 7. 9 Select Done > Do Course. Navigation information appears. 10 Press START to begin navigation. Creating a Round-Trip Course The device can create a round-trip course based on a specified distance and direction of navigation. 1 From the watch face, press START. 2 Select Run or Bike. 3 Hold MENU. 4 Select Navigation > Round-Trip Course. 5 Enter the total distance for the course. 6 Select a direction heading. The device creates up to three courses. You can press DOWN to view the courses. 7 Press START to select a course. 8 Select an option: • To begin navigation, select Go. • To view the course on the map and pan or zoom the map, select Map. • To view a list of turns in the course, select Turn By Turn. • To view an elevation plot of the course, select Elevation Plot. • To save the course, select Save. • To view a list of ascents in the course, select View Climbs. Creating a Course on Garmin Connect Before you can create a course on the Garmin Connect app, you must have a Garmin Connect account (Garmin Connect, page 66). 1 From the Garmin Connect app, select . 2 Select Training & Planning > Courses > Create Course. 3 Select a course type. 4 Follow the on-screen instructions. 5 Select Done. NOTE: You can send this course to your device (Sending a Course to Your Device, page 74). Sending a Course to Your Device You can send a course you created using the Garmin Connect app to your device (Creating a Course on Garmin Connect, page 74). 1 From the Garmin Connect app, select . 2 Select Training & Planning > Courses. 3 Select a course. 4 Select . 5 Select your compatible device. 6 Follow the on-screen instructions. 74 Navigation
-
 1
1 -
2
-
3
-
4
-
5
-
6
-
7
-
8
-
9
-
10
-
11
-
12
-
13
-
14
-
15
-
16
-
17
-
18
-
19
-
20
-
21
-
22
-
23
-
24
-
25
-
26
-
27
-
28
-
29
-
30
-
31
-
32
-
33
-
34
-
35
-
36
-
37
-
38
-
39
-
40
-
41
-
42
-
43
-
44
-
45
-
46
-
47
-
48
-
49
-
50
-
51
-
52
-
53
-
54
-
55
-
56
-
57
-
58
-
59
-
60
-
61
-
62
-
63
-
64
-
65
-
66
-
67
-
68
-
69
-
70
-
71
-
72
-
73
-
74
-
75
-
76
-
 77
77 -
 78
78 -
 79
79 -
 80
80 -
 81
81 -
 82
82 -
 83
83 -
 84
84 -
 85
85 -
 86
86 -
 87
87 -
88
-
89
-
90
-
91
-
92
-
93
-
94
-
95
-
96
-
97
-
98
-
99
-
100
-
101
-
102
-
103
-
104
 |
 |
