Garmin D2 Mach 1 Owners Manual PDF - Page 80
Intensity Minutes, Sleep Tracking, Viewing and Editing Your Saved Locations, Setting a Reference
 |
View all Garmin D2 Mach 1 manuals
Add to My Manuals
Save this manual to your list of manuals |
Page 80 highlights
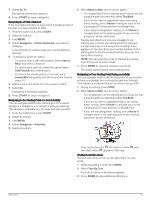
appear after every 15 minutes of inactivity. The device also beeps or vibrates if audible tones are turned on (System Settings, page 76). Go for a short walk (at least a couple of minutes) to reset the move alert. Intensity Minutes To improve your health, organizations such as the World Health Organization recommend at least 150 minutes per week of moderate intensity activity, such as brisk walking, or 75 minutes per week of vigorous intensity activity, such as running. The watch monitors your activity intensity and tracks your time spent participating in moderate to vigorous intensity activities (heart rate data is required to quantify vigorous intensity). The watch adds the amount of moderate activity minutes with the amount of vigorous activity minutes. Your total vigorous intensity minutes are doubled when added. Earning Intensity Minutes Your D2 Mach 1 watch calculates intensity minutes by comparing your heart rate data to your average resting heart rate. If heart rate is turned off, the watch calculates moderate intensity minutes by analyzing your steps per minute. • Start a timed activity for the most accurate calculation of intensity minutes. • Wear your watch all day and night for the most accurate resting heart rate. Sleep Tracking While you are sleeping, the watch automatically detects your sleep and monitors your movement during your normal sleep hours. You can set your normal sleep hours in the Garmin Connect app or in the watch settings (Customizing Sleep Mode, page 78). Sleep statistics include total hours of sleep, sleep stages, sleep movement, and sleep score. Naps are added to your sleep statistics, and can also impact your recovery. You can view detailed sleep statistics on your Garmin Connect account. NOTE: You can use do not disturb mode to turn off notifications and alerts, with the exception of alarms (Controls, page 49). Using Automated Sleep Tracking 1 Wear your watch while sleeping. 2 Upload your sleep tracking data to the Garmin Connect site (Using the Garmin Connect App, page 66). You can view your sleep statistics on your Garmin Connect account. You can view sleep information from the previous night on your D2 Mach 1 watch (Glances, page 38). Navigation Viewing and Editing Your Saved Locations TIP: You can save a location from the controls menu (Controls, page 49). 1 From the watch face, press START. 2 Select Navigate > Saved Locations. 3 Select a saved location. 4 Select an option to view or edit the location details. Saving a Dual Grid Location You can save your current location using dual grid coordinates to navigate back to the same location later. 1 Customize a button or button combination for the Dual Grid feature (Customizing the Hot Keys, page 78). 2 Hold the button or button combination you customized to save a dual grid location. 3 Wait while the watch locates satellites. 4 Press START to save the location. 5 If necessary, press DOWN to edit the location details. Setting a Reference Point You can set a reference point to provide the heading and distance to a location or bearing. 1 Select an option: • Hold LIGHT. TIP: You can set a reference point while you are recording an activity. • From the watch face, press START. 2 Select Reference Point. 3 Wait while the watch locates satellites. 4 Press START, and select Add Point. 5 Select a location or bearing to use as a reference point for navigation. The compass arrow and distance to your destination appear. 6 Point the top of the watch toward your heading. When you deviate from the heading, the compass displays the direction from the heading and degree of deviation. 7 If necessary, press START, and select Change Point to set a different reference point. Navigating to a Destination You can use your device to navigate to a destination or follow a course. 1 From the watch face, press START. 2 Select an activity. 3 Hold MENU. 4 Select Navigation. 5 Select a category. 6 Respond to the on-screen prompts to choose a destination. 72 Navigation
-
 1
1 -
2
-
3
-
4
-
5
-
6
-
7
-
8
-
9
-
10
-
11
-
12
-
13
-
14
-
15
-
16
-
17
-
18
-
19
-
20
-
21
-
22
-
23
-
24
-
25
-
26
-
27
-
28
-
29
-
30
-
31
-
32
-
33
-
34
-
35
-
36
-
37
-
38
-
39
-
40
-
41
-
42
-
43
-
44
-
45
-
46
-
47
-
48
-
49
-
50
-
51
-
52
-
53
-
54
-
55
-
56
-
57
-
58
-
59
-
60
-
61
-
62
-
63
-
64
-
65
-
66
-
67
-
68
-
69
-
70
-
71
-
72
-
73
-
74
-
 75
75 -
 76
76 -
 77
77 -
 78
78 -
 79
79 -
 80
80 -
 81
81 -
 82
82 -
 83
83 -
 84
84 -
 85
85 -
86
-
87
-
88
-
89
-
90
-
91
-
92
-
93
-
94
-
95
-
96
-
97
-
98
-
99
-
100
-
101
-
102
-
103
-
104
 |
 |
