HP 1012 HP LaserJet 1010/1012/1015 Printer - Software Technical Reference - Page 42
Installing the customization utility, Procedure 1 - laserjet windows 10
 |
View all HP 1012 manuals
Add to My Manuals
Save this manual to your list of manuals |
Page 42 highlights
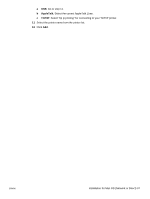
Installing the customization utility Note To install the customization utility, perform one of the following procedures: Procedure 1 1 If the Welcome screen does not open, click Start on the Windows task bar. 2 Click Run. 3 Type Z:\hpsetup (where Z is your CD-ROM drive letter). 4 Click OK. Procedure 2 1 Quit all programs. 2 Place the HP LaserJet 1010 series printer software CD-ROM into the CD-ROM drive. 3 Wait for autorun to begin the software installation. If the Welcome screen does not open, click Start on the Windows task bar, click Run, type ó (where Z is your CD-ROM drive letter), and then click OK. 4 On the Welcome screen, click customization utility. 5 The HP LaserJet 1010 Setup screen appears. To continue, click Next. 6 In the Language window, select the language from the drop-down list, and then click Next. 7 In the Printer Port window, select the type of printer port from the list of options, or browse to select another port in the field. Click Next. 8 In the Connector Type window, select the type of printer connection, and then click Next. 9 From the list of printer models, select your printer, and then click Next. 10 From the Features window, select the features you wish to install, and then click Next. 11 Click Next to accept the default printer name, or type a new printer name in the field. 12 If you want this printer to be the default printer, make sure the check box is checked, and then click Next. 13 In the Printer Sharing window, select from the list of options, and then click Next. (If you select Share as:, type the name for the shared printer in the field.) 14 Type in the location and a comment if you wish, and then click Next. 15 In the Custom Installer Location window, type in the location or click Change to browse to the location, and then click Install. 16 When installation of the customization utility is complete, click Finish. The Welcome screen displays again. 42 Chapter 4 - Installing the HP LaserJet 1010 series software ENWW
-
 1
1 -
2
-
3
-
4
-
5
-
6
-
7
-
8
-
9
-
10
-
11
-
12
-
13
-
14
-
15
-
16
-
17
-
18
-
19
-
20
-
21
-
22
-
23
-
24
-
25
-
26
-
27
-
28
-
29
-
30
-
31
-
32
-
33
-
34
-
35
-
36
-
 37
37 -
 38
38 -
 39
39 -
 40
40 -
 41
41 -
 42
42 -
 43
43 -
 44
44 -
 45
45 -
 46
46 -
 47
47 -
48
-
49
-
50
-
51
-
52
-
53
-
54
-
55
-
56
-
57
-
58
-
59
-
60
-
61
-
62
-
63
-
64
-
65
-
66
-
67
-
68
-
69
-
70
-
71
-
72
-
73
-
74
-
75
-
76
-
77
-
78
-
79
-
80
-
81
-
82
-
83
-
84
-
85
-
86
-
87
-
88
-
89
-
90
-
91
-
92
-
93
-
94
-
95
-
96
-
97
-
98
-
99
-
100
-
101
-
102
-
103
-
104
-
105
-
106
-
107
-
108
-
109
-
110
-
111
-
112
-
113
-
114
 |
 |