HP 400N HP JetDirect 400N Print Server Hardware Installation Guide - 5969-3587 - Page 78
For the 600 Series Printers, For DHCP Dynamic Host Configuration Protocol
 |
UPC - 088698733714
View all HP 400N manuals
Add to My Manuals
Save this manual to your list of manuals |
Page 78 highlights
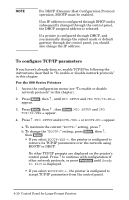
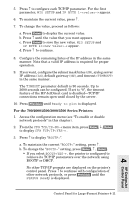
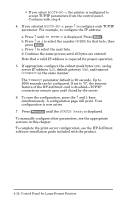
NOTE For DHCP (Dynamic Host Configuration Protocol) operation, BOOTP must be enabled. If an IP address is configured through DHCP and is subsequently changed through the control panel, the DHCP assigned address is released. If a printer is configured through DHCP, and you manually change the subnet mask or default gateway through the control panel, you should also change the IP address. To configure TCP/IP parameters If you haven't already done so, enable TCP/IP by following the instructions described in "To enable or disable network protocols" in this chapter. For the 600 Series Printers 1. Access the configuration menu (see "To enable or disable network protocols" in this chapter). 2. Press [Enter], then ↑ , until MIO SETUP and CFG TCP/IP=NO→ appear. 3. Press [Enter], then ↑ , then [Enter]. MIO SETUP and CFG TCP/IP=YES→ appear. 4. Press ↑ . MIO SETUP and BOOTP=YES→ or BOOTP=NO→ appear. a. To maintain the current "BOOTP=" setting, press ↑ . b. To change the "BOOTP=" setting, press [Enter], then ↑, then [Enter]. • If you select BOOTP=YES→ , the printer is configured to retrieve its TCP/IP parameters over the network using BOOTP or DHCP. No other TCP/IP prompts are displayed on the printer's control panel. Press ↑ to continue with configuration of other network protocols, or press [Previous] until Ready to Plot is displayed. • If you select BOOTP=NO→ , the printer is configured to accept TCP/IP parameters from the control panel. 4-10 Control Panel for Large-Format Printers
-
 1
1 -
2
-
3
-
4
-
5
-
6
-
7
-
8
-
9
-
10
-
11
-
12
-
13
-
14
-
15
-
16
-
17
-
18
-
19
-
20
-
21
-
22
-
23
-
24
-
25
-
26
-
27
-
28
-
29
-
30
-
31
-
32
-
33
-
34
-
35
-
36
-
37
-
38
-
39
-
40
-
41
-
42
-
43
-
44
-
45
-
46
-
47
-
48
-
49
-
50
-
51
-
52
-
53
-
54
-
55
-
56
-
57
-
58
-
59
-
60
-
61
-
62
-
63
-
64
-
65
-
66
-
67
-
68
-
69
-
70
-
71
-
72
-
 73
73 -
 74
74 -
 75
75 -
 76
76 -
 77
77 -
 78
78 -
 79
79 -
 80
80 -
 81
81 -
 82
82 -
 83
83 -
84
-
85
-
86
-
87
-
88
-
89
-
90
-
91
-
92
-
93
-
94
-
95
-
96
 |
 |
