HP 400N HP JetDirect 400N Print Server Hardware Installation Guide - 5969-3587 - Page 82
Configuring the Timeout for End-of-Job Sensing for the HP DesignJet 600 Series, To set the JOB TIMEOUT
 |
UPC - 088698733714
View all HP 400N manuals
Add to My Manuals
Save this manual to your list of manuals |
Page 82 highlights
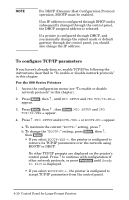
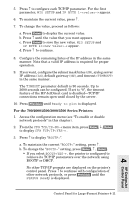
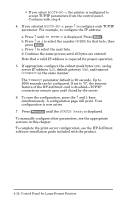
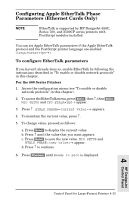
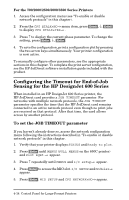
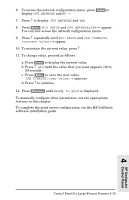
For the 700/2000/2500/3000/3500 Series Printers 1. Access the configuration menu (see "To enable or disable network protocols" in this chapter). 2. From the CFG ETALK=NO→ menu item, press [Enter], ↓, [Enter] to display CFG ETALK=YES→ . 3. Press ↑ to display the current phase parameter. To change the setting, press [Enter], ↓, [Enter]. 4. To save the configuration, print a configuration plot by pressing the two arrow keys simultaneously. Your printer configuration is now active. To manually configure other parameters, see the appropriate sections in this chapter. To complete the print server configuration, see the HP JetDirect software installation guide included with the product. Configuring the Timeout for End-of-Job Sensing for the HP DesignJet 600 Series When installed in an HP DesignJet 600 Series printer, the HP JetDirect card provides a JOB TIMEOUT parameter. For networks with multiple network protocols, the JOB TIMEOUT parameter specifies the time that the HP JetDirect card remains connected to an active network protocol even though no print jobs are received on that protocol. After that time, the card allows access by another protocol. To set the JOB TIMEOUT parameter If you haven't already done so, access the network configuration menu following the instructions described in "To enable or disable network protocols" in this chapter. 1. Verify that your printer displays STATUS and Ready to plot. 2. Press [Enter] until MENUS (FULL MENUS on the 650C printer) and Plot mgmt → appear. 3. Press ↑ repeatedly until MENUS and I/O setup→ appear. 4. Press [Enter] to access the MIO slot. I/O SETUP and Modular→ appear. 5. Press [Enter]. MIO SETUP and CFG NETWORK=NO→ appear. 4-14 Control Panel for Large-Format Printers
-
 1
1 -
2
-
3
-
4
-
5
-
6
-
7
-
8
-
9
-
10
-
11
-
12
-
13
-
14
-
15
-
16
-
17
-
18
-
19
-
20
-
21
-
22
-
23
-
24
-
25
-
26
-
27
-
28
-
29
-
30
-
31
-
32
-
33
-
34
-
35
-
36
-
37
-
38
-
39
-
40
-
41
-
42
-
43
-
44
-
45
-
46
-
47
-
48
-
49
-
50
-
51
-
52
-
53
-
54
-
55
-
56
-
57
-
58
-
59
-
60
-
61
-
62
-
63
-
64
-
65
-
66
-
67
-
68
-
69
-
70
-
71
-
72
-
73
-
74
-
75
-
76
-
 77
77 -
 78
78 -
 79
79 -
 80
80 -
 81
81 -
 82
82 -
 83
83 -
 84
84 -
 85
85 -
 86
86 -
 87
87 -
88
-
89
-
90
-
91
-
92
-
93
-
94
-
95
-
96
 |
 |