HP 6127 HP Deskjet 6120 Series printers - (English) Macintosh User's Guide - Page 104
calibration Caution
 |
View all HP 6127 manuals
Add to My Manuals
Save this manual to your list of manuals |
Page 104 highlights
5. Remove the replacement print cartridge from its packaging and carefully remove the plastic tape. 1. black cartridge 2. color cartridge 3. ink nozzles 4. copper contacts 5. plastic tape Caution! Do not touch the print cartridge ink nozzles or copper contacts. Touching these parts will result in clogs, ink failure, and bad electrical connections. Do not remove the copper strips. They are required electrical contacts. 1. copper contacts 6. Push the print cartridge firmly into the cradle. 7. Secure the cradle latch. 8. Close the top cover. A calibration page prints to align the print cartridges. Caution! If you are in the middle of printing, and you change a print cartridge, your current print job may be cancelled. 104
-
 1
1 -
2
-
3
-
4
-
5
-
6
-
7
-
8
-
9
-
10
-
11
-
12
-
13
-
14
-
15
-
16
-
17
-
18
-
19
-
20
-
21
-
22
-
23
-
24
-
25
-
26
-
27
-
28
-
29
-
30
-
31
-
32
-
33
-
34
-
35
-
36
-
37
-
38
-
39
-
40
-
41
-
42
-
43
-
44
-
45
-
46
-
47
-
48
-
49
-
50
-
51
-
52
-
53
-
54
-
55
-
56
-
57
-
58
-
59
-
60
-
61
-
62
-
63
-
64
-
65
-
66
-
67
-
68
-
69
-
70
-
71
-
72
-
73
-
74
-
75
-
76
-
77
-
78
-
79
-
80
-
81
-
82
-
83
-
84
-
85
-
86
-
87
-
88
-
89
-
90
-
91
-
92
-
93
-
94
-
95
-
96
-
97
-
98
-
 99
99 -
 100
100 -
 101
101 -
 102
102 -
 103
103 -
 104
104 -
 105
105 -
 106
106 -
 107
107 -
 108
108 -
 109
109 -
110
-
111
-
112
-
113
-
114
-
115
-
116
-
117
-
118
-
119
-
120
-
121
-
122
-
123
-
124
-
125
-
126
-
127
-
128
-
129
-
130
-
131
-
132
-
133
-
134
-
135
-
136
-
137
-
138
-
139
-
140
-
141
-
142
-
143
-
144
-
145
-
146
-
147
-
148
-
149
-
150
-
151
-
152
-
153
-
154
-
155
-
156
-
157
-
158
-
159
-
160
-
161
-
162
-
163
-
164
-
165
-
166
-
167
-
168
-
169
-
170
-
171
-
172
-
173
-
174
-
175
-
176
-
177
-
178
-
179
-
180
-
181
-
182
-
183
-
184
-
185
-
186
-
187
-
188
-
189
-
190
 |
 |
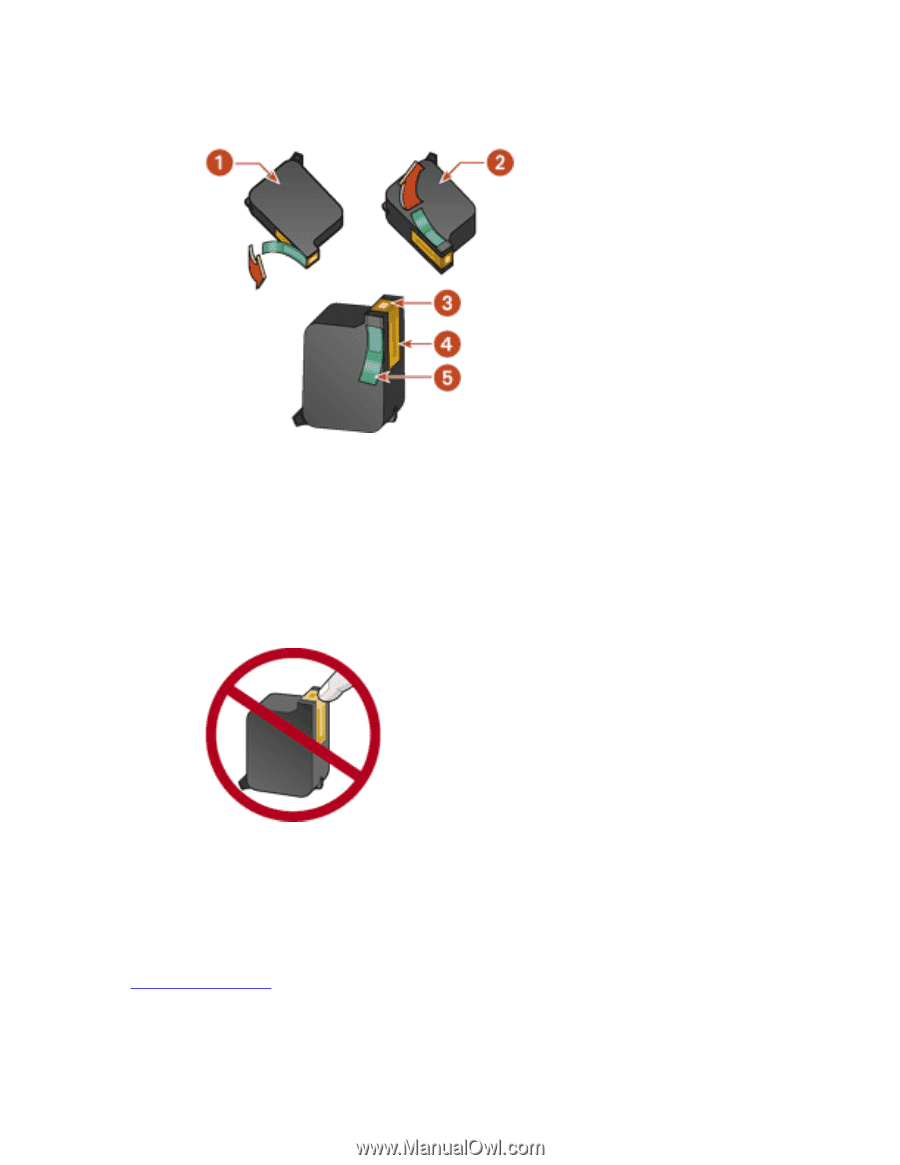
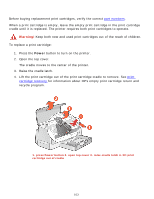
5.
Remove the replacement print cartridge from its packaging and carefully remove
the plastic tape.
1. black cartridge 2. color cartridge 3. ink nozzles 4. copper contacts 5. plastic
tape
Caution!
Do not touch the print cartridge ink nozzles or copper contacts. Touching these
parts will result in clogs, ink failure, and bad electrical connections. Do not remove the
copper strips. They are required electrical contacts.
1. copper contacts
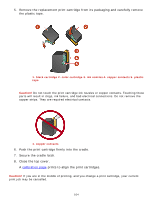
6.
Push the print cartridge firmly into the cradle.
7.
Secure the cradle latch.
8.
Close the top cover.
A
calibration page
prints to align the print cartridges.
Caution!
If you are in the middle of printing, and you change a print cartridge, your current
print job may be cancelled.
104