HP 6300C HP Scanjet 6300C Scanner PrecisionScan Pro - (English) User Guide - Page 111
Saving the file, Ctrl+S, Save As, File name, Save as type, True Color
 |
View all HP 6300C manuals
Add to My Manuals
Save this manual to your list of manuals |
Page 111 highlights
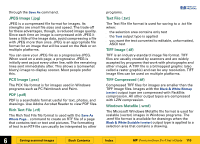
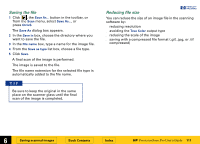
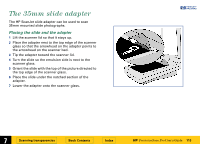
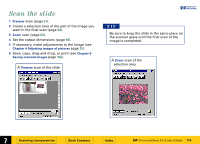
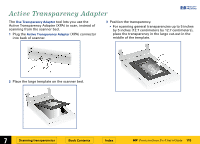
Saving the file 1 Click , the Save As... button in the toolbar, or from the Scan menu, select Save As..., or press Ctrl+S. The Save As dialog box appears. 2 In the Save in box, choose the directory where you want to save the file. 3 In the File name box, type a name for the image file. 4 From the Save as type list box, choose a file type. 5 Click Save. A final scan of the image is performed. The image is saved to the file. The file name extension for the selected file type is automatically added to the file name. TIP Be sure to keep the original in the same place on the scanner glass until the final scan of the image is completed. Reducing file size +$%& You can reduce the size of an image file in the scanning software by: s reducing resolution s avoiding the True Color output type s reducing the scale of the image s saving with a compressed file format (.gif, .jpg, or .tif compressed) È 6 Saving scanned images Book Contents Index È HP PrecisionScan Pro User's Guide 111
-
 1
1 -
2
-
3
-
4
-
5
-
6
-
7
-
8
-
9
-
10
-
11
-
12
-
13
-
14
-
15
-
16
-
17
-
18
-
19
-
20
-
21
-
22
-
23
-
24
-
25
-
26
-
27
-
28
-
29
-
30
-
31
-
32
-
33
-
34
-
35
-
36
-
37
-
38
-
39
-
40
-
41
-
42
-
43
-
44
-
45
-
46
-
47
-
48
-
49
-
50
-
51
-
52
-
53
-
54
-
55
-
56
-
57
-
58
-
59
-
60
-
61
-
62
-
63
-
64
-
65
-
66
-
67
-
68
-
69
-
70
-
71
-
72
-
73
-
74
-
75
-
76
-
77
-
78
-
79
-
80
-
81
-
82
-
83
-
84
-
85
-
86
-
87
-
88
-
89
-
90
-
91
-
92
-
93
-
94
-
95
-
96
-
97
-
98
-
99
-
100
-
101
-
102
-
103
-
104
-
105
-
 106
106 -
 107
107 -
 108
108 -
 109
109 -
 110
110 -
 111
111 -
 112
112 -
 113
113 -
 114
114 -
 115
115 -
 116
116 -
117
-
118
-
119
-
120
-
121
 |
 |
