HP LaserJet Pro P1606 HP LaserJet Professional P1560 and P1600 Printer series - Page 40
Connect to a network, Supported network protocols, Install the product on a wired network
 |
View all HP LaserJet Pro P1606 manuals
Add to My Manuals
Save this manual to your list of manuals |
Page 40 highlights
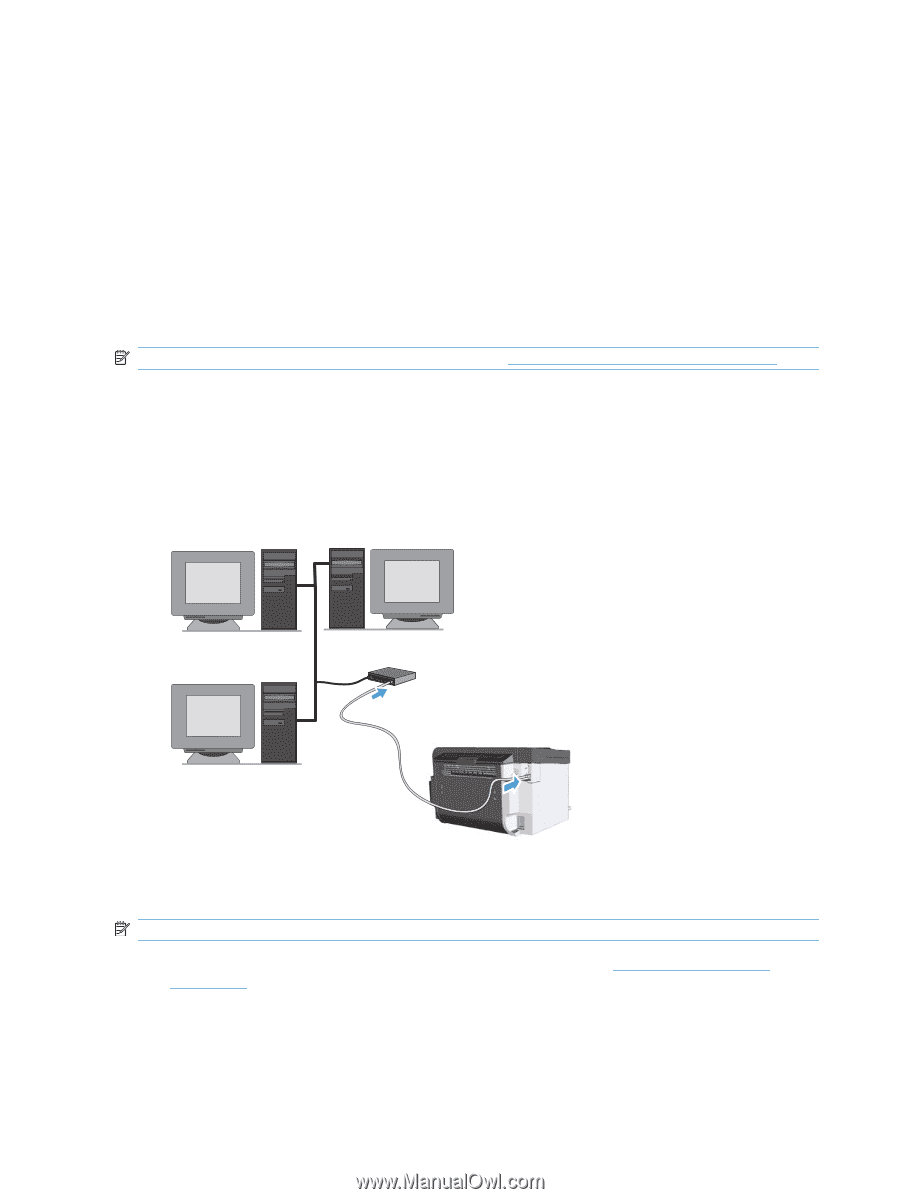
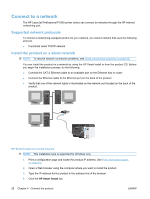
Connect to a network The HP LaserJet Professional P1600 printer series can connect to networks through the HP internal networking port. Supported network protocols To connect a networking-equipped product to your network, you need a network that uses the following protocol. ● Functional wired TCP/IP network Install the product on a wired network NOTE: To resolve network connection problems, see Solve connectivity problems on page 98. You can install the product on a network by using the HP Smart Install or from the product CD. Before you begin the installation process, do the following: ● Connect the CAT-5 Ethernet cable to an available port on the Ethernet hub or router. ● Connect the Ethernet cable to the Ethernet port on the back of the product. ● Verify that one of the network lights is illuminated on the network port located on the back of the product. HP Smart Install on a wired network NOTE: This installation type is supported for Windows only. 1. Print a configuration page and locate the product IP address. See Print information pages on page 52. 2. Open a Web browser using the computer where you want to install the product. 3. Type the IP address for the product in the address line of the browser. 4. Click the HP Smart Install tab. 28 Chapter 4 Connect the product ENWW
-
 1
1 -
2
-
3
-
4
-
5
-
6
-
7
-
8
-
9
-
10
-
11
-
12
-
13
-
14
-
15
-
16
-
17
-
18
-
19
-
20
-
21
-
22
-
23
-
24
-
25
-
26
-
27
-
28
-
29
-
30
-
31
-
32
-
33
-
34
-
 35
35 -
 36
36 -
 37
37 -
 38
38 -
 39
39 -
 40
40 -
 41
41 -
 42
42 -
 43
43 -
 44
44 -
 45
45 -
46
-
47
-
48
-
49
-
50
-
51
-
52
-
53
-
54
-
55
-
56
-
57
-
58
-
59
-
60
-
61
-
62
-
63
-
64
-
65
-
66
-
67
-
68
-
69
-
70
-
71
-
72
-
73
-
74
-
75
-
76
-
77
-
78
-
79
-
80
-
81
-
82
-
83
-
84
-
85
-
86
-
87
-
88
-
89
-
90
-
91
-
92
-
93
-
94
-
95
-
96
-
97
-
98
-
99
-
100
-
101
-
102
-
103
-
104
-
105
-
106
-
107
-
108
-
109
-
110
-
111
-
112
-
113
-
114
-
115
-
116
-
117
-
118
-
119
-
120
-
121
-
122
-
123
-
124
-
125
-
126
-
127
-
128
-
129
-
130
-
131
-
132
-
133
-
134
-
135
-
136
-
137
-
138
-
139
-
140
-
141
-
142
 |
 |