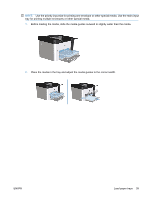
HP LaserJet Pro P1606 HP LaserJet Professional P1560 and P1600 Printer series - Page 56
Print colored text as black with Windows, Save custom print settings for reuse with Windows
 |
View all HP LaserJet Pro P1606 manuals
Add to My Manuals
Save this manual to your list of manuals |
Page 56 highlights
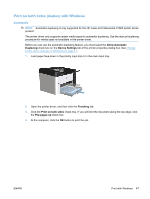
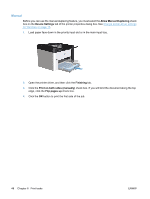
Print colored text as black with Windows 1. Open the printer driver, click the Properties or Preferences button, and then click the Advanced tab. 2. Click the Print All Text as Black check box. 3. Click the OK button. Save custom print settings for reuse with Windows Use a printing quick set 1. Open the printer driver, and then click the Properties or Preferences button. The Print Tasks Quick Sets drop-down list appears on all tabs except the Services tab. 2. In the Print Tasks Quick Sets drop-down list , select one of the quick sets, and then click OK to print the job with the predefined settings. Create a custom printing quick set 1. Open the printer driver, and then click the Properties or Preferences button. The Print Tasks Quick Sets drop-down list appears on all tabs except the Services tab. 2. Select an existing quick set as a base. 3. Select the print options for the new quick set. 4. Click Save As, type a name for the quick set, and then click OK. Improve print quality with Windows Select a page size 1. Open the printer driver, click the Properties or Preferences button, and then click the Paper/ Quality tab. 2. Select a size from the Size is drop-down list. 3. Click the OK button. Select a custom page size 1. Open the printer driver, and then click the Paper/Quality tab. 2. Click the Custom button. The Custom Paper Size dialog box opens. 3. Type a name for the custom size, specify the dimensions, and then click Save. 4. Click the Close button, and then click the OK button. 44 Chapter 6 Print tasks ENWW
-
 1
1 -
2
-
3
-
4
-
5
-
6
-
7
-
8
-
9
-
10
-
11
-
12
-
13
-
14
-
15
-
16
-
17
-
18
-
19
-
20
-
21
-
22
-
23
-
24
-
25
-
26
-
27
-
28
-
29
-
30
-
31
-
32
-
33
-
34
-
35
-
36
-
37
-
38
-
39
-
40
-
41
-
42
-
43
-
44
-
45
-
46
-
47
-
48
-
49
-
50
-
 51
51 -
 52
52 -
 53
53 -
 54
54 -
 55
55 -
 56
56 -
 57
57 -
 58
58 -
 59
59 -
 60
60 -
 61
61 -
62
-
63
-
64
-
65
-
66
-
67
-
68
-
69
-
70
-
71
-
72
-
73
-
74
-
75
-
76
-
77
-
78
-
79
-
80
-
81
-
82
-
83
-
84
-
85
-
86
-
87
-
88
-
89
-
90
-
91
-
92
-
93
-
94
-
95
-
96
-
97
-
98
-
99
-
100
-
101
-
102
-
103
-
104
-
105
-
106
-
107
-
108
-
109
-
110
-
111
-
112
-
113
-
114
-
115
-
116
-
117
-
118
-
119
-
120
-
121
-
122
-
123
-
124
-
125
-
126
-
127
-
128
-
129
-
130
-
131
-
132
-
133
-
134
-
135
-
136
-
137
-
138
-
139
-
140
-
141
-
142
 |
 |
