HP ProLiant DL388e HP ProLiant DL388e Gen8 Server User Guide - Page 51
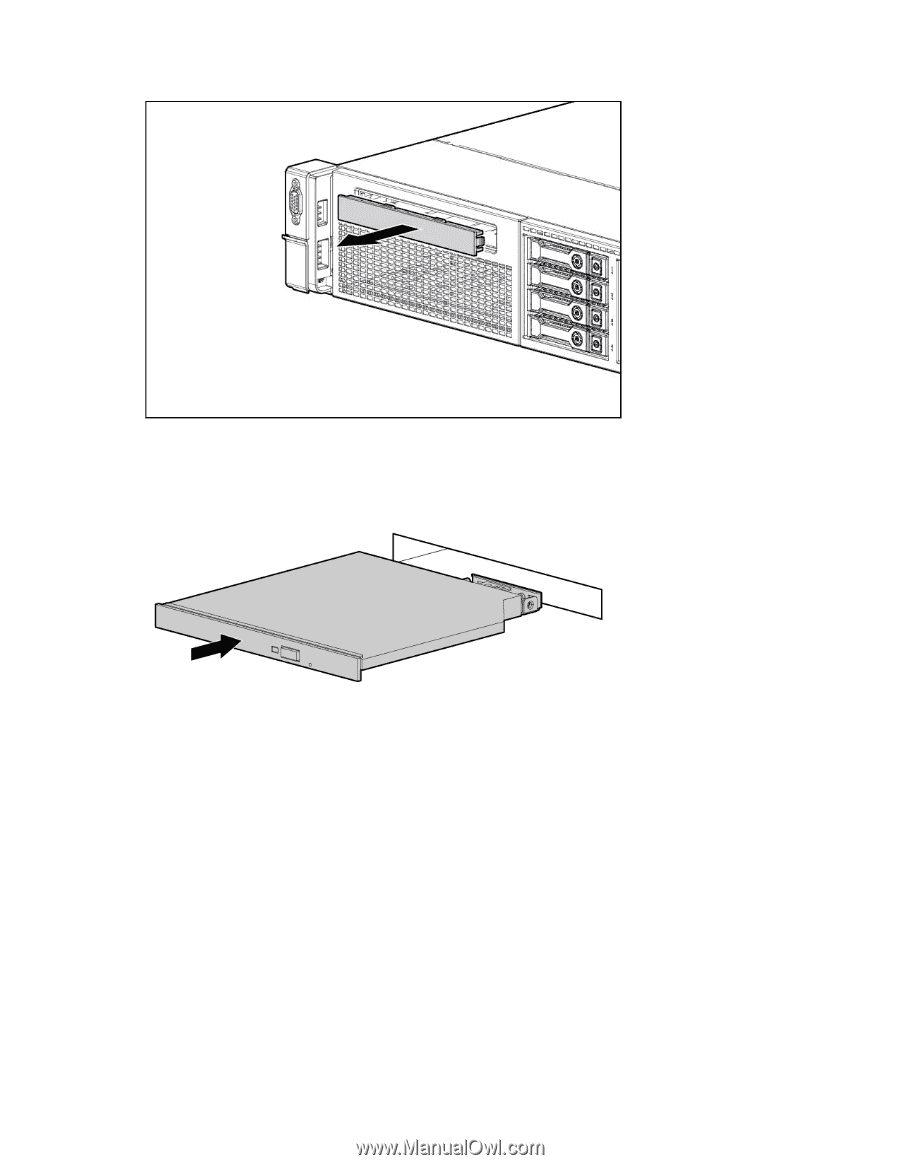
Slide the optical drive into the drive bay., Connect the optical drive cable to the rear of the drive.
 |
View all HP ProLiant DL388e manuals
Add to My Manuals
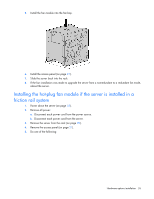
Save this manual to your list of manuals |
Page 51 highlights
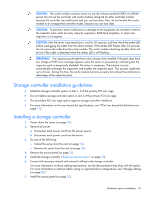
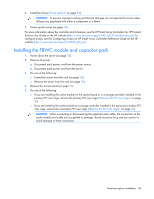
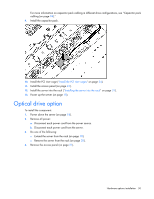
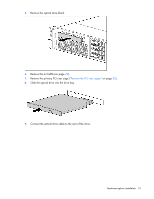
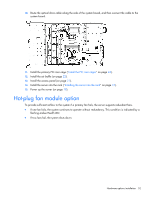
5. Remove the optical drive blank. 6. Remove the air baffle (on page 22). 7. Remove the primary PCI riser cage ("Remove the PCI riser cages" on page 23). 8. Slide the optical drive into the drive bay. 9. Connect the optical drive cable to the rear of the drive. Hardware options installation 51
-
 1
1 -
2
-
3
-
4
-
5
-
6
-
7
-
8
-
9
-
10
-
11
-
12
-
13
-
14
-
15
-
16
-
17
-
18
-
19
-
20
-
21
-
22
-
23
-
24
-
25
-
26
-
27
-
28
-
29
-
30
-
31
-
32
-
33
-
34
-
35
-
36
-
37
-
38
-
39
-
40
-
41
-
42
-
43
-
44
-
45
-
 46
46 -
 47
47 -
 48
48 -
 49
49 -
 50
50 -
 51
51 -
 52
52 -
 53
53 -
 54
54 -
 55
55 -
 56
56 -
57
-
58
-
59
-
60
-
61
-
62
-
63
-
64
-
65
-
66
-
67
-
68
-
69
-
70
-
71
-
72
-
73
-
74
-
75
-
76
-
77
-
78
-
79
-
80
-
81
-
82
-
83
-
84
-
85
-
86
-
87
-
88
-
89
-
90
-
91
-
92
-
93
-
94
-
95
-
96
-
97
-
98
-
99
-
100
-
101
-
102
-
103
-
104
-
105
-
106
-
107
-
108
-
109
-
110
-
111
-
112
-
113
-
114
-
115
-
116
-
117
-
118
-
119
-
120
-
121
-
122
-
123
-
124
-
125
-
126
-
127
-
128
-
129
-
130
-
131
-
132
-
133
-
134
-
135
-
136
-
137
-
138
-
139
-
140
 |
 |
Hardware options installation 51
5.
Remove the optical drive blank.
6.
Remove the air baffle (on page
22
).
7.
Remove the primary PCI riser cage ("
Remove the PCI riser cages
" on page
23
).
8.
Slide the optical drive into the drive bay.
9.
Connect the optical drive cable to the rear of the drive.