HP ProLiant DL388e HP ProLiant DL388e Gen8 Server User Guide - Page 70
Expansion board option
 |
View all HP ProLiant DL388e manuals
Add to My Manuals
Save this manual to your list of manuals |
Page 70 highlights
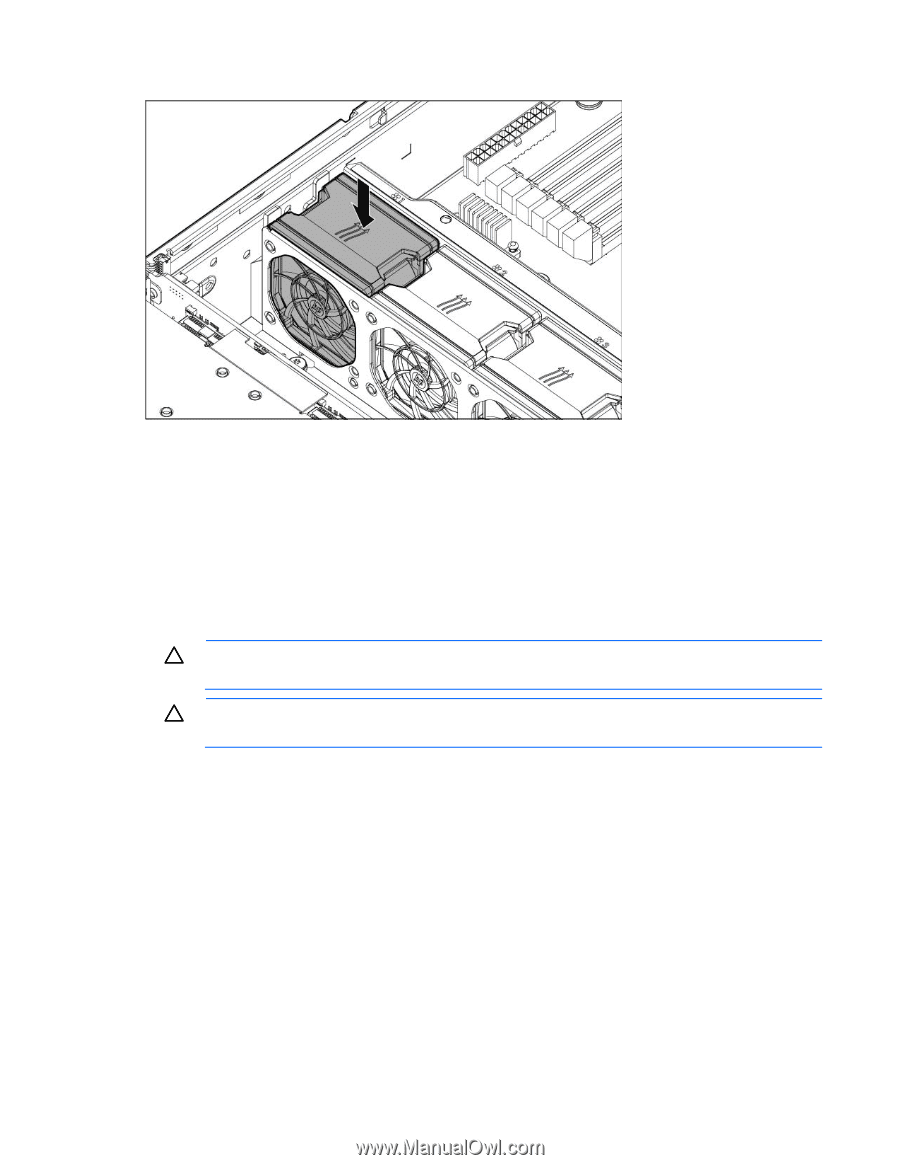
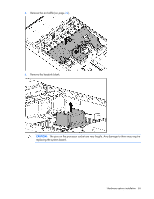
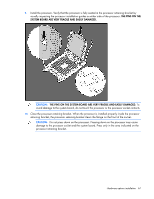
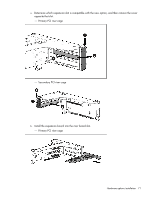
Store any unused fans as spares. 17. Install the air baffle (on page 22). 18. Install the access panel (on page 21). 19. Install the server into the rack ("Installing the server into the rack" on page 31). 20. Power up the server (on page 18). Expansion board option The server has both full-height and low-profile expansion slots for controller option installation ("PCIe riser board slot definitions" on page 11). CAUTION: To prevent damage to the server or expansion boards, power down the server, and disconnect all power cords before removing or installing the PCI riser cage. CAUTION: To prevent improper cooling and thermal damage, do not operate the server unless all expansion slots have either an expansion slot cover or an expansion board installed. To install the component: 1. Power down the server (on page 18). 2. Remove all power: a. Disconnect each power cord from the power source. b. Disconnect each power cord from the server. 3. Do one of the following: o Extend the server from the rack (on page 18). o Remove the server from the rack (on page 20). 4. Remove the access panel (on page 21). 5. Remove the PCI riser cage ("Remove the PCI riser cages" on page 23). 6. Install the expansion board: Hardware options installation 70
-
 1
1 -
2
-
3
-
4
-
5
-
6
-
7
-
8
-
9
-
10
-
11
-
12
-
13
-
14
-
15
-
16
-
17
-
18
-
19
-
20
-
21
-
22
-
23
-
24
-
25
-
26
-
27
-
28
-
29
-
30
-
31
-
32
-
33
-
34
-
35
-
36
-
37
-
38
-
39
-
40
-
41
-
42
-
43
-
44
-
45
-
46
-
47
-
48
-
49
-
50
-
51
-
52
-
53
-
54
-
55
-
56
-
57
-
58
-
59
-
60
-
61
-
62
-
63
-
64
-
 65
65 -
 66
66 -
 67
67 -
 68
68 -
 69
69 -
 70
70 -
 71
71 -
 72
72 -
 73
73 -
 74
74 -
 75
75 -
76
-
77
-
78
-
79
-
80
-
81
-
82
-
83
-
84
-
85
-
86
-
87
-
88
-
89
-
90
-
91
-
92
-
93
-
94
-
95
-
96
-
97
-
98
-
99
-
100
-
101
-
102
-
103
-
104
-
105
-
106
-
107
-
108
-
109
-
110
-
111
-
112
-
113
-
114
-
115
-
116
-
117
-
118
-
119
-
120
-
121
-
122
-
123
-
124
-
125
-
126
-
127
-
128
-
129
-
130
-
131
-
132
-
133
-
134
-
135
-
136
-
137
-
138
-
139
-
140
 |
 |