HP ProLiant DL388e HP ProLiant DL388e Gen8 Server User Guide - Page 53
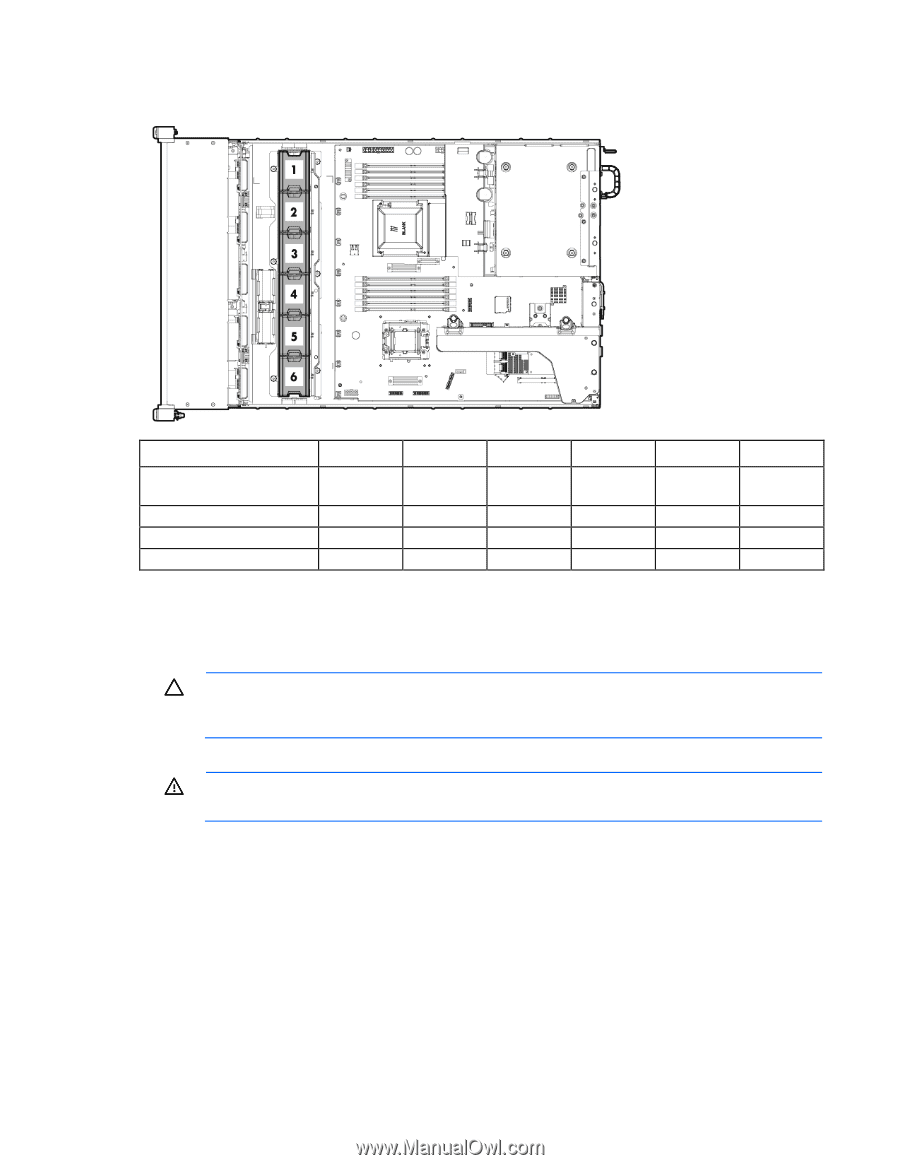
Fan population guidelines
 |
View all HP ProLiant DL388e manuals
Add to My Manuals
Save this manual to your list of manuals |
Page 53 highlights
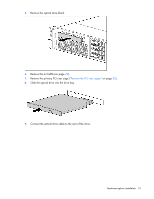
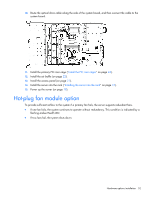
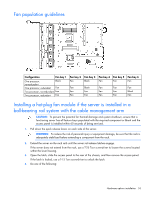
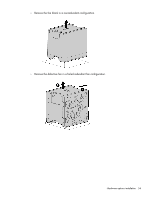
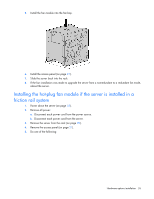
Fan population guidelines Configuration Fan bay 1 One processor, Blank nonredundant One processor, redundant Fan Two processor, nonredundant Fan Two processor, redundant Fan Fan bay 2 Fan Fan Fan Fan Fan bay 3 Blank Blank Fan Fan Fan bay 4 Fan Fan Fan Fan Fan bay 5 Fan Fan Fan Fan Fan bay 6 Fan Fan Blank Fan Installing a hot-plug fan module if the server is installed in a ball-bearing rail system with the cable management arm CAUTION: To prevent the potential for thermal damage and system shutdown, ensure that a functioning server has all feature bays populated with the required component or blank and the access panel is installed within 60 seconds of being serviced. 1. Pull down the quick release levers on each side of the server. WARNING: To reduce the risk of personal injury or equipment damage, be sure that the rack is adequately stabilized before extending a component from the rack. 2. Extend the server on the rack rails until the server rail-release latches engage. If the server does not extend from the rack, use a T-25 Torx screwdriver to loosen the screws located within the lever housing. 3. Open the latch, slide the access panel to the rear of the chassis, and then remove the access panel. If the latch is locked, use a T-15 Torx screwdriver to unlock the latch. 4. Do one of the following: Hardware options installation 53
-
 1
1 -
2
-
3
-
4
-
5
-
6
-
7
-
8
-
9
-
10
-
11
-
12
-
13
-
14
-
15
-
16
-
17
-
18
-
19
-
20
-
21
-
22
-
23
-
24
-
25
-
26
-
27
-
28
-
29
-
30
-
31
-
32
-
33
-
34
-
35
-
36
-
37
-
38
-
39
-
40
-
41
-
42
-
43
-
44
-
45
-
46
-
47
-
 48
48 -
 49
49 -
 50
50 -
 51
51 -
 52
52 -
 53
53 -
 54
54 -
 55
55 -
 56
56 -
 57
57 -
 58
58 -
59
-
60
-
61
-
62
-
63
-
64
-
65
-
66
-
67
-
68
-
69
-
70
-
71
-
72
-
73
-
74
-
75
-
76
-
77
-
78
-
79
-
80
-
81
-
82
-
83
-
84
-
85
-
86
-
87
-
88
-
89
-
90
-
91
-
92
-
93
-
94
-
95
-
96
-
97
-
98
-
99
-
100
-
101
-
102
-
103
-
104
-
105
-
106
-
107
-
108
-
109
-
110
-
111
-
112
-
113
-
114
-
115
-
116
-
117
-
118
-
119
-
120
-
121
-
122
-
123
-
124
-
125
-
126
-
127
-
128
-
129
-
130
-
131
-
132
-
133
-
134
-
135
-
136
-
137
-
138
-
139
-
140
 |
 |