HP Q6651C HP Designjet Z6100 Printer Series - User's Guide - Page 107
Save a job
 |
View all HP Q6651C manuals
Add to My Manuals
Save this manual to your list of manuals |
Page 107 highlights
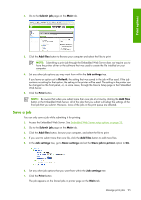
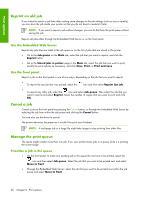
Print options 2. Go to the Submit job page on the Main tab. 3. Click the Add files button to Browse your computer and select the files to print. NOTE: Submitting a print job through the Embedded Web Server does not require you to have the printer driver or the software that was used to create the file installed on your computer. 4. Set any other job options you may want from within the Job settings tree. If you leave an option set to Default, the setting that was saved in the job will be used. If the job contains no setting for that option, the setting in the printer will be used. The setting in the printer can be changed on the front panel, or, in some cases, through the Device Setup page in the Embedded Web Server. 5. Click the Print button. NOTE: Be aware that when you submit more than one job at a time by clicking the Add files button in the Embedded Web Server, all of the jobs that you submit will adopt the settings of the final job that you submit. However, none of the jobs in the print queue are affected. Save a job You can only save a job while submitting it for printing: 1. Access the Embedded Web Server. See Embedded Web Server setup options on page 23. 2. Go to the Submit job page on the Main tab. 3. Click the Add files button, browse your computer, and select the file to print. 4. If you want to submit more than one file, click the Add files button to add more files. 5. In the Job settings tree, go to Basic settings and set the Store job in printer option to On. 6. Set any other job options that you want from within the Job settings tree. 7. Click the Print button. The job appears on the Stored jobs in printer page on the Main tab. Manage print jobs 95
-
 1
1 -
2
-
3
-
4
-
5
-
6
-
7
-
8
-
9
-
10
-
11
-
12
-
13
-
14
-
15
-
16
-
17
-
18
-
19
-
20
-
21
-
22
-
23
-
24
-
25
-
26
-
27
-
28
-
29
-
30
-
31
-
32
-
33
-
34
-
35
-
36
-
37
-
38
-
39
-
40
-
41
-
42
-
43
-
44
-
45
-
46
-
47
-
48
-
49
-
50
-
51
-
52
-
53
-
54
-
55
-
56
-
57
-
58
-
59
-
60
-
61
-
62
-
63
-
64
-
65
-
66
-
67
-
68
-
69
-
70
-
71
-
72
-
73
-
74
-
75
-
76
-
77
-
78
-
79
-
80
-
81
-
82
-
83
-
84
-
85
-
86
-
87
-
88
-
89
-
90
-
91
-
92
-
93
-
94
-
95
-
96
-
97
-
98
-
99
-
100
-
101
-
 102
102 -
 103
103 -
 104
104 -
 105
105 -
 106
106 -
 107
107 -
 108
108 -
 109
109 -
 110
110 -
 111
111 -
 112
112 -
113
-
114
-
115
-
116
-
117
-
118
-
119
-
120
-
121
-
122
-
123
-
124
-
125
-
126
-
127
-
128
-
129
-
130
-
131
-
132
-
133
-
134
-
135
-
136
-
137
-
138
-
139
-
140
-
141
-
142
-
143
-
144
-
145
-
146
-
147
-
148
-
149
-
150
-
151
-
152
-
153
-
154
-
155
-
156
-
157
-
158
-
159
-
160
-
161
-
162
-
163
-
164
-
165
-
166
-
167
-
168
-
169
-
170
-
171
-
172
-
173
-
174
-
175
-
176
-
177
-
178
-
179
-
180
-
181
-
182
-
183
-
184
-
185
-
186
-
187
-
188
-
189
-
190
-
191
-
192
-
193
-
194
-
195
-
196
-
197
-
198
-
199
-
200
-
201
-
202
-
203
-
204
-
205
-
206
-
207
-
208
-
209
-
210
-
211
-
212
-
213
-
214
-
215
-
216
-
217
-
218
-
219
-
220
-
221
-
222
-
223
-
224
-
225
-
226
-
227
-
228
-
229
-
230
-
231
-
232
 |
 |
