HP Q6651C HP Designjet Z6100 Printer Series - User's Guide - Page 162
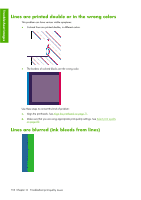
Lines are too thick, too thin, or missing, Lines appear stepped or jagged
 |
View all HP Q6651C manuals
Add to My Manuals
Save this manual to your list of manuals |
Page 162 highlights
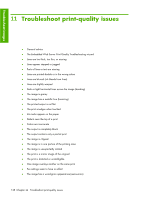
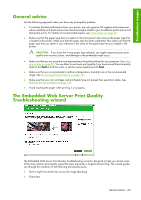
Troubleshoot images ● Poor line quality ● Inaccurate color To access the Embedded Web Server Print Quality Troubleshooting wizard, click the Print Quality Troubleshooting link on the Support tab. Select the print-quality issue that you are experiencing and click the Next button. A list of suggestions for corrective action appears along with help to guide you through the corrective action. Lines are too thick, too thin, or missing 1. Verify that the paper type that you have loaded corresponds to the paper type that you selected on the front panel and in your software. 2. Make sure that you are using the appropriate print-quality settings for your purposes. See Select print quality on page 80. 3. If you are using a HP-GL/2 driver and the resolution of your image is greater than the printing resolution, you might notice a loss of line quality. You can find the Max. Application Resolution option on the Windows driver Advanced tab, under Document Options > Printer Features. If you change this option, reprint your job if the problem has been solved. 4. If lines are too thin or missing, print the Printhead status plot. See Use the Printhead status plot on page 71. 5. Try aligning the printheads. See Align the printheads on page 71. After alignment, reprint your job if the problem has been solved. 6. Select the icon on the printer's front panel, and then View loaded paper to see the paper- advance calibration status. If the status is PENDING, perform a paper-advance calibration. See Perform paper advance calibration on page 46. If the problem persists after you complete these actions, contact your customer service representative for further support. Lines appear stepped or jagged Use the following procedure if lines in your image appear stepped or jagged when printed: 150 Chapter 11 Troubleshoot print-quality issues
-
 1
1 -
2
-
3
-
4
-
5
-
6
-
7
-
8
-
9
-
10
-
11
-
12
-
13
-
14
-
15
-
16
-
17
-
18
-
19
-
20
-
21
-
22
-
23
-
24
-
25
-
26
-
27
-
28
-
29
-
30
-
31
-
32
-
33
-
34
-
35
-
36
-
37
-
38
-
39
-
40
-
41
-
42
-
43
-
44
-
45
-
46
-
47
-
48
-
49
-
50
-
51
-
52
-
53
-
54
-
55
-
56
-
57
-
58
-
59
-
60
-
61
-
62
-
63
-
64
-
65
-
66
-
67
-
68
-
69
-
70
-
71
-
72
-
73
-
74
-
75
-
76
-
77
-
78
-
79
-
80
-
81
-
82
-
83
-
84
-
85
-
86
-
87
-
88
-
89
-
90
-
91
-
92
-
93
-
94
-
95
-
96
-
97
-
98
-
99
-
100
-
101
-
102
-
103
-
104
-
105
-
106
-
107
-
108
-
109
-
110
-
111
-
112
-
113
-
114
-
115
-
116
-
117
-
118
-
119
-
120
-
121
-
122
-
123
-
124
-
125
-
126
-
127
-
128
-
129
-
130
-
131
-
132
-
133
-
134
-
135
-
136
-
137
-
138
-
139
-
140
-
141
-
142
-
143
-
144
-
145
-
146
-
147
-
148
-
149
-
150
-
151
-
152
-
153
-
154
-
155
-
156
-
 157
157 -
 158
158 -
 159
159 -
 160
160 -
 161
161 -
 162
162 -
 163
163 -
 164
164 -
 165
165 -
 166
166 -
 167
167 -
168
-
169
-
170
-
171
-
172
-
173
-
174
-
175
-
176
-
177
-
178
-
179
-
180
-
181
-
182
-
183
-
184
-
185
-
186
-
187
-
188
-
189
-
190
-
191
-
192
-
193
-
194
-
195
-
196
-
197
-
198
-
199
-
200
-
201
-
202
-
203
-
204
-
205
-
206
-
207
-
208
-
209
-
210
-
211
-
212
-
213
-
214
-
215
-
216
-
217
-
218
-
219
-
220
-
221
-
222
-
223
-
224
-
225
-
226
-
227
-
228
-
229
-
230
-
231
-
232
 |
 |
