Hitachi P50X901 Owners Guide - Page 76
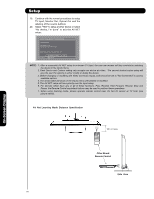
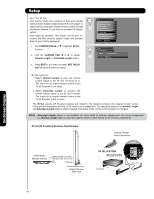
AV Net Learning Mode Distance Specification, Side View, Remote Control, Other Brand
 |
View all Hitachi P50X901 manuals
Add to My Manuals
Save this manual to your list of manuals |
Page 76 highlights
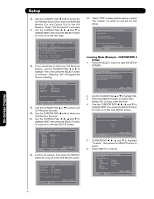
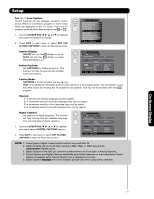
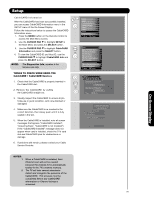
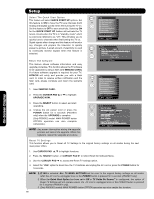
Setup 19. Continue with the normal procedures to setup TV Input, Monitor Out, Optical Out and the labeling of the source buttons. 20. Select "YES" to setup another device or select "No thanks, I'm done" to exit the AV NET setup. AV Net Setup Wizard : Device Settings Congratulations! Your DVD3 is now connected to your AV network. Would you like to setup another device? Move No thanks, I'm done. SEL Select Yes NOTE : 1. After a successful AV NET setup to a chosen TV Input, the user can access soft key controls by selecting the device in the inputs menu. 2. Each Device and Custom setting only accepts one device at a time. The second device/custom setup will give the user the options to either modify or delete the device. 3. Before changing or modifying the Video and Audio Inputs, both should be set to "Not Connected" to access available options. 4. The device label will show on the Inputs menu until deleted or modified. 5. The AV NET setup will have priority over the Input setup. 6. For devices which have any or all of these functions, Play, Rewind, Fast Forward, Record, Stop and Pause, the Remote Control equivalent buttons may be used to perform these operations. 7. When using learning mode, please operate remote control near AV Net IR sensor at TV front (see picture below). AV Net Learning Mode Distance Specification 1m or less On-Screen Display Other Brand Remote Control Side View 76
-
 1
1 -
2
-
3
-
4
-
5
-
6
-
7
-
8
-
9
-
10
-
11
-
12
-
13
-
14
-
15
-
16
-
17
-
18
-
19
-
20
-
21
-
22
-
23
-
24
-
25
-
26
-
27
-
28
-
29
-
30
-
31
-
32
-
33
-
34
-
35
-
36
-
37
-
38
-
39
-
40
-
41
-
42
-
43
-
44
-
45
-
46
-
47
-
48
-
49
-
50
-
51
-
52
-
53
-
54
-
55
-
56
-
57
-
58
-
59
-
60
-
61
-
62
-
63
-
64
-
65
-
66
-
67
-
68
-
69
-
70
-
 71
71 -
 72
72 -
 73
73 -
 74
74 -
 75
75 -
 76
76 -
 77
77 -
 78
78 -
 79
79 -
 80
80 -
 81
81 -
82
-
83
-
84
-
85
-
86
-
87
-
88
-
89
-
90
-
91
-
92
-
93
-
94
-
95
-
96
-
97
-
98
-
99
-
100
-
101
-
102
-
103
-
104
-
105
-
106
-
107
-
108
-
109
-
110
-
111
-
112
-
113
-
114
-
115
-
116
-
117
-
118
-
119
-
120
-
121
-
122
-
123
-
124
-
125
-
126
-
127
-
128
-
129
-
130
-
131
-
132
-
133
-
134
-
135
-
136
-
137
-
138
-
139
-
140
-
141
-
142
-
143
-
144
-
145
-
146
-
147
-
148
-
149
-
150
-
151
-
152
-
153
-
154
-
155
-
156
-
157
-
158
-
159
-
160
-
161
-
162
-
163
-
164
-
165
-
166
-
167
-
168
-
169
-
170
-
171
-
172
-
173
-
174
-
175
-
176
-
177
-
178
-
179
-
180
-
181
-
182
-
183
-
184
-
185
-
186
-
187
-
188
-
189
-
190
-
191
-
192
 |
 |