IBM QS21 Service Guide - Page 58
Installing, BladeCenter, Express, Expansion
 |
UPC - 883436016940
View all IBM QS21 manuals
Add to My Manuals
Save this manual to your list of manuals |
Page 58 highlights
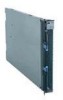
Installing the BladeCenter PCI Express I/O Expansion Unit Important: v A BladeCenter QS21 with the BladeCenter PCI Express I/O Expansion Unit installed takes up two contiguous slots in the BladeCenter chassis v You must remove any expansion card using the high-speed connector before installing the expansion unit. Cover pins Cover release Cover release Figure 19. Installing the expansion unit Complete the following steps to install the BladeCenter PCI Express I/O Expansion Unit: 1. Read the safety information beginning on page vii and "Installation guidelines" on page 29. 2. Remove the blade server cover and set it aside. See "Opening and removing the blade server cover" on page 32 for further information. 3. Remove the connector cover or any optional card from the high-speed connector. Figure 9 on page 34 shows the location of the high-speed connector. 4. Lower the expansion unit so that the slots at the rear slide down onto the cover pins at the rear of the blade server, as shown in Figure 19. 5. Carefully close the expansion unit as shown in Figure 19 until it clicks into place. 40 BladeCenter QS21 Type 0792: Problem Determination and Service Guide
-
 1
1 -
2
-
3
-
4
-
5
-
6
-
7
-
8
-
9
-
10
-
11
-
12
-
13
-
14
-
15
-
16
-
17
-
18
-
19
-
20
-
21
-
22
-
23
-
24
-
25
-
26
-
27
-
28
-
29
-
30
-
31
-
32
-
33
-
34
-
35
-
36
-
37
-
38
-
39
-
40
-
41
-
42
-
43
-
44
-
45
-
46
-
47
-
48
-
49
-
50
-
51
-
52
-
 53
53 -
 54
54 -
 55
55 -
 56
56 -
 57
57 -
 58
58 -
 59
59 -
 60
60 -
 61
61 -
 62
62 -
 63
63 -
64
-
65
-
66
-
67
-
68
-
69
-
70
-
71
-
72
-
73
-
74
-
75
-
76
-
77
-
78
-
79
-
80
-
81
-
82
-
83
-
84
-
85
-
86
-
87
-
88
-
89
-
90
-
91
-
92
-
93
-
94
-
95
-
96
-
97
-
98
-
99
-
100
-
101
-
102
-
103
-
104
-
105
-
106
-
107
-
108
-
109
-
110
-
111
-
112
-
113
-
114
-
115
-
116
-
117
-
118
-
119
-
120
-
121
-
122
-
123
-
124
-
125
-
126
-
127
-
128
-
129
-
130
-
131
-
132
-
133
-
134
-
135
-
136
-
137
-
138
-
139
-
140
-
141
-
142
-
143
-
144
 |
 |
