Intel SR1625UR Service Guide - Page 105
Removing Mini Control Panel Module from the Server System
 |
View all Intel SR1625UR manuals
Add to My Manuals
Save this manual to your list of manuals |
Page 105 highlights
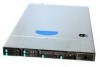
1. Press the latch at the back of the mini control panel and push the control panel forward to release it from the system (see letter "A" in Figure 74). 2. Slide the mini control panel out through the front of the server system (see letter "B" in Figure 74). 3. Remove the filler panel or two right drive carriers (see letter "C" in Figure 74). Latch A Mini CPoanntreoll B C Filler Panel AF002868 Figure 74. Removing Mini Control Panel Module from the Server System 4. Connect the USB and data cables to the replacement control panel (see letter "A" in Figure 75) 5. Feed the cables of the replacement control panel through the chassis opening (see letter "B" in Figure 75). Data Cable USB Cable A ControlLPoacnael l B AF002951 Figure 75. Connecting the Control Panel Cables 6. Slide the replacement control panel into the server system (see letter "A" in Figure 76) until it clicks into place. 7. Connect the two cables to the USB and control panel connectors on the backplane as shown (see letter "B" in Figure 76). Intel® Server System SR1625UR Service Guide 87
-
 1
1 -
2
-
3
-
4
-
5
-
6
-
7
-
8
-
9
-
10
-
11
-
12
-
13
-
14
-
15
-
16
-
17
-
18
-
19
-
20
-
21
-
22
-
23
-
24
-
25
-
26
-
27
-
28
-
29
-
30
-
31
-
32
-
33
-
34
-
35
-
36
-
37
-
38
-
39
-
40
-
41
-
42
-
43
-
44
-
45
-
46
-
47
-
48
-
49
-
50
-
51
-
52
-
53
-
54
-
55
-
56
-
57
-
58
-
59
-
60
-
61
-
62
-
63
-
64
-
65
-
66
-
67
-
68
-
69
-
70
-
71
-
72
-
73
-
74
-
75
-
76
-
77
-
78
-
79
-
80
-
81
-
82
-
83
-
84
-
85
-
86
-
87
-
88
-
89
-
90
-
91
-
92
-
93
-
94
-
95
-
96
-
97
-
98
-
99
-
 100
100 -
 101
101 -
 102
102 -
 103
103 -
 104
104 -
 105
105 -
 106
106 -
 107
107 -
 108
108 -
 109
109 -
 110
110 -
111
-
112
-
113
-
114
-
115
-
116
-
117
-
118
-
119
-
120
-
121
-
122
-
123
-
124
-
125
-
126
-
127
-
128
-
129
-
130
-
131
-
132
-
133
-
134
-
135
-
136
-
137
-
138
-
139
-
140
-
141
-
142
-
143
-
144
-
145
-
146
-
147
-
148
-
149
-
150
-
151
-
152
-
153
-
154
-
155
-
156
-
157
-
158
-
159
-
160
-
161
-
162
-
163
-
164
-
165
-
166
-
167
-
168
-
169
-
170
-
171
-
172
-
173
-
174
-
175
-
176
-
177
-
178
-
179
-
180
-
181
-
182
-
183
-
184
-
185
-
186
 |
 |
