Kyocera KM-2030 Scan System A Instruction HB (Functions) - Page 102
Kyocera KM-2030 Manual
 |
View all Kyocera KM-2030 manuals
Add to My Manuals
Save this manual to your list of manuals |
Page 102 highlights
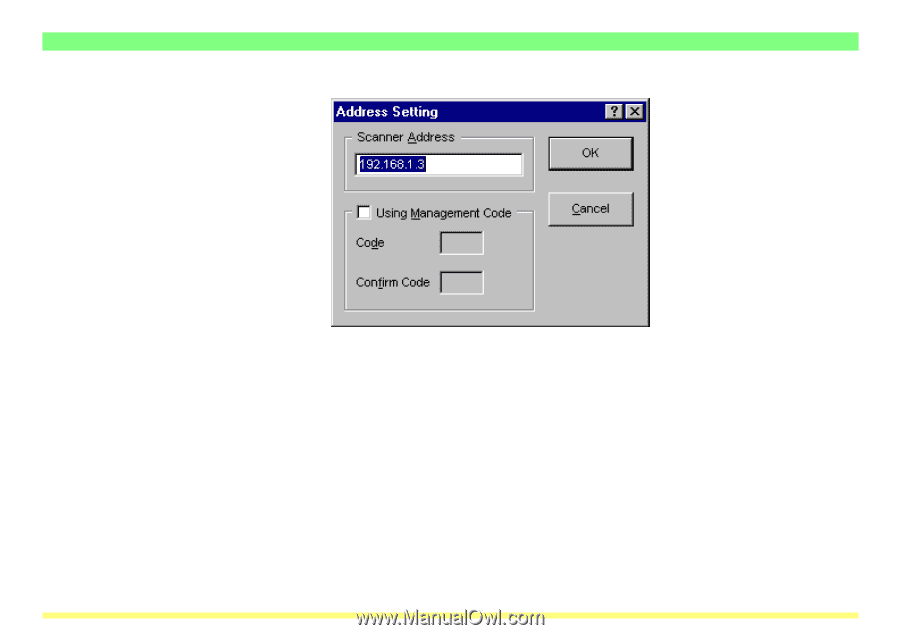
3-4 TWAIN Source 3. Type in the correct IP address. 4. Click on the OK button to return to the Scan Setup Dialogue Box. 5. Click on the OK button to return to the Main Dialogue Box. 6. Click on the OK button to close the Main Dialogue Box. The new scanner IP address will be registered. Page 3-59
-
 1
1 -
2
-
3
-
4
-
5
-
6
-
7
-
8
-
9
-
10
-
11
-
12
-
13
-
14
-
15
-
16
-
17
-
18
-
19
-
20
-
21
-
22
-
23
-
24
-
25
-
26
-
27
-
28
-
29
-
30
-
31
-
32
-
33
-
34
-
35
-
36
-
37
-
38
-
39
-
40
-
41
-
42
-
43
-
44
-
45
-
46
-
47
-
48
-
49
-
50
-
51
-
52
-
53
-
54
-
55
-
56
-
57
-
58
-
59
-
60
-
61
-
62
-
63
-
64
-
65
-
66
-
67
-
68
-
69
-
70
-
71
-
72
-
73
-
74
-
75
-
76
-
77
-
78
-
79
-
80
-
81
-
82
-
83
-
84
-
85
-
86
-
87
-
88
-
89
-
90
-
91
-
92
-
93
-
94
-
95
-
96
-
 97
97 -
 98
98 -
 99
99 -
 100
100 -
 101
101 -
 102
102 -
 103
103 -
 104
104 -
 105
105 -
 106
106 -
 107
107 -
108
-
109
-
110
-
111
-
112
 |
 |
Page 3-59
3-4
TWAIN Source
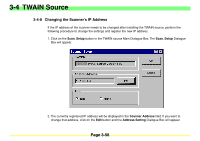
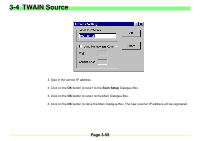
3. Type in the correct IP address.
4. Click on the
OK
button to return to the
Scan Setup
Dialogue Box.
5. Click on the
OK
button to return to the Main Dialogue Box.
6. Click on the
OK
button to close the Main Dialogue Box. The new scanner IP address will be registered.