Kyocera KM-2030 Scan System A Instruction HB (Functions) - Page 69
Using the Scanner Delivery Utility, Outline of the Procedure
 |
View all Kyocera KM-2030 manuals
Add to My Manuals
Save this manual to your list of manuals |
Page 69 highlights
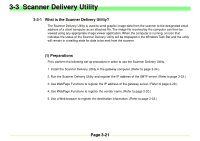
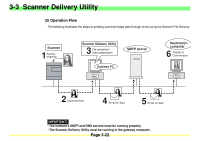
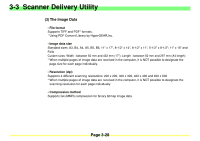
3-3 Scanner Delivery Utility 3-3-4 Using the Scanner Delivery Utility (1) Outline of the Procedure The following procedure explains in general how to use the Scanner Delivery Utility to receive graphic image data from the scanner. IMPORTANT! • The host name and IP address of the SMTP server must be registered in advance. In addition, in order to receive notices and information regarding errors, the administrator's email address must also be registered in advance. (Refer to page 3-33.) * Make sure that the Scanner Delivery Utility is running in a computer that is on the same network controlled by the SMTP server. If the Scanner Delivery Utility is NOT running, refer to "(1) Accessing the Start Dialogue Box" on page 3-29 and start up the utility. 1. Set the original that you want to scan into the scanner. 2. On the scanner's operation panel, select the destination site. 3. Press the Start key on the scanner's operation panel. The original will be scanned and the resulting data will be sent to the designated email address as an attached file. 4. The image data file will be received by the email account in your destination computer just as with any standard email. 5. The attached data file can then be displayed, edited and printed by the recipient using any appropriate image viewer application. Page 3-26
-
 1
1 -
2
-
3
-
4
-
5
-
6
-
7
-
8
-
9
-
10
-
11
-
12
-
13
-
14
-
15
-
16
-
17
-
18
-
19
-
20
-
21
-
22
-
23
-
24
-
25
-
26
-
27
-
28
-
29
-
30
-
31
-
32
-
33
-
34
-
35
-
36
-
37
-
38
-
39
-
40
-
41
-
42
-
43
-
44
-
45
-
46
-
47
-
48
-
49
-
50
-
51
-
52
-
53
-
54
-
55
-
56
-
57
-
58
-
59
-
60
-
61
-
62
-
63
-
 64
64 -
 65
65 -
 66
66 -
 67
67 -
 68
68 -
 69
69 -
 70
70 -
 71
71 -
 72
72 -
 73
73 -
 74
74 -
75
-
76
-
77
-
78
-
79
-
80
-
81
-
82
-
83
-
84
-
85
-
86
-
87
-
88
-
89
-
90
-
91
-
92
-
93
-
94
-
95
-
96
-
97
-
98
-
99
-
100
-
101
-
102
-
103
-
104
-
105
-
106
-
107
-
108
-
109
-
110
-
111
-
112
 |
 |