Kyocera KM-2030 Scan System A Instruction HB (Functions) - Page 54
Kyocera KM-2030 Manual
 |
View all Kyocera KM-2030 manuals
Add to My Manuals
Save this manual to your list of manuals |
Page 54 highlights
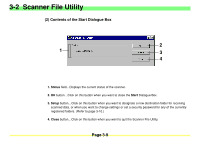
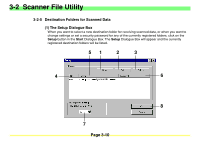
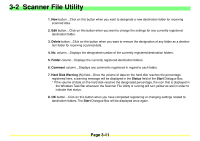
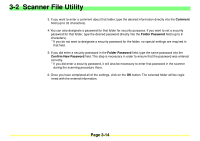
3-2 Scanner File Utility 1. New button...Click on this button when you want to designate a new destination folder for receiving scanned data. 2. Edit button...Click on this button when you want to change the settings for any currently registered destination folder. 3. Delete button...Click on this button when you want to remove the designation of any folder as a destination folder for receiving scanned data. 4. No. column...Displays the designated number of the currently registered destination folders. 5. Folder column...Displays the currently registered destination folders. 6. Comment column...Displays any comments registered in regard to each folder. 7. Hard Disk Warning (%) field...Once the volume of data on the hard disk reaches the percentage registered here, a warning message will be displayed in the Status field of the Start Dialogue Box. * If the volume of data on the hard disk reaches the designated percentage, the icon that is displayed in the Windows Task Bar whenever the Scanner File Utility is running will turn yellow as well in order to indicate that status. 8. OK button...Click on this button when you have completed registering or changing settings related to destination folders. The Start Dialogue Box will be displayed once again. Page 3-11
-
 1
1 -
2
-
3
-
4
-
5
-
6
-
7
-
8
-
9
-
10
-
11
-
12
-
13
-
14
-
15
-
16
-
17
-
18
-
19
-
20
-
21
-
22
-
23
-
24
-
25
-
26
-
27
-
28
-
29
-
30
-
31
-
32
-
33
-
34
-
35
-
36
-
37
-
38
-
39
-
40
-
41
-
42
-
43
-
44
-
45
-
46
-
47
-
48
-
 49
49 -
 50
50 -
 51
51 -
 52
52 -
 53
53 -
 54
54 -
 55
55 -
 56
56 -
 57
57 -
 58
58 -
 59
59 -
60
-
61
-
62
-
63
-
64
-
65
-
66
-
67
-
68
-
69
-
70
-
71
-
72
-
73
-
74
-
75
-
76
-
77
-
78
-
79
-
80
-
81
-
82
-
83
-
84
-
85
-
86
-
87
-
88
-
89
-
90
-
91
-
92
-
93
-
94
-
95
-
96
-
97
-
98
-
99
-
100
-
101
-
102
-
103
-
104
-
105
-
106
-
107
-
108
-
109
-
110
-
111
-
112
 |
 |