LG D500 Owners Manual - English - Page 85
Settings - sim card
 |
View all LG D500 manuals
Add to My Manuals
Save this manual to your list of manuals |
Page 85 highlights
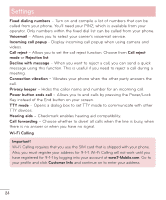
Settings Fixed dialing numbers - Turn on and compile a list of numbers that can be called from your phone. You'll need your PIN2, which is available from your operator. Only numbers within the fixed dial list can be called from your phone. Voicemail - Allows you to select your carrier's voicemail service. Incoming call popup - Display incoming call popup when using camera and videos. Call reject - Allows you to set the call reject function. Choose from Call reject mode or Rejection list. Decline with message - When you want to reject a call, you can send a quick message using this function. This is useful if you need to reject a call during a meeting. Connection vibration - Vibrates your phone when the other party answers the call. Privacy keeper - Hides the caller name and number for an incoming call. Power button ends call - Allows you to end calls by pressing the Power/Lock Key instead of the End button on your screen. TTY mode - Opens a dialog box to set TTY mode to communicate with other TTY devices. Hearing aids - Checkmark enables hearing aid compatibility. Call forwarding - Choose whether to divert all calls when the line is busy, when there is no answer or when you have no signal. Wi-Fi Calling Important! Wi-Fi Calling requires that you use the SIM card that is shipped with your phone. Also, you must register your address for 9-1-1. Wi-Fi Calling will not work until you have registered for 9-1-1 by logging into your account at www.T-Mobile.com. Go to your profile and click Customer Info and continue on to enter your address. 84
-
 1
1 -
2
-
3
-
4
-
5
-
6
-
7
-
8
-
9
-
10
-
11
-
12
-
13
-
14
-
15
-
16
-
17
-
18
-
19
-
20
-
21
-
22
-
23
-
24
-
25
-
26
-
27
-
28
-
29
-
30
-
31
-
32
-
33
-
34
-
35
-
36
-
37
-
38
-
39
-
40
-
41
-
42
-
43
-
44
-
45
-
46
-
47
-
48
-
49
-
50
-
51
-
52
-
53
-
54
-
55
-
56
-
57
-
58
-
59
-
60
-
61
-
62
-
63
-
64
-
65
-
66
-
67
-
68
-
69
-
70
-
71
-
72
-
73
-
74
-
75
-
76
-
77
-
78
-
79
-
 80
80 -
 81
81 -
 82
82 -
 83
83 -
 84
84 -
 85
85 -
 86
86 -
 87
87 -
 88
88 -
 89
89 -
 90
90 -
91
-
92
-
93
-
94
-
95
-
96
-
97
-
98
-
99
-
100
-
101
-
102
-
103
-
104
-
105
-
106
-
107
-
108
-
109
-
110
-
111
-
112
-
113
-
114
-
115
-
116
-
117
-
118
-
119
-
120
-
121
-
122
-
123
-
124
-
125
-
126
-
127
-
128
-
129
-
130
-
131
-
132
-
133
-
134
 |
 |
