Lantronix SLC 8000 Advanced Console Manager User Guide - Page 39
Physical Installation, Connecting to a Device Port
 |
View all Lantronix SLC 8000 Advanced Console Manager manuals
Add to My Manuals
Save this manual to your list of manuals |
Page 39 highlights
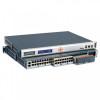
3: Installation Component (continued) Description Optional Internal Modem 300 bps to 56K bps data rate Upstream 48K bps, downstream 56K bps V.44 data compression (V92MB-U, V92HU) V.42 bis and MNP-5 data compression V.29 FastPOS support Caller ID type I and II for select countries Agency approvals: Transferable FCC68, CS03 and CTR21 certifications, IEC60601-1 (Medical Electronics) compliant, CE Marking, IEC60950 approved Operating Atmosphere For use at altitudes no more than 2000 meters above sea level only. Caution: EQUIPMENT IS FOR INDOOR USE ONLY! 2000m For use in non-tropical conditions only Physical Installation Install the SLC 8000 advanced console manager in an EIA-standard 19-inch rack (1U tall) or as a desktop unit. The SLC module uses convection cooling to dissipate excess heat. To install the SLC 8000 advanced console manager in a rack: 1. Place the SLC unit in a 19-inch rack. Warning: Do not to block the air vents on the sides of the SLC module. If you mount the SLC advanced console manager in an enclosed rack, we recommend that the rack have a ventilation fan to provide adequate airflow through the SLC unit. 2. Connect the serial device(s) to the SLC unit ports. See the section, Connecting to a Device Port (on page 39). 3. Choose one of the following options: - To configure the SLC 8000 advanced console manager using the network, or to monitor serial devices on the network, connect at least one SLC network port to a network. See Connecting to Network Ports (on page 42). - To configure the SLC unit using a dumb terminal or a computer with terminal emulation, connect the terminal or PC to the front panel SLC console port. See Connecting Terminals (on page 42). 4. Connect the power cord, and apply power. See AC Input (on page 43). 5. Wait approximately one minute for the boot process to complete. When the boot process ends, the SLC host name and the clock appear on the LCD display. Now you are ready to configure the network settings as described in Chapter 4: Quick Setup. Connecting to a Device Port You can connect almost any device that has a serial console port to a device port on the SLC 8000 unit for remote administration. The console port must support the RS-232C interface. SLC™ 8000 Advanced Console Manager User Guide 39
-
 1
1 -
2
-
3
-
4
-
5
-
6
-
7
-
8
-
9
-
10
-
11
-
12
-
13
-
14
-
15
-
16
-
17
-
18
-
19
-
20
-
21
-
22
-
23
-
24
-
25
-
26
-
27
-
28
-
29
-
30
-
31
-
32
-
33
-
 34
34 -
 35
35 -
 36
36 -
 37
37 -
 38
38 -
 39
39 -
 40
40 -
 41
41 -
 42
42 -
 43
43 -
 44
44 -
45
-
46
-
47
-
48
-
49
-
50
-
51
-
52
-
53
-
54
-
55
-
56
-
57
-
58
-
59
-
60
-
61
-
62
-
63
-
64
-
65
-
66
-
67
-
68
-
69
-
70
-
71
-
72
-
73
-
74
-
75
-
76
-
77
-
78
-
79
-
80
-
81
-
82
-
83
-
84
-
85
-
86
-
87
-
88
-
89
-
90
-
91
-
92
-
93
-
94
-
95
-
96
-
97
-
98
-
99
-
100
-
101
-
102
-
103
-
104
-
105
-
106
-
107
-
108
-
109
-
110
-
111
-
112
-
113
-
114
-
115
-
116
-
117
-
118
-
119
-
120
-
121
-
122
-
123
-
124
-
125
-
126
-
127
-
128
-
129
-
130
-
131
-
132
-
133
-
134
-
135
-
136
-
137
-
138
-
139
-
140
-
141
-
142
-
143
-
144
-
145
-
146
-
147
-
148
-
149
-
150
-
151
-
152
-
153
-
154
-
155
-
156
-
157
-
158
-
159
-
160
-
161
-
162
-
163
-
164
-
165
-
166
-
167
-
168
-
169
-
170
-
171
-
172
-
173
-
174
-
175
-
176
-
177
-
178
-
179
-
180
-
181
-
182
-
183
-
184
-
185
-
186
-
187
-
188
-
189
-
190
-
191
-
192
-
193
-
194
-
195
-
196
-
197
-
198
-
199
-
200
-
201
-
202
-
203
-
204
-
205
-
206
-
207
-
208
-
209
-
210
-
211
-
212
-
213
-
214
-
215
-
216
-
217
-
218
-
219
-
220
-
221
-
222
-
223
-
224
-
225
-
226
-
227
-
228
-
229
-
230
-
231
-
232
-
233
-
234
-
235
-
236
-
237
-
238
-
239
-
240
-
241
-
242
-
243
-
244
-
245
-
246
-
247
-
248
-
249
-
250
-
251
-
252
-
253
-
254
-
255
-
256
-
257
-
258
-
259
-
260
-
261
-
262
-
263
-
264
-
265
-
266
-
267
-
268
-
269
-
270
-
271
-
272
-
273
-
274
-
275
-
276
-
277
-
278
-
279
-
280
-
281
-
282
-
283
-
284
-
285
-
286
-
287
-
288
-
289
-
290
-
291
-
292
-
293
-
294
-
295
-
296
-
297
-
298
-
299
-
300
-
301
-
302
-
303
-
304
-
305
-
306
-
307
-
308
-
309
-
310
-
311
-
312
-
313
-
314
-
315
-
316
-
317
-
318
-
319
-
320
-
321
-
322
-
323
-
324
-
325
-
326
-
327
-
328
-
329
-
330
-
331
-
332
-
333
-
334
-
335
-
336
-
337
-
338
-
339
-
340
-
341
-
342
-
343
-
344
-
345
-
346
-
347
-
348
-
349
-
350
-
351
-
352
-
353
-
354
-
355
-
356
-
357
-
358
-
359
-
360
-
361
-
362
-
363
-
364
-
365
-
366
-
367
-
368
-
369
-
370
-
371
-
372
-
373
-
374
-
375
-
376
-
377
-
378
-
379
-
380
-
381
-
382
-
383
-
384
-
385
-
386
-
387
-
388
-
389
-
390
-
391
-
392
-
393
-
394
-
395
-
396
-
397
-
398
-
399
-
400
-
401
-
402
-
403
-
404
-
405
-
406
-
407
-
408
-
409
-
410
-
411
-
412
-
413
-
414
-
415
-
416
-
417
-
418
-
419
-
420
-
421
-
422
-
423
-
424
-
425
-
426
-
427
-
428
-
429
-
430
-
431
-
432
-
433
-
434
-
435
-
436
-
437
-
438
-
439
-
440
-
441
-
442
-
443
-
444
-
445
-
446
-
447
-
448
-
449
-
450
-
451
-
452
-
453
-
454
-
455
-
456
-
457
-
458
-
459
-
460
-
461
-
462
-
463
-
464
-
465
-
466
-
467
-
468
-
469
-
470
-
471
-
472
 |
 |
