Lantronix SLC 8000 Advanced Console Manager User Guide - Page 51
: Quick Setup, Recommendations
 |
View all Lantronix SLC 8000 Advanced Console Manager manuals
Add to My Manuals
Save this manual to your list of manuals |
Page 51 highlights
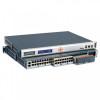
4: Quick Setup 4: Quick Setup This chapter helps get the IP network port up and running quickly, so you can administer the SLC advanced console manager using your network. The setup procedures assume you are starting with a factory default SLC unit. Recommendations To set up the network connections quickly, we suggest you do one of the following: Use the front panel LCD display and keypad buttons to configure the IP address, subnet mask, gateway address and DNS address(es), if applicable. Complete the quick setup (see Figure 4-6) on the web interface. SSH to the command line interface and follow the Quick Setup script on the command line interface. Connect to the console port and follow the Quick Setup script on the command line interface. Note: The first time you power up the SLC unit, Eth1 tries to obtain its IP address via DHCP. If you have connected Eth1 to the network, and Eth1 is able to acquire an IP address, you can view this IP address on the LCD or by running the Lantronix Provisioning Manager application. If Eth1 cannot acquire an IP address, you cannot use Telnet, SSH, or the web interface to run Quick Setup.IP Address Your SLC 8000 advanced console manager must have a unique IP address on your network. The system administrator generally provides the IP address and corresponding subnet mask and gateway. The IP address must be within a valid range and unique to your network. If a valid gateway address has not been assigned the IP address must be on the same subnet as workstations connecting to the SLC 8000 over the network. The following table lists the options for assigning an IP address to your SLC unit. Table 4-1 Methods of Assigning an IP Address Method Description DHCP A DHCP server automatically assigns the IP address and network settings. The SLC 8000 advanced console manager is DHCP-enabled by default. With the Eth1 network port connected to the network, and the SLC unit powered up, Eth1 acquires an IP address, viewable on the LCD. At this point, you can use SSH to connect to the SLC console manager or use the web interface. BOOTP Non-dynamic predecessor to DHCP. Front panel LCD display You manually assign the IP address and other basic network, console, and and keypads date/time settings. If desired, you can restore the factory defaults. Serial port login to command line interface You assign an IP address and configure the SLC unit using a terminal or a PC running a terminal emulation program to the SLC serial console port connection. SLC™ 8000 Advanced Console Manager User Guide 51
-
 1
1 -
2
-
3
-
4
-
5
-
6
-
7
-
8
-
9
-
10
-
11
-
12
-
13
-
14
-
15
-
16
-
17
-
18
-
19
-
20
-
21
-
22
-
23
-
24
-
25
-
26
-
27
-
28
-
29
-
30
-
31
-
32
-
33
-
34
-
35
-
36
-
37
-
38
-
39
-
40
-
41
-
42
-
43
-
44
-
45
-
 46
46 -
 47
47 -
 48
48 -
 49
49 -
 50
50 -
 51
51 -
 52
52 -
 53
53 -
 54
54 -
 55
55 -
 56
56 -
57
-
58
-
59
-
60
-
61
-
62
-
63
-
64
-
65
-
66
-
67
-
68
-
69
-
70
-
71
-
72
-
73
-
74
-
75
-
76
-
77
-
78
-
79
-
80
-
81
-
82
-
83
-
84
-
85
-
86
-
87
-
88
-
89
-
90
-
91
-
92
-
93
-
94
-
95
-
96
-
97
-
98
-
99
-
100
-
101
-
102
-
103
-
104
-
105
-
106
-
107
-
108
-
109
-
110
-
111
-
112
-
113
-
114
-
115
-
116
-
117
-
118
-
119
-
120
-
121
-
122
-
123
-
124
-
125
-
126
-
127
-
128
-
129
-
130
-
131
-
132
-
133
-
134
-
135
-
136
-
137
-
138
-
139
-
140
-
141
-
142
-
143
-
144
-
145
-
146
-
147
-
148
-
149
-
150
-
151
-
152
-
153
-
154
-
155
-
156
-
157
-
158
-
159
-
160
-
161
-
162
-
163
-
164
-
165
-
166
-
167
-
168
-
169
-
170
-
171
-
172
-
173
-
174
-
175
-
176
-
177
-
178
-
179
-
180
-
181
-
182
-
183
-
184
-
185
-
186
-
187
-
188
-
189
-
190
-
191
-
192
-
193
-
194
-
195
-
196
-
197
-
198
-
199
-
200
-
201
-
202
-
203
-
204
-
205
-
206
-
207
-
208
-
209
-
210
-
211
-
212
-
213
-
214
-
215
-
216
-
217
-
218
-
219
-
220
-
221
-
222
-
223
-
224
-
225
-
226
-
227
-
228
-
229
-
230
-
231
-
232
-
233
-
234
-
235
-
236
-
237
-
238
-
239
-
240
-
241
-
242
-
243
-
244
-
245
-
246
-
247
-
248
-
249
-
250
-
251
-
252
-
253
-
254
-
255
-
256
-
257
-
258
-
259
-
260
-
261
-
262
-
263
-
264
-
265
-
266
-
267
-
268
-
269
-
270
-
271
-
272
-
273
-
274
-
275
-
276
-
277
-
278
-
279
-
280
-
281
-
282
-
283
-
284
-
285
-
286
-
287
-
288
-
289
-
290
-
291
-
292
-
293
-
294
-
295
-
296
-
297
-
298
-
299
-
300
-
301
-
302
-
303
-
304
-
305
-
306
-
307
-
308
-
309
-
310
-
311
-
312
-
313
-
314
-
315
-
316
-
317
-
318
-
319
-
320
-
321
-
322
-
323
-
324
-
325
-
326
-
327
-
328
-
329
-
330
-
331
-
332
-
333
-
334
-
335
-
336
-
337
-
338
-
339
-
340
-
341
-
342
-
343
-
344
-
345
-
346
-
347
-
348
-
349
-
350
-
351
-
352
-
353
-
354
-
355
-
356
-
357
-
358
-
359
-
360
-
361
-
362
-
363
-
364
-
365
-
366
-
367
-
368
-
369
-
370
-
371
-
372
-
373
-
374
-
375
-
376
-
377
-
378
-
379
-
380
-
381
-
382
-
383
-
384
-
385
-
386
-
387
-
388
-
389
-
390
-
391
-
392
-
393
-
394
-
395
-
396
-
397
-
398
-
399
-
400
-
401
-
402
-
403
-
404
-
405
-
406
-
407
-
408
-
409
-
410
-
411
-
412
-
413
-
414
-
415
-
416
-
417
-
418
-
419
-
420
-
421
-
422
-
423
-
424
-
425
-
426
-
427
-
428
-
429
-
430
-
431
-
432
-
433
-
434
-
435
-
436
-
437
-
438
-
439
-
440
-
441
-
442
-
443
-
444
-
445
-
446
-
447
-
448
-
449
-
450
-
451
-
452
-
453
-
454
-
455
-
456
-
457
-
458
-
459
-
460
-
461
-
462
-
463
-
464
-
465
-
466
-
467
-
468
-
469
-
470
-
471
-
472
 |
 |
