Lenovo ThinkPad Yoga 14 (English) User Guide - ThinkPad Yoga 14 - Page 130
Replacing the memory module
 |
View all Lenovo ThinkPad Yoga 14 manuals
Add to My Manuals
Save this manual to your list of manuals |
Page 130 highlights
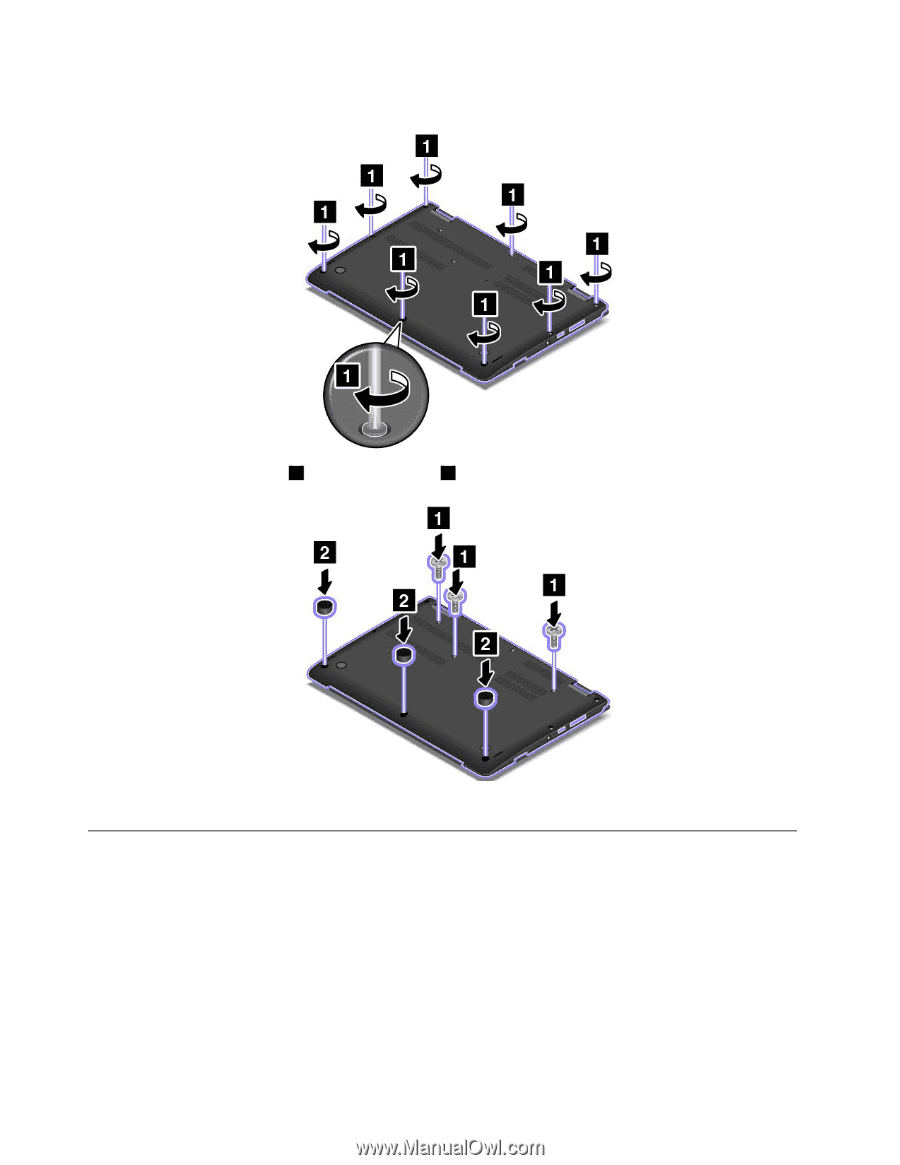
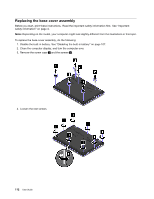
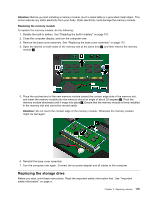
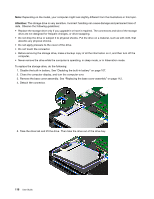
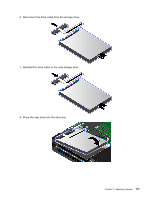
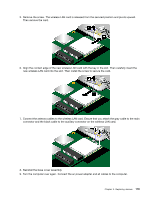
7. Tighten the screws to secure the base cover assembly. 8. Resinstall the rest screws 1 and the screw caps 2 . 9. Turn the computer over again. Connect the ac power adapter and all cables. Replacing the memory module Before you start, print these instructions. Read the important safety information first. See "Important safety information" on page vi. Note: Depending on the model, your computer might look slightly different from the illustrations in this topic. Increasing memory capacity is an effective way to make programs run faster. To replace the memory module, read the following prerequisites, and then the instructions. Note: The operating speed of the memory module has dependency on the system configuration. In some conditions, the memory module in your computer might not be able to operate at the maximum speed. 114 User Guide
-
 1
1 -
2
-
3
-
4
-
5
-
6
-
7
-
8
-
9
-
10
-
11
-
12
-
13
-
14
-
15
-
16
-
17
-
18
-
19
-
20
-
21
-
22
-
23
-
24
-
25
-
26
-
27
-
28
-
29
-
30
-
31
-
32
-
33
-
34
-
35
-
36
-
37
-
38
-
39
-
40
-
41
-
42
-
43
-
44
-
45
-
46
-
47
-
48
-
49
-
50
-
51
-
52
-
53
-
54
-
55
-
56
-
57
-
58
-
59
-
60
-
61
-
62
-
63
-
64
-
65
-
66
-
67
-
68
-
69
-
70
-
71
-
72
-
73
-
74
-
75
-
76
-
77
-
78
-
79
-
80
-
81
-
82
-
83
-
84
-
85
-
86
-
87
-
88
-
89
-
90
-
91
-
92
-
93
-
94
-
95
-
96
-
97
-
98
-
99
-
100
-
101
-
102
-
103
-
104
-
105
-
106
-
107
-
108
-
109
-
110
-
111
-
112
-
113
-
114
-
115
-
116
-
117
-
118
-
119
-
120
-
121
-
122
-
123
-
124
-
 125
125 -
 126
126 -
 127
127 -
 128
128 -
 129
129 -
 130
130 -
 131
131 -
 132
132 -
 133
133 -
 134
134 -
 135
135 -
136
-
137
-
138
-
139
-
140
-
141
-
142
-
143
-
144
-
145
-
146
-
147
-
148
-
149
-
150
-
151
-
152
-
153
-
154
-
155
-
156
-
157
-
158
-
159
-
160
-
161
-
162
-
163
-
164
-
165
-
166
-
167
-
168
-
169
-
170
-
171
-
172
-
173
-
174
-
175
-
176
-
177
-
178
 |
 |