Lenovo ThinkPad Yoga 14 (English) User Guide - ThinkPad Yoga 14 - Page 141
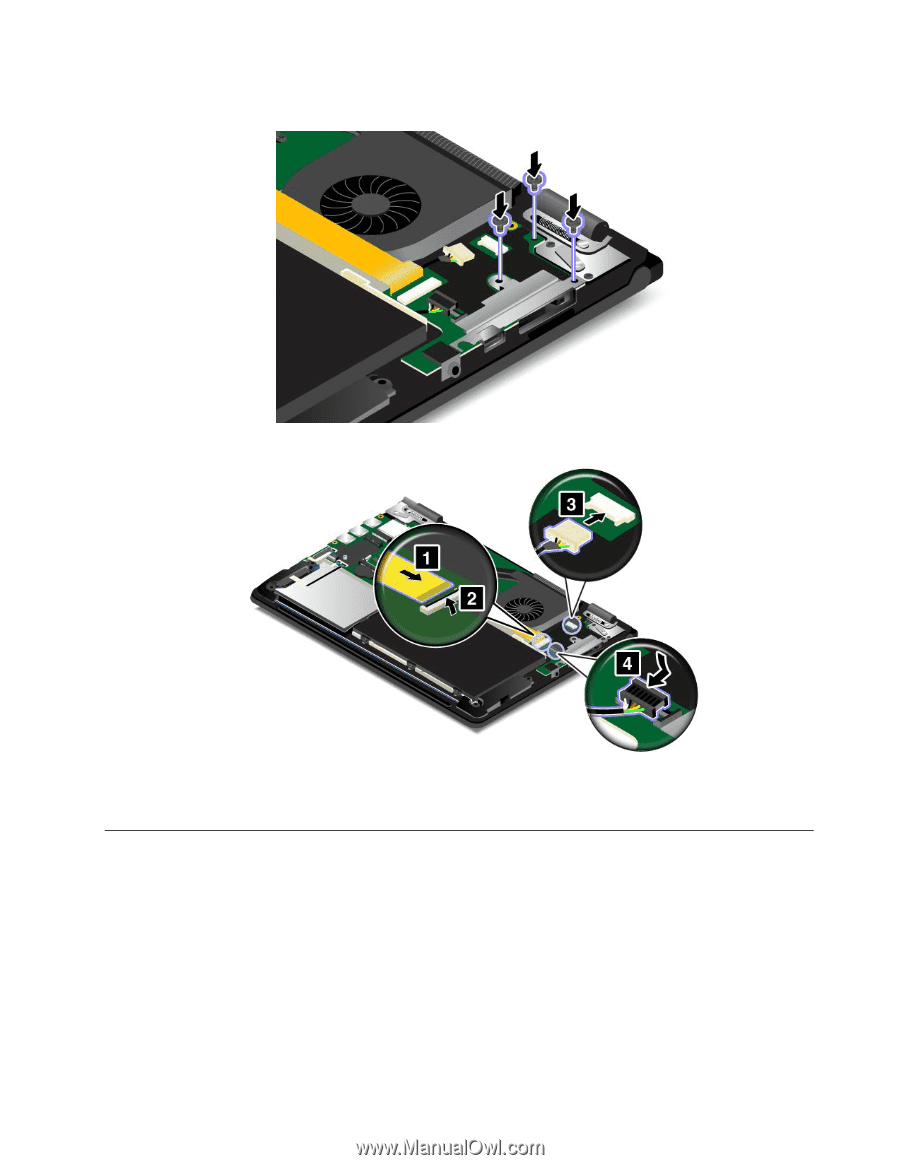
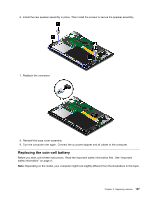
Replacing the speaker assembly, Reinstall the screws to secure the audio/USB/OneLink/ac power card.
 |
View all Lenovo ThinkPad Yoga 14 manuals
Add to My Manuals
Save this manual to your list of manuals |
Page 141 highlights
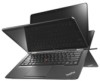
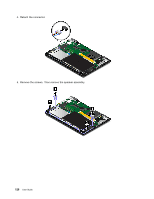
10. Reinstall the screws to secure the audio/USB/OneLink/ac power card. 11. Reconnect all the cables. 12. Reinstall the base cover assembly. 13. Turn the computer over again. Connect the ac power adapter and all cables to the computer. Replacing the speaker assembly Before you start, print these instructions. Read the important safety information first. See "Important safety information" on page vi. Note: Depending on the model, your computer might look slightly different from the illustrations in this topic. To replace the speaker assembly, do the following: 1. Disable the built-in battery. See "Disabling the built-in battery" on page 107. 2. Close the computer display, and turn the computer over. 3. Remove the base cover assembly. See "Replacing the base cover assembly" on page 112. Chapter 9. Replacing devices 125
-
 1
1 -
2
-
3
-
4
-
5
-
6
-
7
-
8
-
9
-
10
-
11
-
12
-
13
-
14
-
15
-
16
-
17
-
18
-
19
-
20
-
21
-
22
-
23
-
24
-
25
-
26
-
27
-
28
-
29
-
30
-
31
-
32
-
33
-
34
-
35
-
36
-
37
-
38
-
39
-
40
-
41
-
42
-
43
-
44
-
45
-
46
-
47
-
48
-
49
-
50
-
51
-
52
-
53
-
54
-
55
-
56
-
57
-
58
-
59
-
60
-
61
-
62
-
63
-
64
-
65
-
66
-
67
-
68
-
69
-
70
-
71
-
72
-
73
-
74
-
75
-
76
-
77
-
78
-
79
-
80
-
81
-
82
-
83
-
84
-
85
-
86
-
87
-
88
-
89
-
90
-
91
-
92
-
93
-
94
-
95
-
96
-
97
-
98
-
99
-
100
-
101
-
102
-
103
-
104
-
105
-
106
-
107
-
108
-
109
-
110
-
111
-
112
-
113
-
114
-
115
-
116
-
117
-
118
-
119
-
120
-
121
-
122
-
123
-
124
-
125
-
126
-
127
-
128
-
129
-
130
-
131
-
132
-
133
-
134
-
135
-
 136
136 -
 137
137 -
 138
138 -
 139
139 -
 140
140 -
 141
141 -
 142
142 -
 143
143 -
 144
144 -
 145
145 -
 146
146 -
147
-
148
-
149
-
150
-
151
-
152
-
153
-
154
-
155
-
156
-
157
-
158
-
159
-
160
-
161
-
162
-
163
-
164
-
165
-
166
-
167
-
168
-
169
-
170
-
171
-
172
-
173
-
174
-
175
-
176
-
177
-
178
 |
 |