Lenovo ThinkPad Yoga 14 (English) User Guide - ThinkPad Yoga 14 - Page 60
Using an external display, Bluetooth Devices - miracast support
 |
View all Lenovo ThinkPad Yoga 14 manuals
Add to My Manuals
Save this manual to your list of manuals |
Page 60 highlights
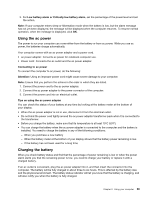
3. Select Send To ➙ Bluetooth Devices. 4. Select a Bluetooth device, and then follow the instructions on the screen. • For Windows 8.1: 1. Go to the desktop, and then right-click the data that you want to send. 2. Select Send To ➙ Bluetooth Devices. 3. Select a Bluetooth device, and then follow the instructions on the screen. For more information, refer to the Windows help information system and the Bluetooth help information system. Using an external display You can use an external display such as a projector or a monitor to give presentations or to expand your workspace. This topic introduces how to connect an external display, choose display modes, and change display settings. Your computer supports up to 4096 x 2304, with an external display connected to the HDMI connector For more information about the external display, refer to the manuals provided with it. Connecting an external display You can use either a wired display or a wireless display. The wired display can be connected to the HDMI, VGA, or mini DisplayPort connector by a cable. The wireless display can be added through the Wi-Di or Miracast function. • Connecting a wired display Note: When you connect an external monitor, a video interface cable with a ferrite core is required. 1. Connect the external display to an appropriate video connector on your computer, such as the VGA connector, mini DisplayPort connector, or HDMI connector. 2. Connect the external display to an electrical outlet. 3. Turn on the external display. If your computer cannot detect the external display, right-click on the desktop, then click Screen resolution ➙ Detect. • Connecting a wireless display Note: To use a wireless display, ensure that both your computer and the external display support the Wi-Di or Miracast feature. - For Windows 7 Open the Lenovo QuickDisplay program and follow the instructions on the screen. For how to access the Lenovo QuickDisplay program, see "Lenovo programs" on page 12. - For Windows 8.1 1. Move your pointer to the top-right or bottom-right corner of the screen to display the charms. 2. Click Devices ➙ Projector ➙ Add a wireless display. 3. Select the desired wireless display and follow the instructions on the screen. For more information, see the help information systems of the Lenovo QuickDisplay program and the Windows 8.1 operating system. 44 User Guide
-
 1
1 -
2
-
3
-
4
-
5
-
6
-
7
-
8
-
9
-
10
-
11
-
12
-
13
-
14
-
15
-
16
-
17
-
18
-
19
-
20
-
21
-
22
-
23
-
24
-
25
-
26
-
27
-
28
-
29
-
30
-
31
-
32
-
33
-
34
-
35
-
36
-
37
-
38
-
39
-
40
-
41
-
42
-
43
-
44
-
45
-
46
-
47
-
48
-
49
-
50
-
51
-
52
-
53
-
54
-
 55
55 -
 56
56 -
 57
57 -
 58
58 -
 59
59 -
 60
60 -
 61
61 -
 62
62 -
 63
63 -
 64
64 -
 65
65 -
66
-
67
-
68
-
69
-
70
-
71
-
72
-
73
-
74
-
75
-
76
-
77
-
78
-
79
-
80
-
81
-
82
-
83
-
84
-
85
-
86
-
87
-
88
-
89
-
90
-
91
-
92
-
93
-
94
-
95
-
96
-
97
-
98
-
99
-
100
-
101
-
102
-
103
-
104
-
105
-
106
-
107
-
108
-
109
-
110
-
111
-
112
-
113
-
114
-
115
-
116
-
117
-
118
-
119
-
120
-
121
-
122
-
123
-
124
-
125
-
126
-
127
-
128
-
129
-
130
-
131
-
132
-
133
-
134
-
135
-
136
-
137
-
138
-
139
-
140
-
141
-
142
-
143
-
144
-
145
-
146
-
147
-
148
-
149
-
150
-
151
-
152
-
153
-
154
-
155
-
156
-
157
-
158
-
159
-
160
-
161
-
162
-
163
-
164
-
165
-
166
-
167
-
168
-
169
-
170
-
171
-
172
-
173
-
174
-
175
-
176
-
177
-
178
 |
 |